This morning we enjoyed our first home made bacon. I used the recipe from Michael Symon’s excellent cookbook, Carnivore, and it was as simple as he suggests. We bought a large pork belly at COSTCO and cut off 4 ½ lbs. to make bacon and used the rest in several other pork belly recipes. The recipe is below, and I will walk through the steps with pictures here and encourage you to give it a try using that recipe.
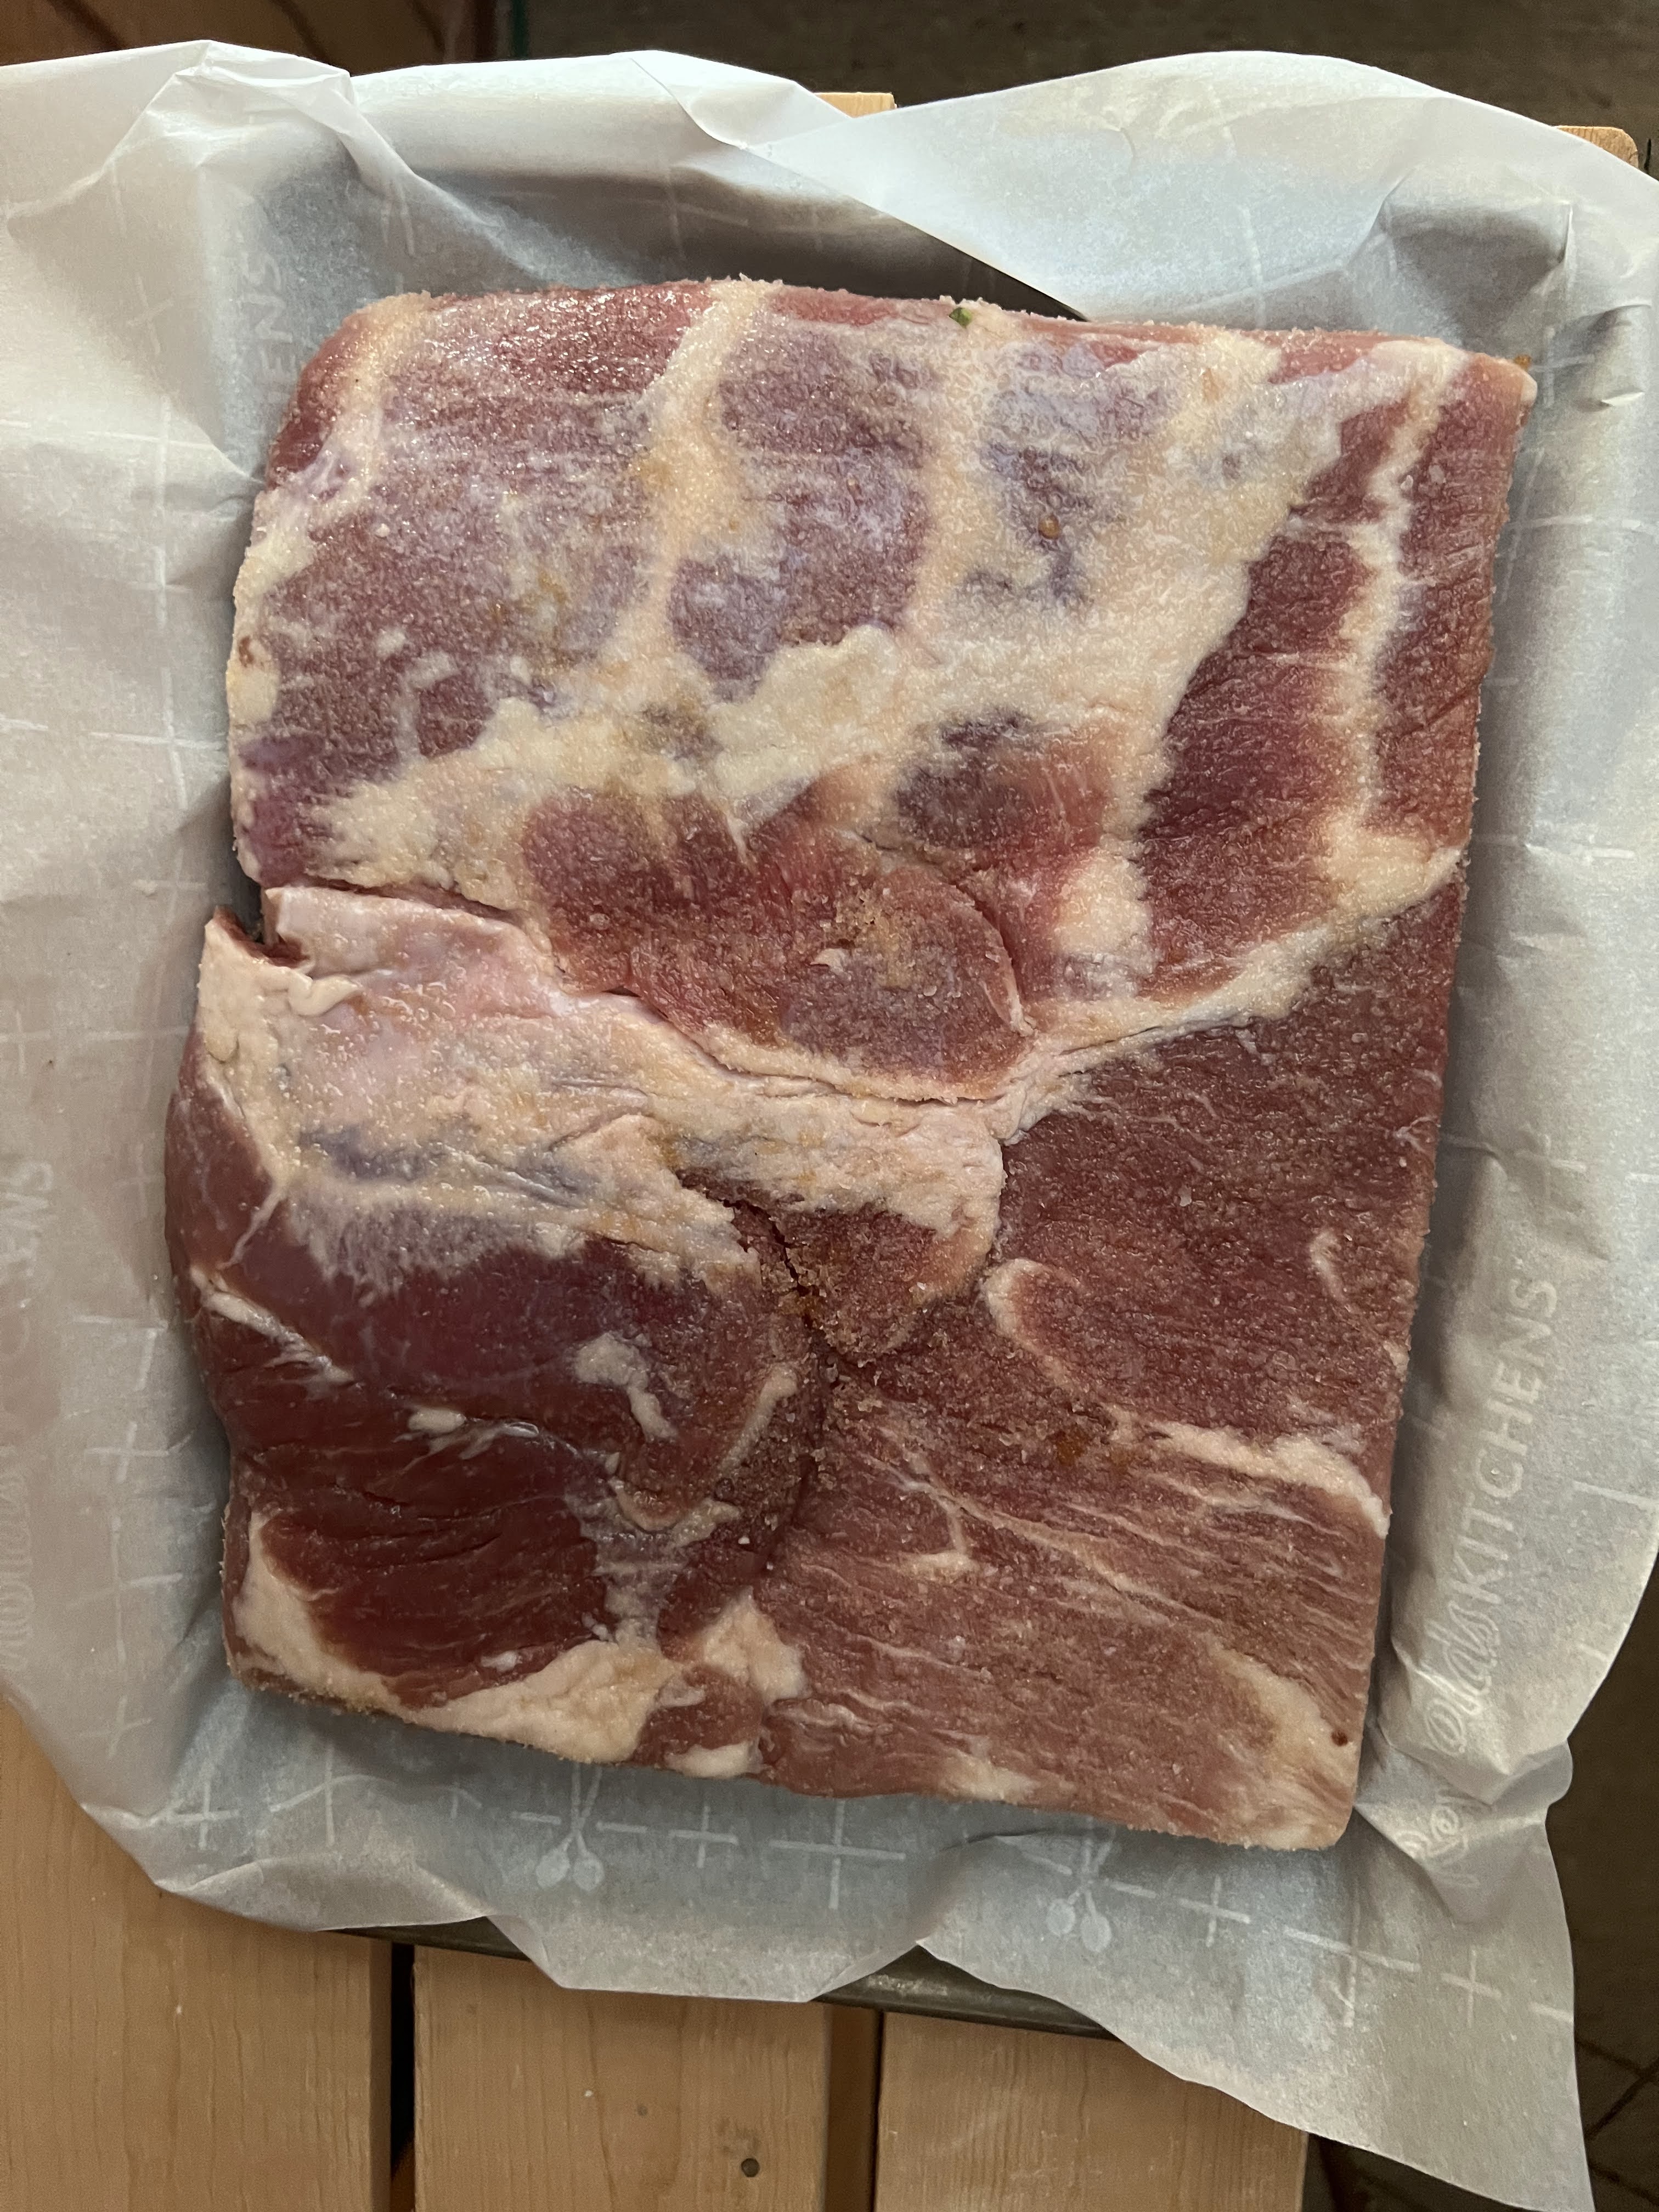
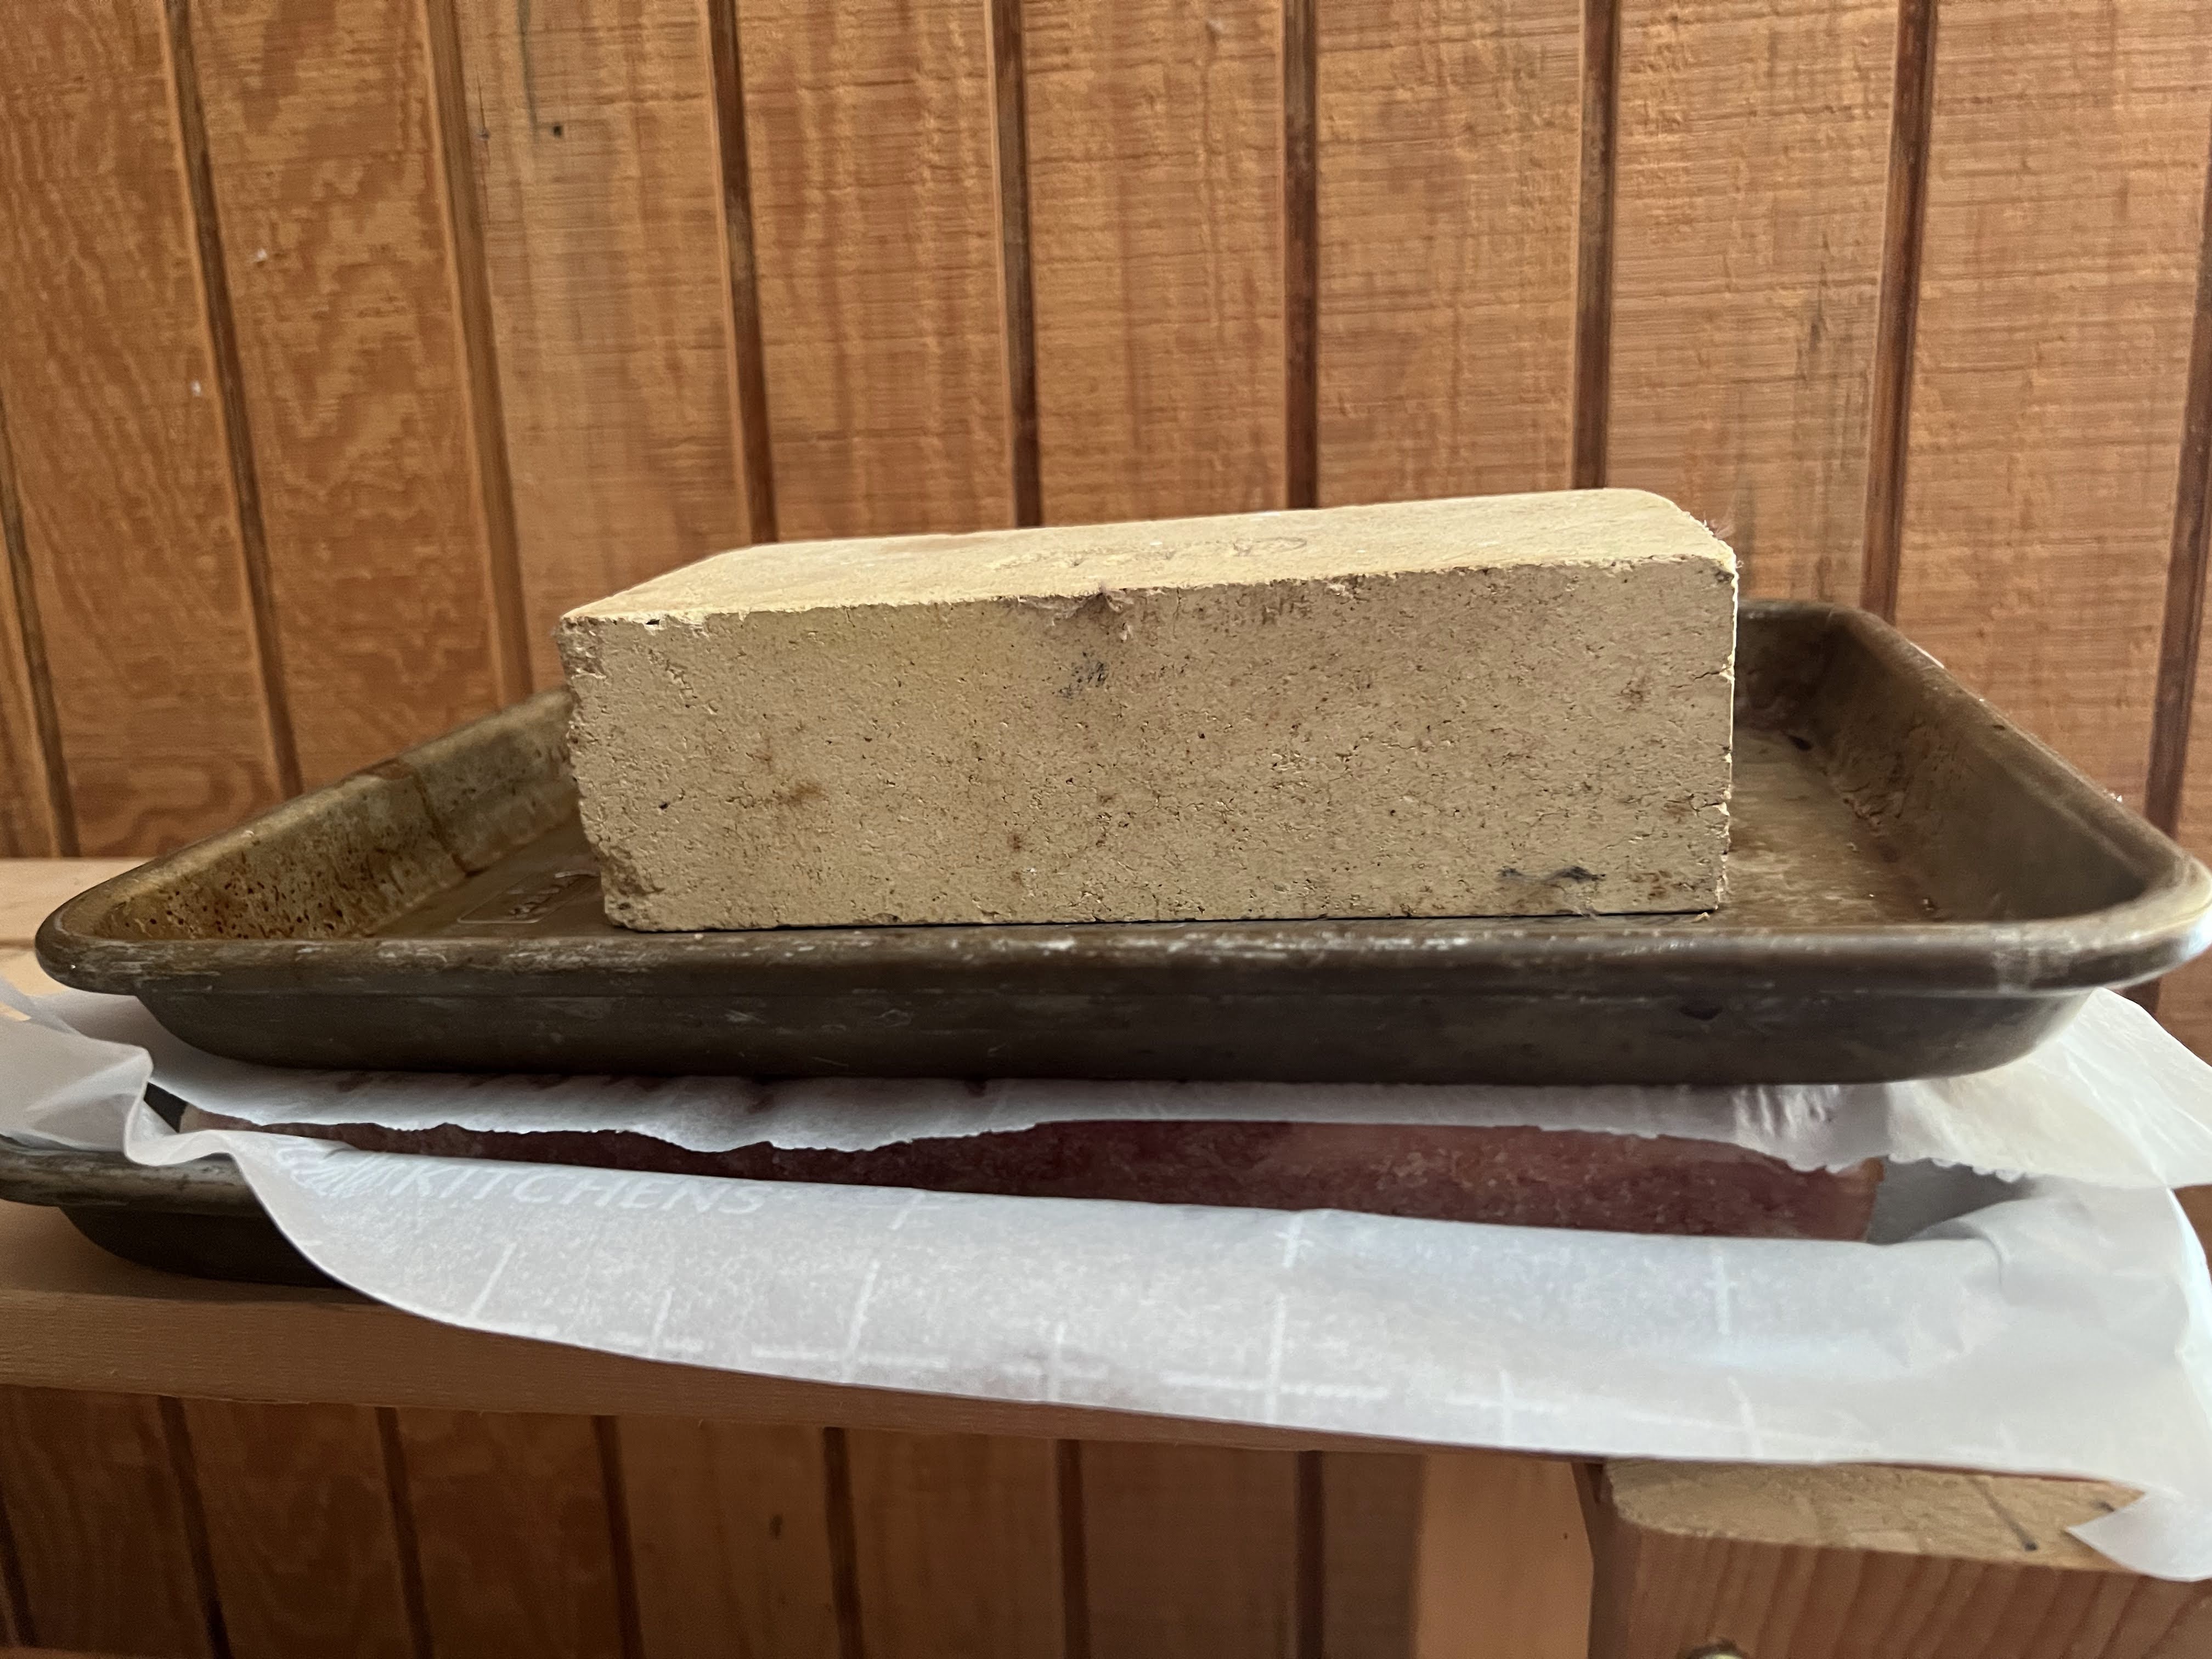
The first step was to cure the pork belly with kosher salt, dark brown sugar, and pink curing salt. We did not have the pink curing salt and there is no substitute for it so we went on line and bought the smallest size we could. It will last us years even if we make bacon several times a year, but it was not expensive and we now have it on the shelf. I rubbed the pork with the mixture and the first picture is that piece of the pork belly with the rub on it. I set it on a sheet of parchment in a ¼ sheet pan and then I covered it with another sheet of parchment paper and then a second ¼ sheet pan and then put a brick in that pan to weigh it down. The second picture shows it ready to go into the refrigerator for 7 days to cure.
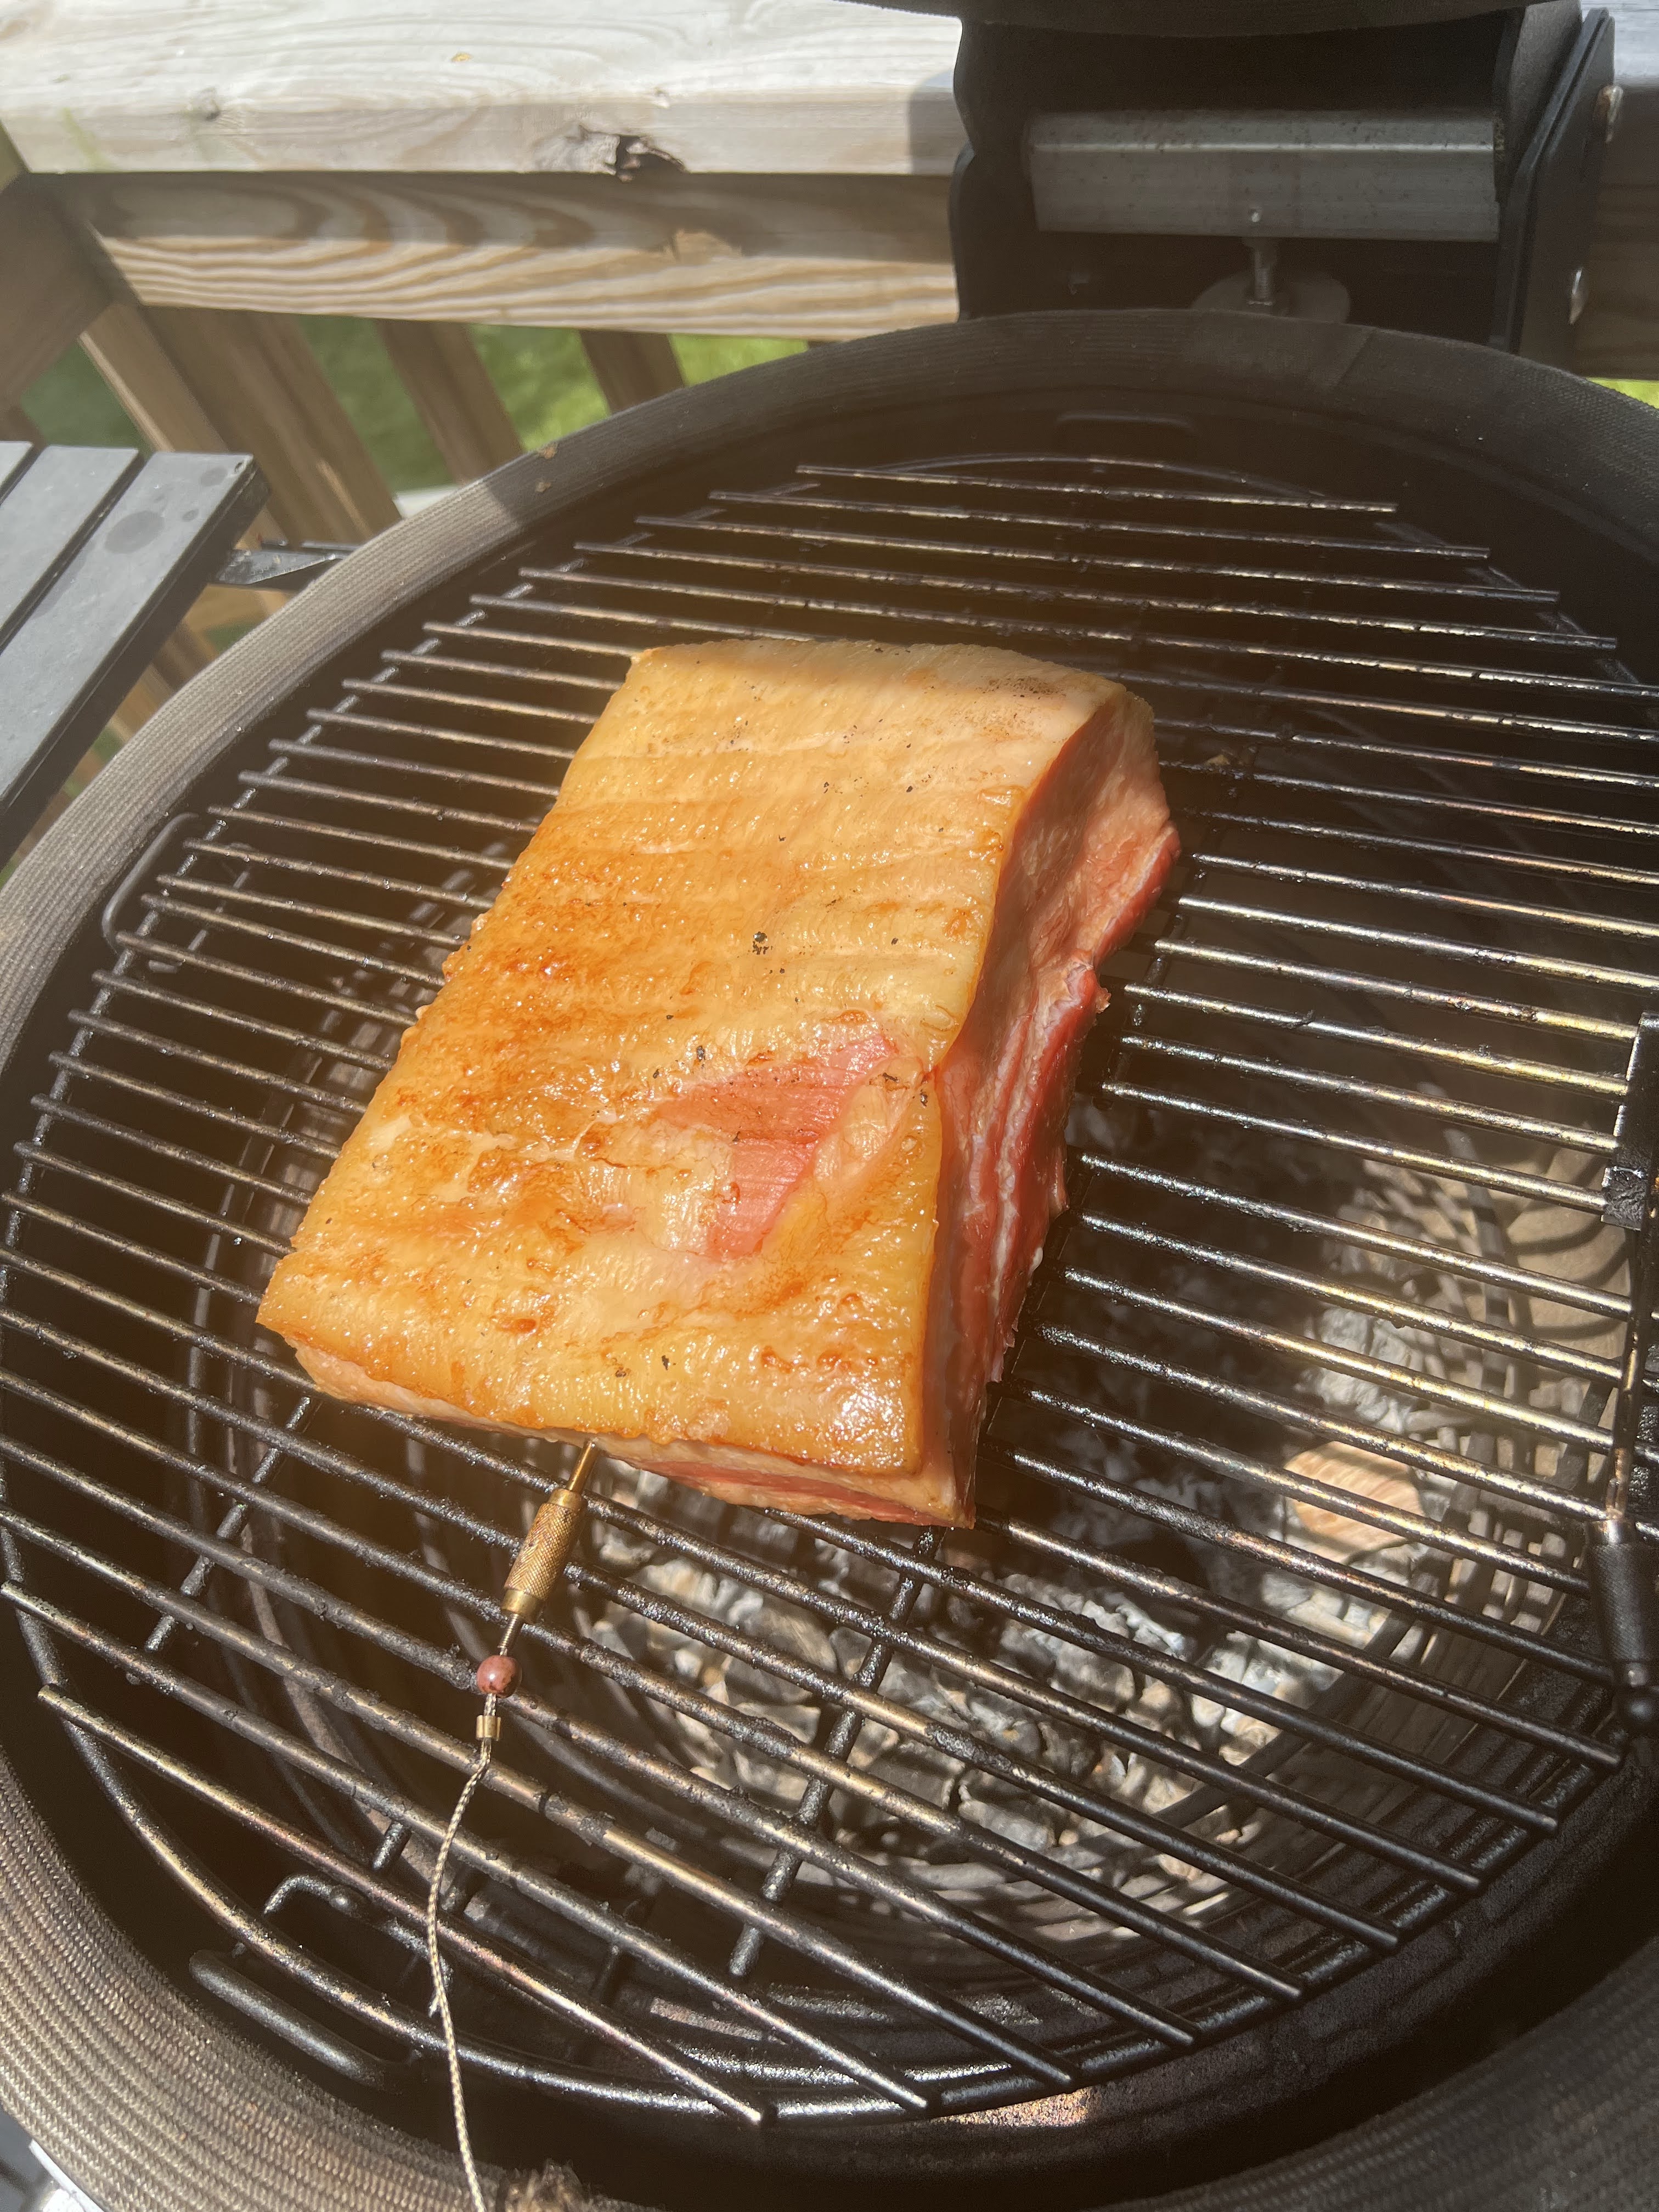
After it cured for a week, I rinsed it off and thoroughly dried it and let it sit overnight on a rack in the refrigerator to thoroughly dry out. I then smoked it for 3 hours on the Kamado with some apple wood chunks until it got to 160° internal. The picture shows it coming off the Kamado.
I am a big fan of the Kamado grills like the Kamado Joe that I have and the Big Green Egg that has the most name recognition. I can cook things anywhere from 180° to over 700° and slow cook to begin with and then reverse sear at high heat on the same grill. But the one thing I do struggle with on my Kamado is smoking at low temperatures. I can’t go below 180° without having the fire go out. This smoke was at 200° and it required constant attention and was probably more like 220° over the 3 hours. The end result was great, but on my Kamado it was not put it on the grill and walk away for three hours.
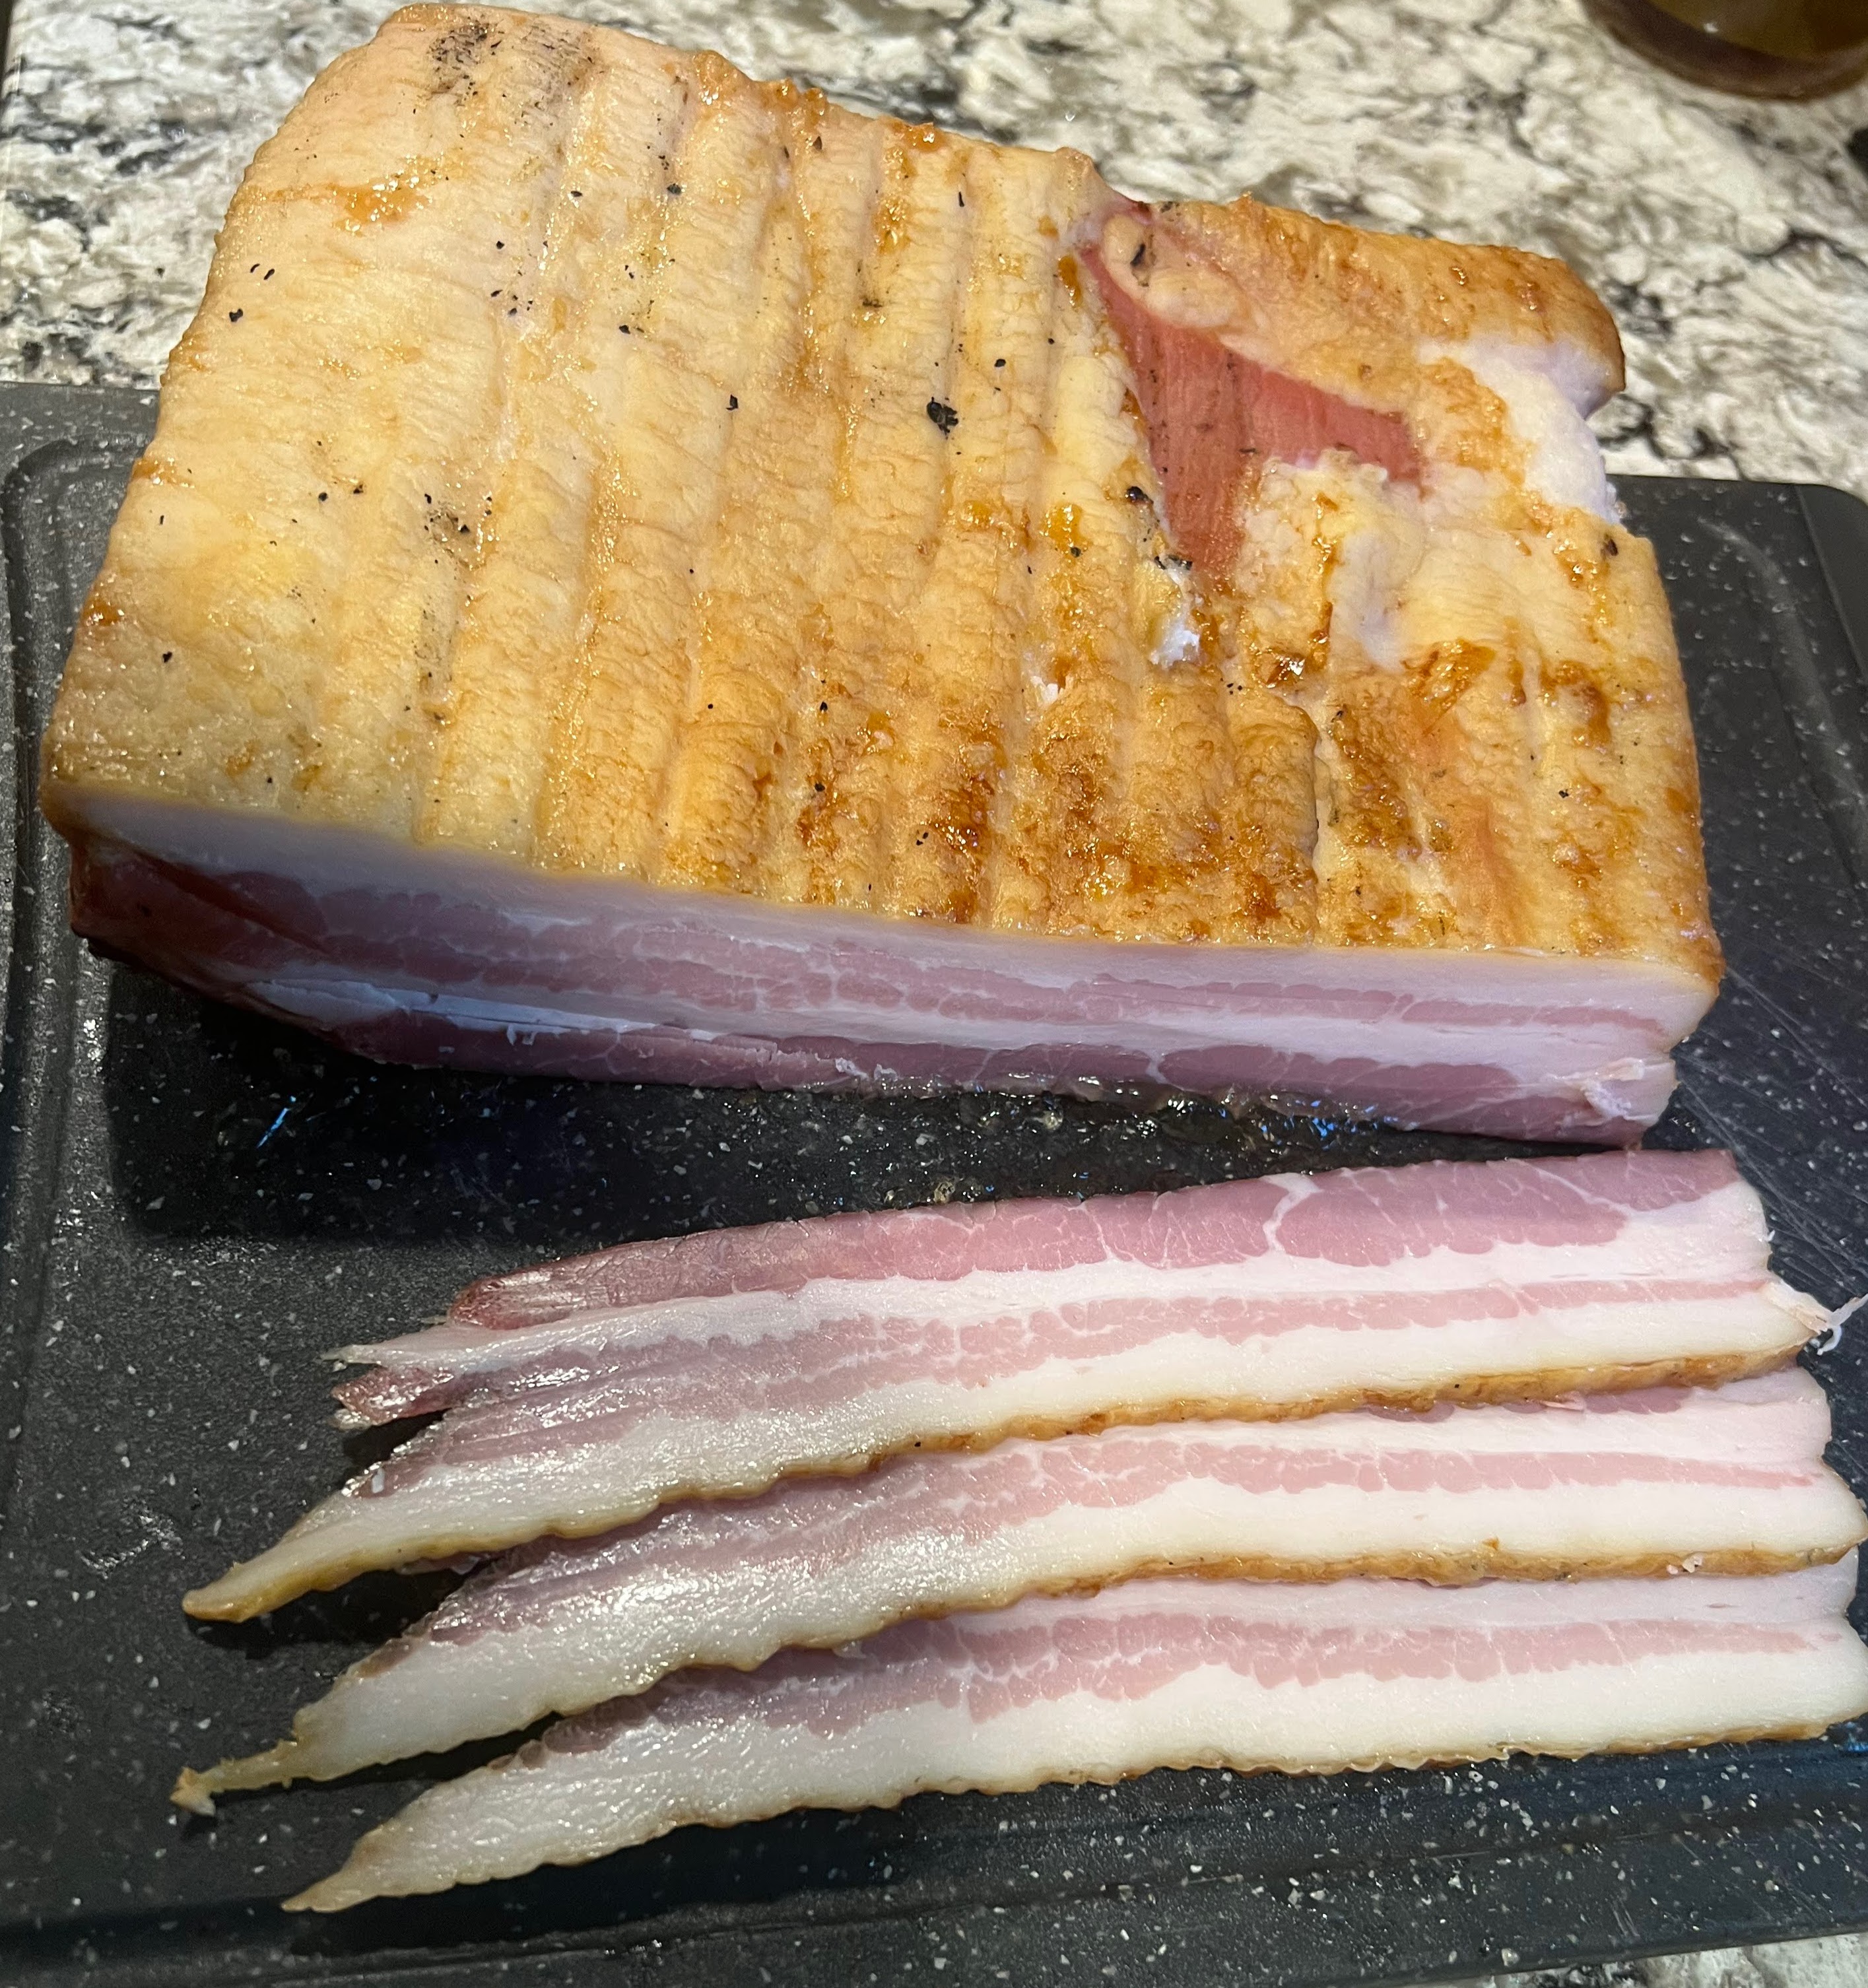
I then put the bacon in the refrigerator overnight to cool and the initial picture at the start of the post shows it sliced this morning. Because I am hand slicing, it is thick slices of bacon.
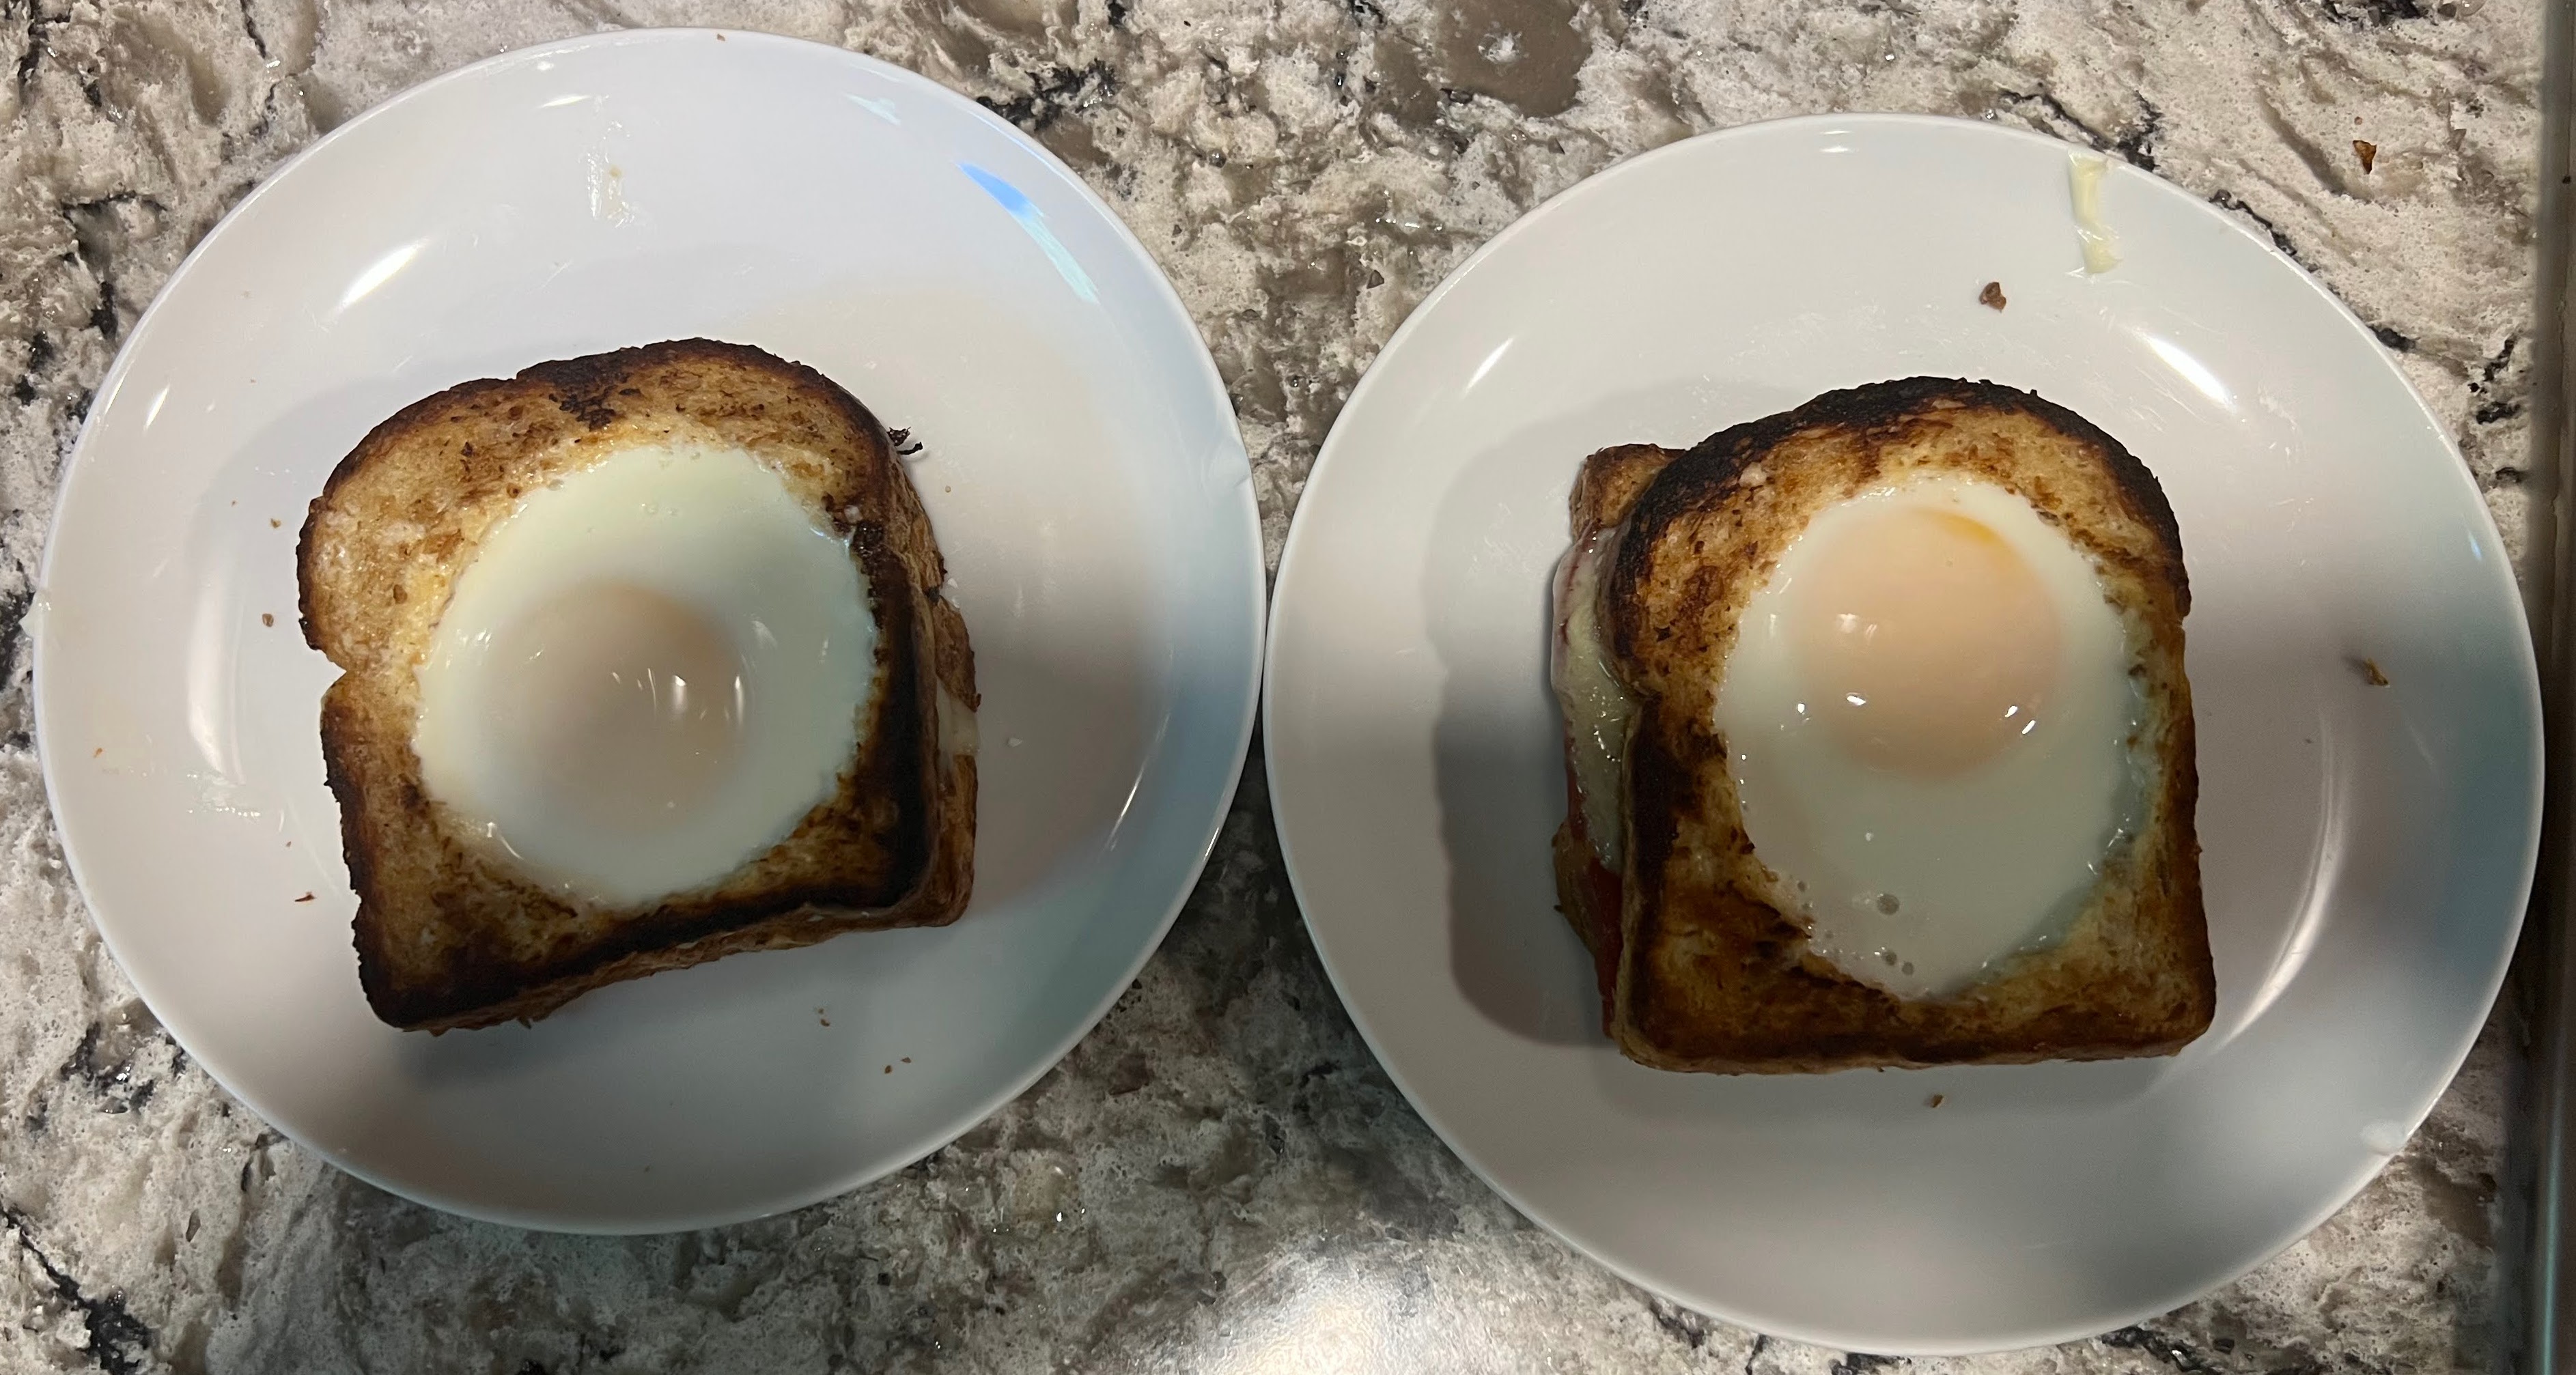
To celebrate I made Toad In A Hole sandwiches for Beth and I for breakfast with the bacon, Swiss Cheese, and an egg. I cut out a hole in one slice of the bread and covered one side of each slice with mayonnaise. I then put the full slice in my cast iron fry pan with the mayonnaise side down to toast it with the cooked bacon and Swiss Cheese on the top side. I then slid it under the broiler for 20 seconds to get the cheese fully melted. I then toasted the slice with the hole in it in my fry pan mayonnaise side down and then flipped it so the toasted side was up. I cracked an egg into the hole in each slice and let it cook until the white as mostly cooked. As discussed in my earlier post of cooking fried eggs, if you let the egg cook in the fry pan until it white is fully cooked, the yolk will no longer be runny, so I built the sandwich in the pan with the bottom slice, bacon and cheese and then used the spatula to put the slice with egg inside on top of that. I then put the pan under the broiler for about 30 seconds until the white was fully cooked but that still left the yolk runny. The picture does not show the bacon since it is at the bottom of the sandwich, but it was delicious.
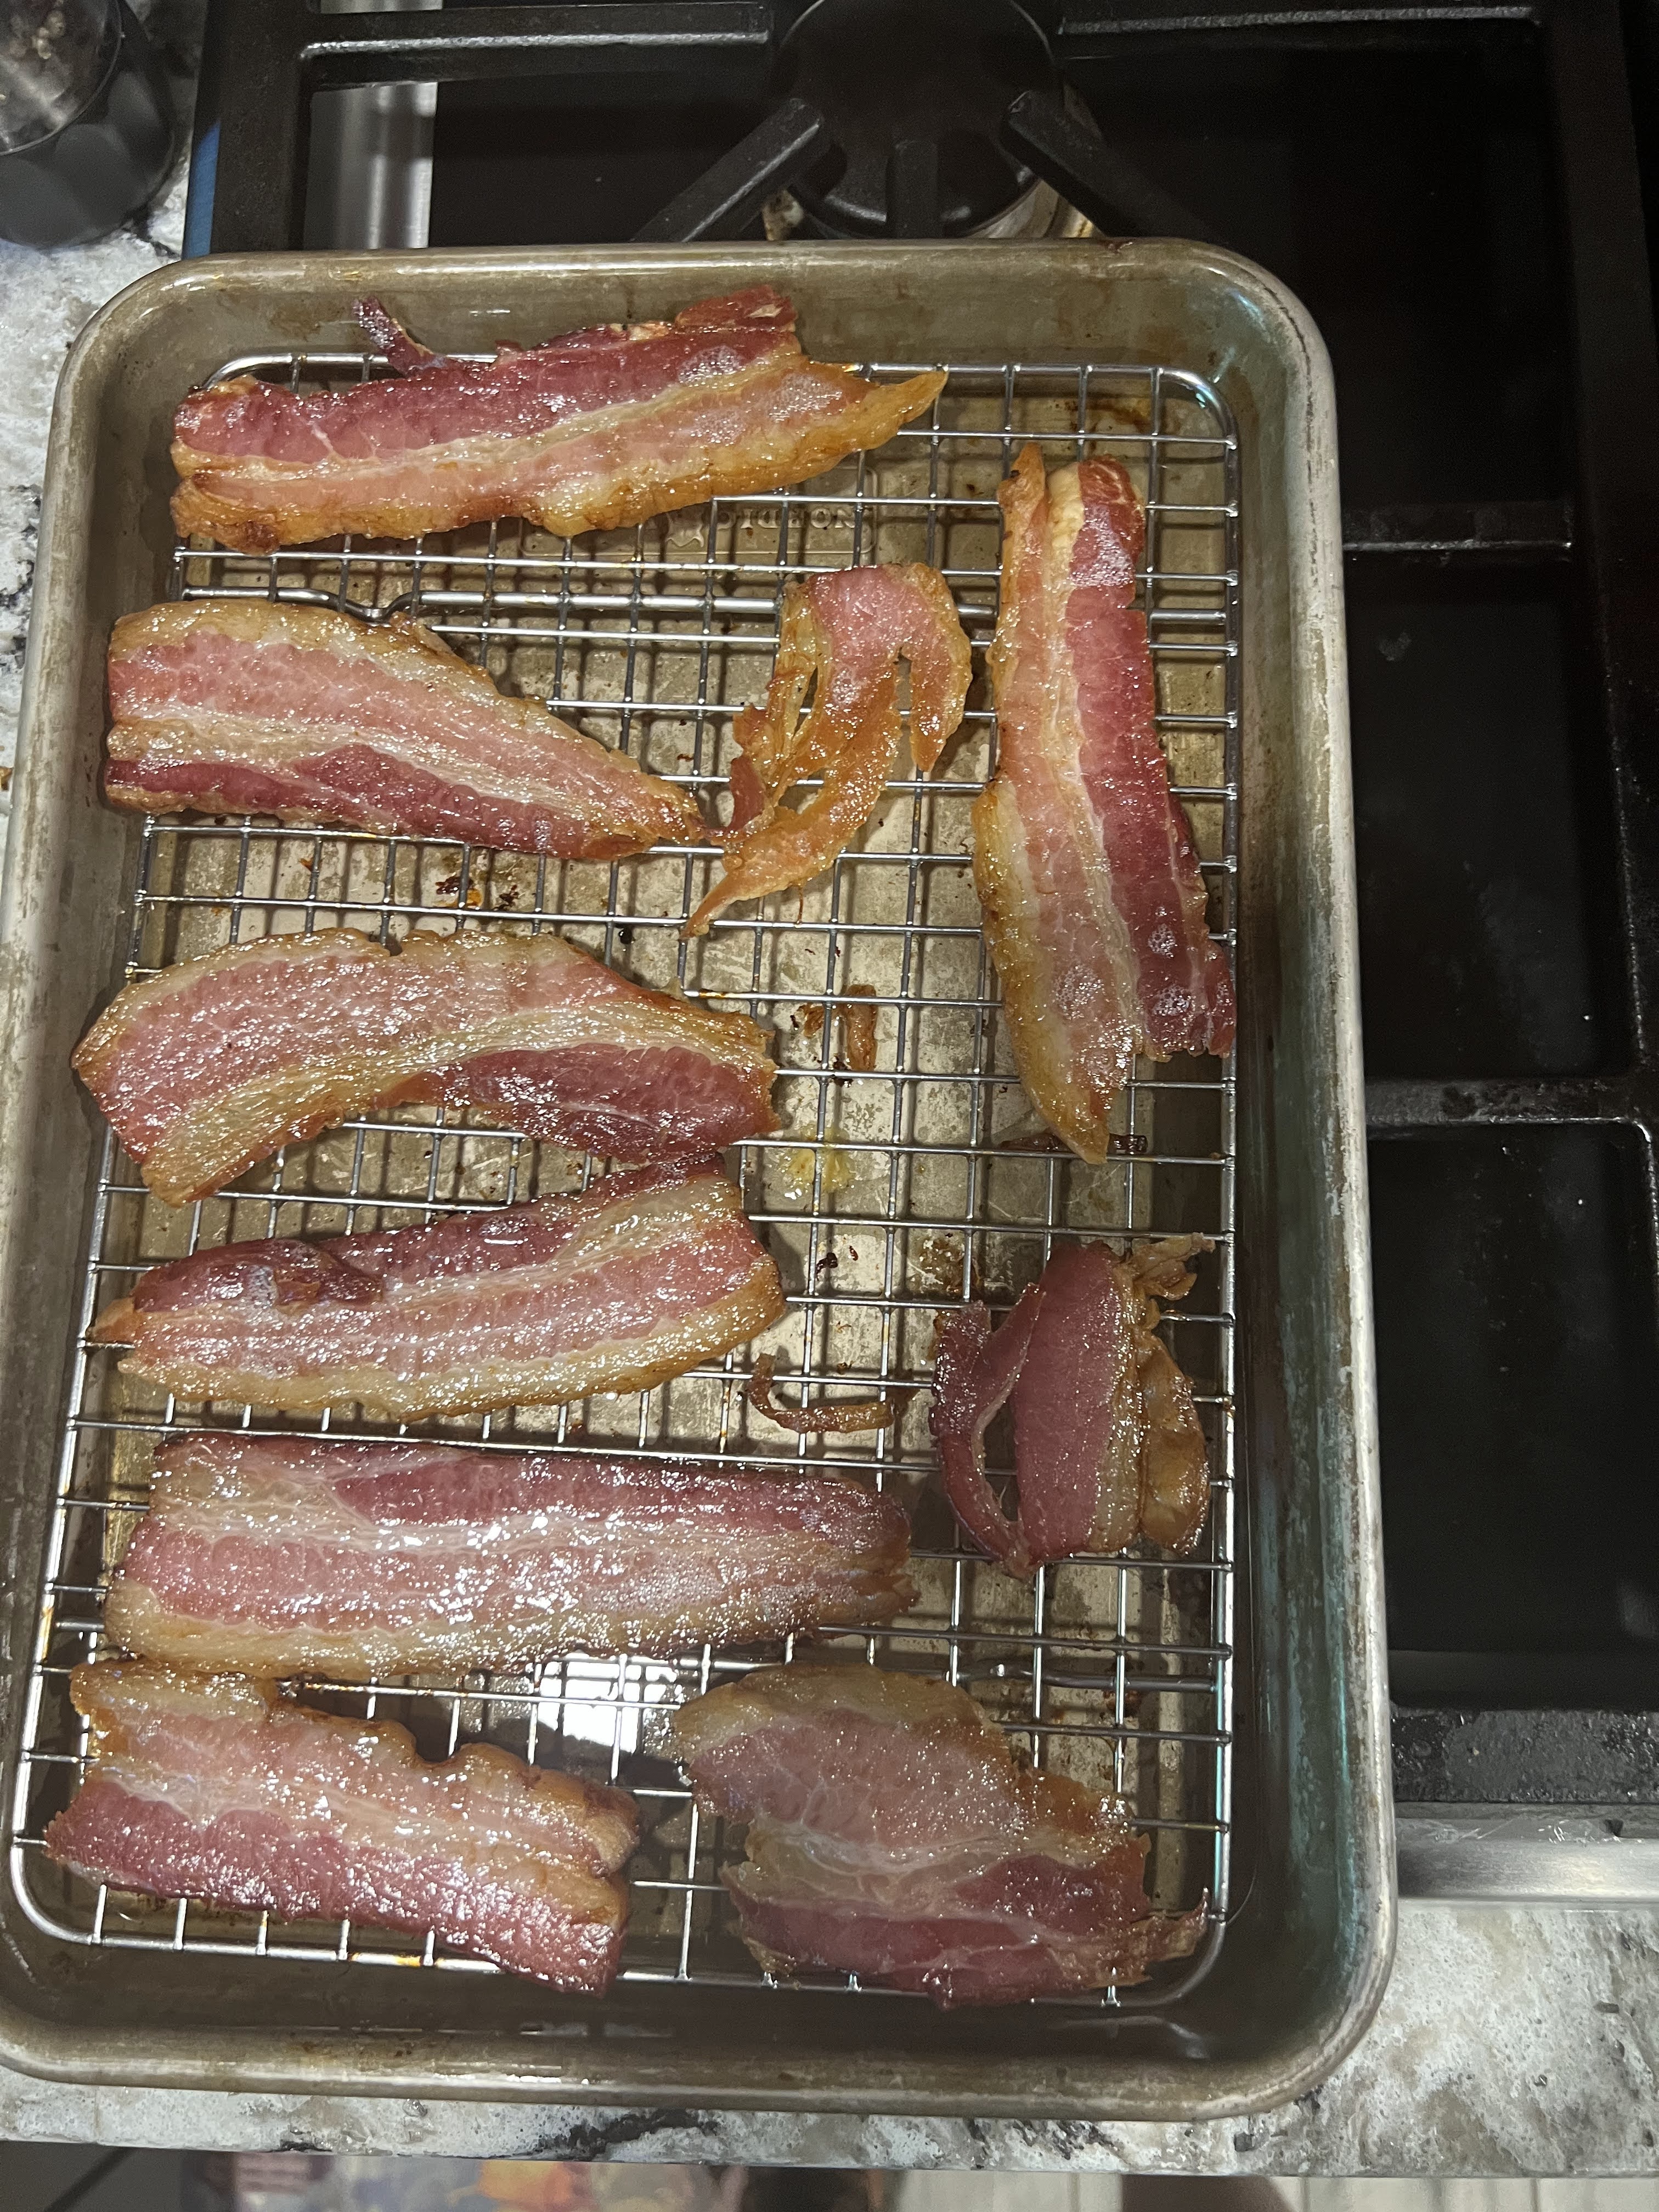
I then sliced and cooked a pound of the bacon for Beth who is making a delicious quiche today that we can have for breakfast and/or lunch tomorrow. The recommended approach to cook the bacon is on a rack in the oven at 350 degrees for about 30 minutes. Because these were thick slices and we wanted them crispy for the quiche, I went to 36 minutes.
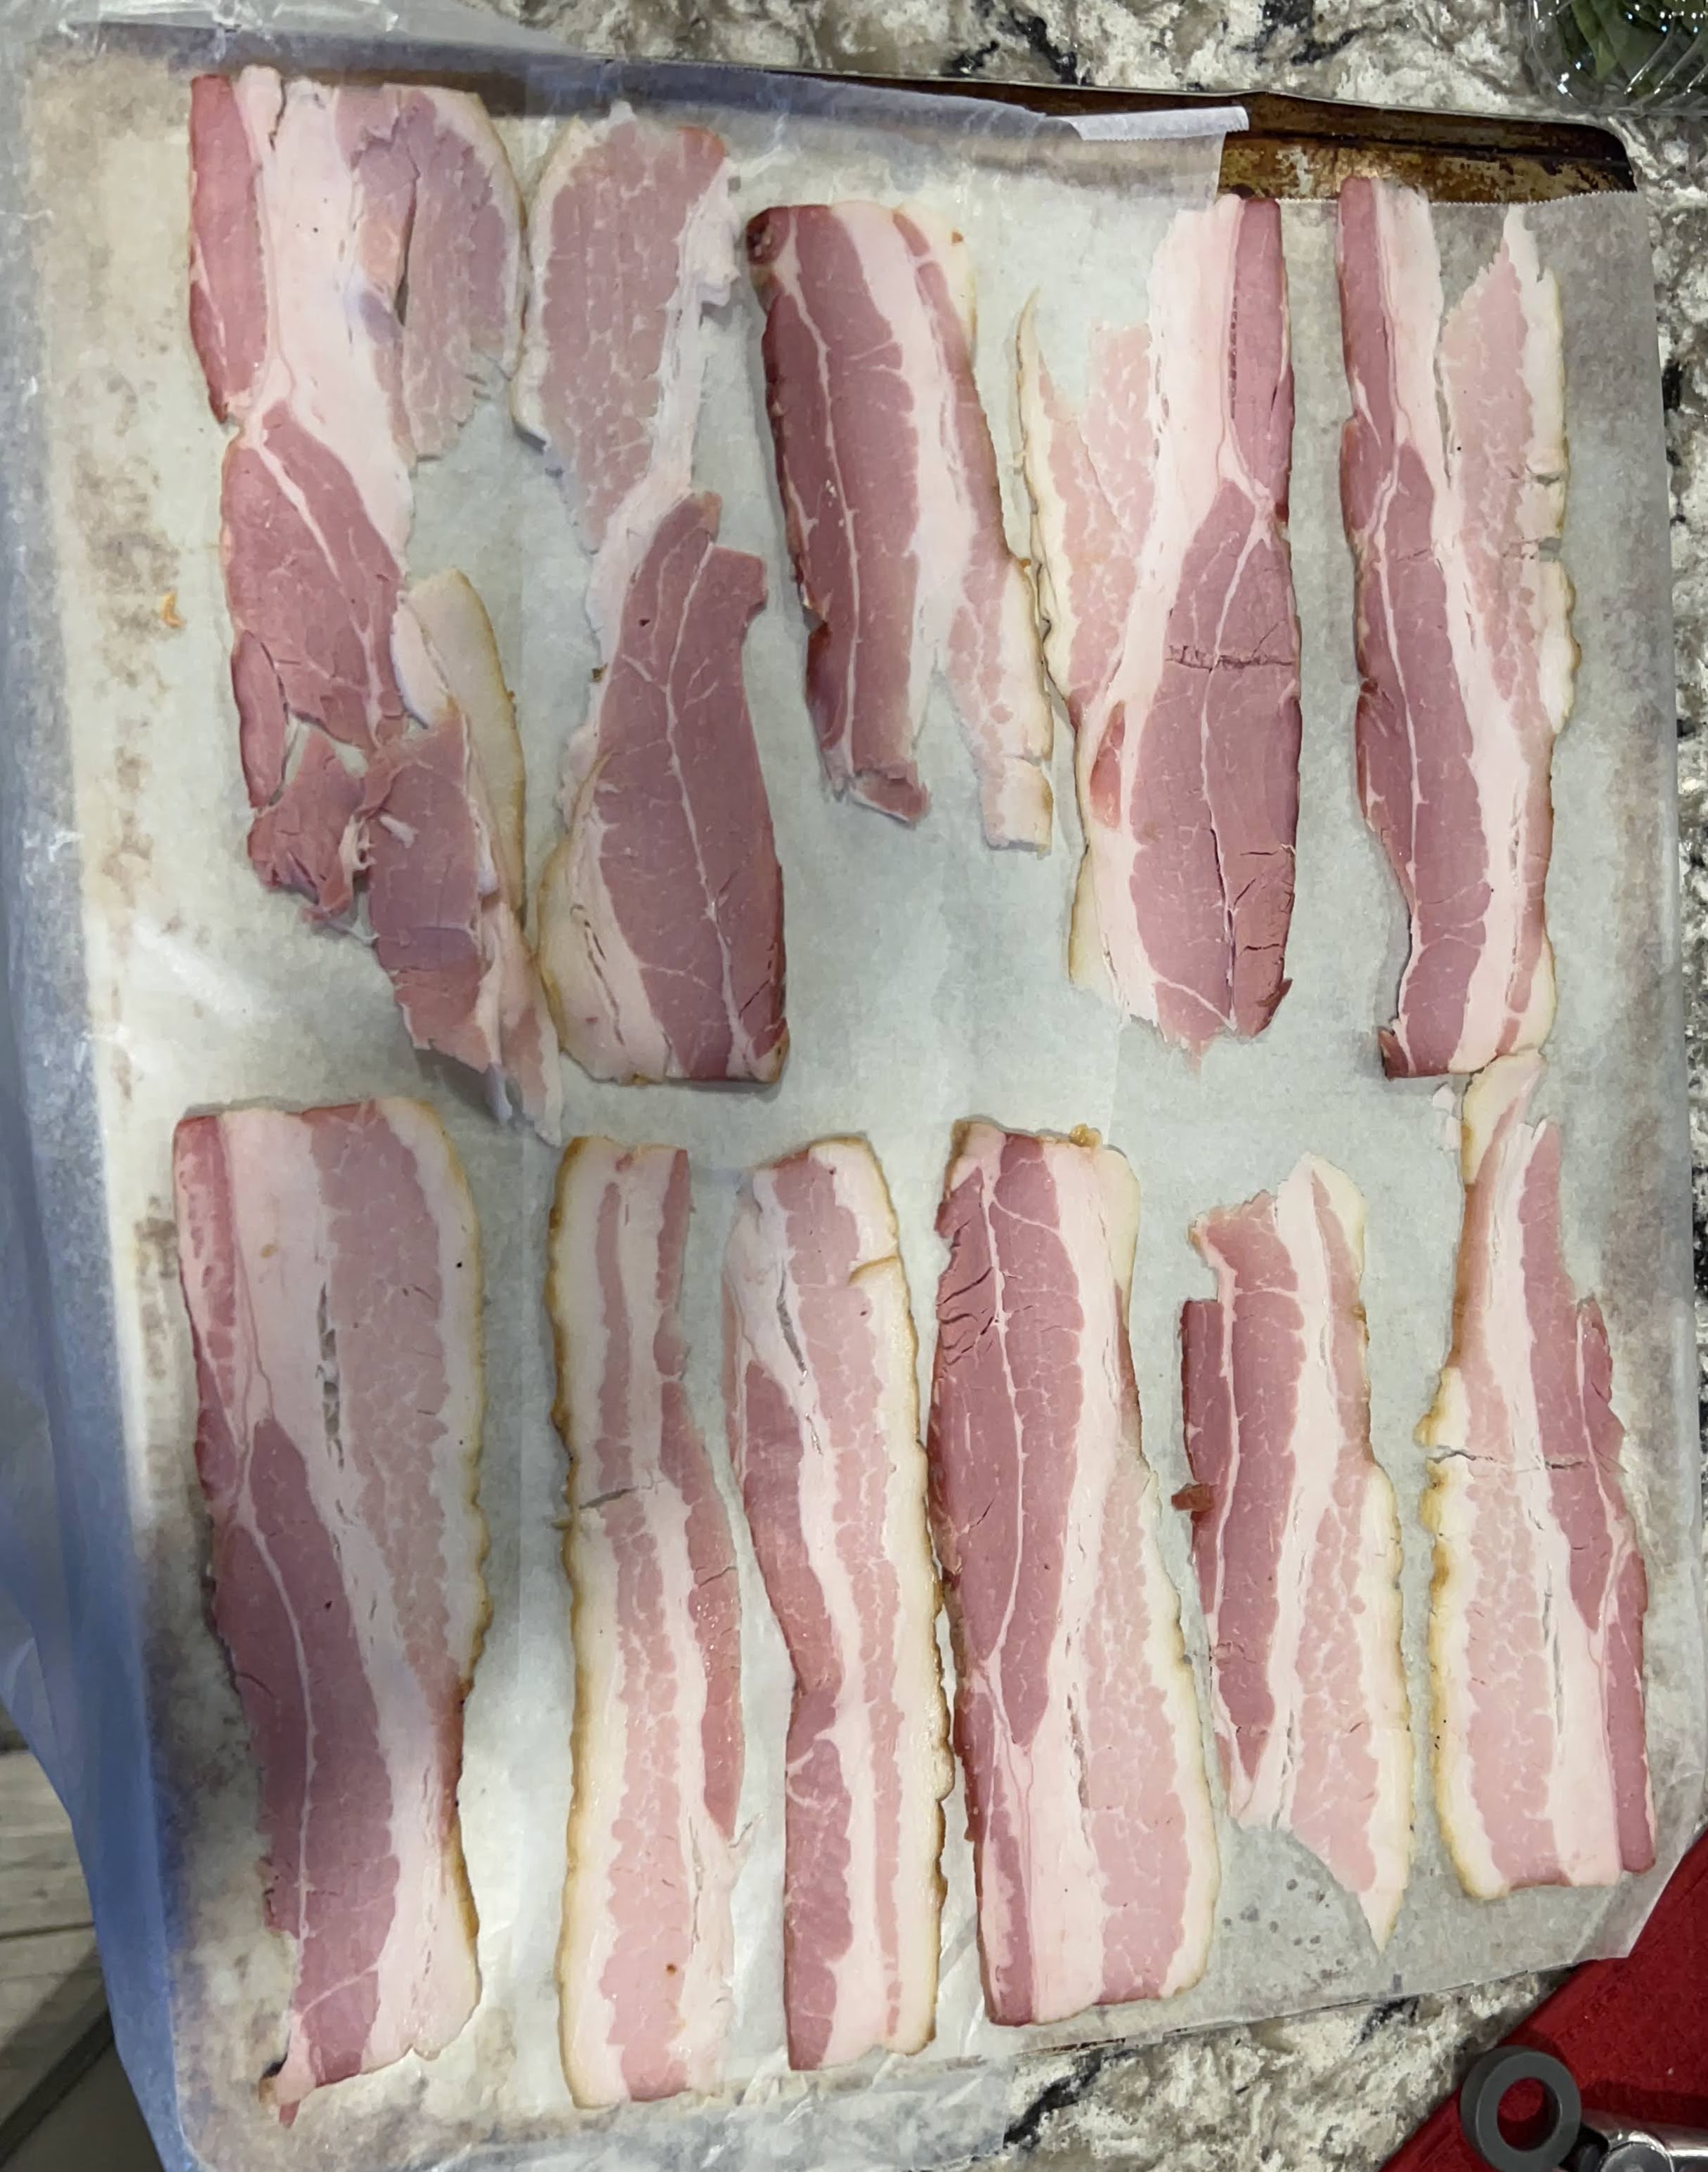
While that was cooking, I sliced the rest of the bacon and put the slices on a sheet and froze the slices individually and then wrapped them up. That will let us take as many slices as the two of us need and defrost them, leaving the remainder still frozen.

For lunch Beth made delicious club sandwiches on sourdough bread with our bacon. We are not planning on any bacon with dinner tonight!
Yes, it was 9 days from when I rubbed the cure onto the bacon until I put some in my mouth. But the first 8 days took less than an hour of total work time. The most difficult thing was making space in the refrigerator for the two pans with the brick on top for a week. Yesterday I had to pay attention to the smoking process but I had my temperature probe giving me the cooking temp on the grill night next to the bacon and the other probe giving me the internal temp. I had them showing on my phone so I spent a few hours reading a good book on my screened in porch, checking my phone for the temps every 5 minutes or so. I will also take credit for some exercise getting up and down to adjust the vents on the grill as needed to keep the cooking temp close to 200°.
This bacon got rave reviews from Beth so this will be repeated, and I may look at things like adding bourbon to the cure or some maple syrup. I will let you know how that works out and if you give this a try, let us know on the blog how that worked for you.
Recipe
Ingredients
- 5 pounds pork belly
- 2 Tbs kosher salt
- 1Tsp pink curing salt
- 1 ½ Tbs packed dark brown sugar
Directions (All temperatures are in Fahrenheit):
- Mix the kosher salt, pink curing salt, and brown sugar together in a bowl. Thoroughly coat the pork belly with this mixture, making sure to use it all. Put the pork belly on a sheet of parchment in a rimmed baking sheet. A ¼ sheet pan should be a good fit for this size pork belly. Put another parchment sheet on top of the belly and cover it with another baking sheet. Weigh it down with a few heavy cans or something else heavy. I used a brick. Put it in the refrigerator for at least 7 days. Flip the pork belly once each day.
- NOTE: You are working with raw pork here. Wash your hands frequently and thoroughly. After it is in the refrigerator, wash everything thoroughly that came into contact or close contact with the pork belly, including the countertop you were working on.
- After the 7 day cure period rinse the pork belly in cold water to wash all the cure off of it. Dry it and put in on a rack on a baking sheet. Refrigerate, uncovered, overnight to dry it out a bit.
- Get the fire going in your smoker and get it to 200°. Add chunks of apple wood and give it a few minutes to get rid of the initial smoke. Put the pork belly in the smoker with a temperature probe all the way into the pork belly giving you the internal temp while it cooks. Cook until it reaches an internal temp of 160°, about 3 hours. Cook to the 160° temp, not for a specified time period.
- When the bacon is done, remove from the smoker and refrigerate for at least several hours. It will keep for 1 week in the refrigerator or up to 2 months frozen.
