I am a long-time home bread baker. My focus has been on artisan breads like baguettes, boules, and focaccia with many different toppings. King Arthur Bread Flour is my staple. But our oldest grandson was recently diagnosed with celiac disease. Bread was a great love of his and I am now learning to make gluten-free breads for him. I was very happy with some gluten-free English muffins that I recently made and am sharing that recipe here. We do not have a gluten-free kitchen and are learning what we need to do to have him continue to enjoy family meals at our house.
It has been an interesting learning curve for me so in addition to providing this recipe for you to download below, this post provides some and some lessons learned from my first attempts at gluten-free baking. At the end, for those new to gluten-free baking, I have some background on gluten-free baking that I found very interesting and helpful.
Being a big fan of King Arthur Flour’s products, I went first to their web site for gluten-free recipes and ingredients. I also looked at a number of gluten-free bread recipes that have been posted on line and tried some for focaccia and baguettes. The standard approach in almost all of the recipes that I saw was to purchase one of the mixes of gluten-free flours at a grocery store and use and xanthan gum to replace gluten as the way to capture the CO2 released by the yeast so the bread rises. I was very disappointed with the results I got with this approach. The breads were very dense and gummy.
My wife found a great cookbook, Against The Grain which takes a totally different approach to gluten-free baking that I really like. Nancy Cain was a very good home baker who had to convert her kitchen to gluten-free when her husband and younger son both were diagnosed with celiac disease. Much of the discussion below extensively uses material from the first 53 pages of that cookbook. I have one very long page length quote below and several smaller quotes from that book in the discussion at the end of this post. All quotes in this post are from that cookbook. Any mistakes in the information below, or misunderstandings of what Nancy has in her book are totally my fault.
Nancy was so successful that she created a company, Against The Grain Gourmet and their products are widely available in grocery stores. Their web site is https://againstthegraingourmet.com/ and it has tabs for what products they offer through retail stores and where you can find stores close to you that carry those products. To get the recipes you need to purchase her book and if you are at all interested in gluten-free baking, I strongly encourage you to do that.
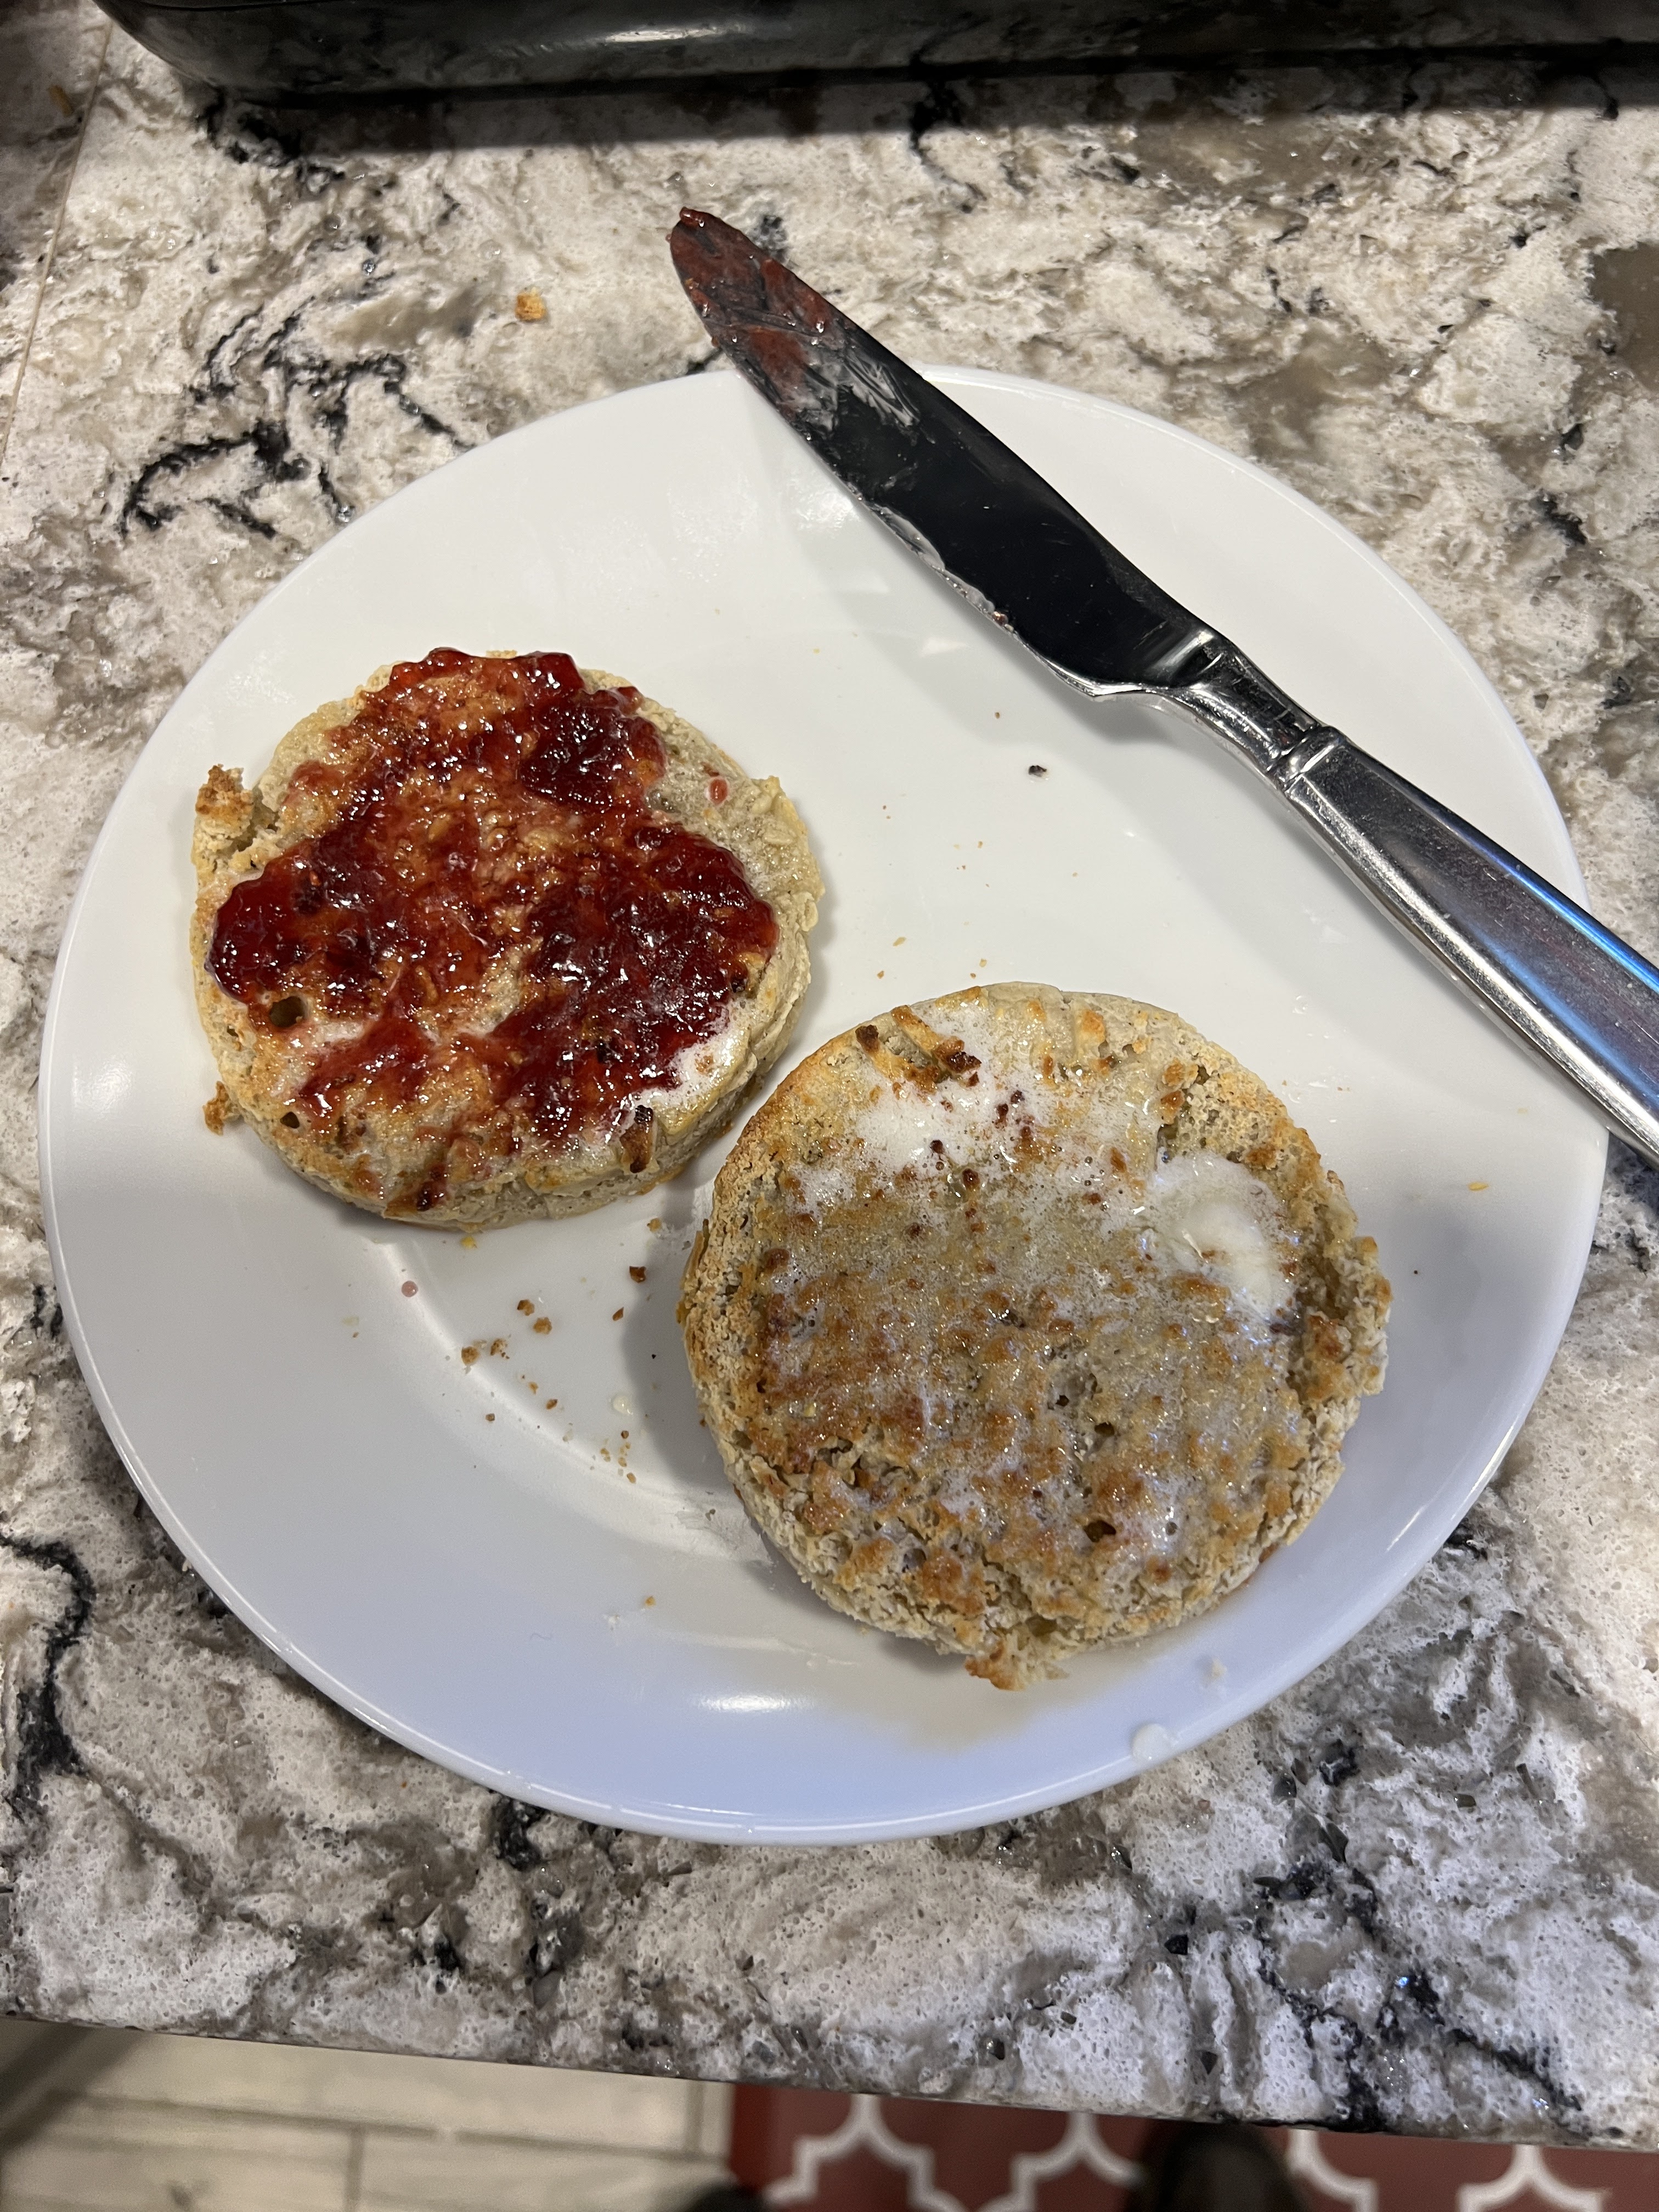
My recipe that you can download indicates that it was adapted from the recipe in the Against The Grain Cookbook. I have made wheat-based english muffins that I really like and part of that is an overnight slow rise in the refrigerator. I also use large english muffin rings that I got from King Arthur Flour and wanted to make 8 muffins in a batch, so I adjusted the recipe to be larger. The last significant difference is that Nancy’s recipes are based on using a food processor, but with the increased ingredients, it was too large for my food processor, so I used my Kitchen Aide stand mixer. The dough here has a thick batter like consistency and I find it much easier to get the batter like dough out of the bowl of the mixer than out of the food processor bowl with the large cylinder in the center that holds the blade. I do have some notes at the bottom of the recipe for people who want to use a food processor. I put the bowl and blade through the dishwasher before using them for any gluten-free bread to minimize any cross contamination.
When you bake with gluten, that is the mortar that holds the dough together. In the absence of gluten, you want flours with different sized granules to improve your structure. Mixing at least two different flours with different granule sizes – one of those a pure starch – will significantly improve the structure and integrity of your baked goods. Most commercial gluten-free flours contain three or more different flours for this reason. This english muffin recipe uses Tapioca Starch and light buckwheat flour to provide the alternative proteins. Some additional proteins are added by the milk and whole egg. I am not using any commercial mix of different gluten-free flours.
Buckwheat produces a heavy, earth-flavored flour that is good in pancakes but not much else. But light buckwheat flour is a great ingredient that is suitable for all types of baked goods. It adds a little color to the breads but no buckwheat flavor that I can taste. I use Organic Hulled Buckwheat Flour that I buy in 5 lb. bags from Amazon. It has a cost of only $0.34/ounce making it much less expensive than the small bags sold in supermarkets.
Tapioca flour is tapioca starch with fiber included. Many bags have both Tapioca starch and tapioca flour on the label suggesting they are the same thing. Bringing the milk and butter to a boil before adding them to the dry ingredients is needed to make the starch become soluble. As discussed in long quote below, starch is insoluble in cold water and becomes a dead weight in the bread unless the liquid is hot. I use Anthony’s Organic Tapioca Flour that I get from Amazon in 5 lb. bags. It has a cost of only $0.26/ounce. There can be a wide variation in Tapioca starch (flour) from the same vendor. Doing ingredients by weight instead of by volume will give more consistent results. In the recipe I have both the weight and the volume measurements. As you probably know, good bakers strongly recommend adding ingredients by weight, not by volume.
Recipe Hints and Lessons Learned
The wheat-based english muffins that I have made in the past had a slow overnight rise in the refrigerator and I have incorporated that approach to this recipe. The dough/batter is put into the rings on a sheet pan and that sheet pan is covered in plastic and put in the refrigerator overnight. One of the important steps in planning for this recipe is making room in your refrigerator for this sheet pan. You want the dough and the rings to be at room temperature when you start the cooking process the next day. The recipe suggests at least two hours in a slightly warm oven to do that. Once they are at room temperature they can sit for a while with no problem before cooking them.
The biggest challenge in this recipe is to get some color on the sides so they have a little crispness coming out of the toaster but having the center of the muffin fully cooked, but not overcooked. This is done with a three-step process.
- The muffins are initially cooked in a cast iron fry pan over low heat for 5 minutes on each side. The goal is to have each side lightly browned, like the ones in the package of Thomas’s English Muffins in the store. Just lightly browned since they will go in the toaster in stage 3 when you are ready to eat them.
- Because of the thickness of the muffins, the centers will not be fully cooked when they come off the fry pan. Stage 2 is to put them in a 350° oven for 5-10 minutes until the center is fully cooked. The recipe talks about using a cake taster at the 5 minute mark to see if additional time is needed. We don’t want the muffins to be overcooked and dried out.
- The final stage is when you want to eat the muffins to fork split them and put them in to toaster until they are nicely browned. That takes 1 ½ cycles in my toaster.
The timings for stages 1 and 2 in the recipe are approximate. They are what works for my cast iron fry pan at the setting I have on my Viking gas range and then in my Kitchen Aide electric oven. If you have an electric or induction burner range, your timing and heat levels are very likely to be different from mine and your oven may cook at a different speed than mine. I suggest the first time you try this recipe that you do one muffin at a time to start. This trial and error on one muffin at a time will let you get the timing and temperature that is right for your fry pan, range, and oven. I would keep the range temp low enough that at least 4 minutes is needed before they are lightly browned but high enough so it is not more than 6 minutes. I would be more inclined to drop the oven temp and add time than I would be to raise the oven temp and reduce time. We are trying to get the very moist center fully cooked but not overcooked. Going completely through that process for one muffin and after it comes out of the oven fork splitting it to see how the center is and the color of each side will let you adjust the settings on the range and oven and the times you want to use to get it properly cooked. Once you get a muffin that you really like, you can add your timings to the recipe and then you can cook the muffins in batches with confidence they are coming out right for your kitchen each time you make this recipe in the future.
Your cast iron fry pan must be fully hot before starting the cooking process. A Carbon Steel fry pan is also a fine alternative to cast iron. I strongly prefer cast iron or carbon steel to nonstick pans, but you are free to do whatever works for you. A cast iron or carbon steel griddle also works.
I use 3.75” english muffin rings sold by King Arthur Flour in sets of four rings in each package. This size makes a larger muffin than the Thomas’s English muffins sold in the stores that we have enjoyed for years. If you are using a smaller size ring, and they are available on Amazon in many sizes, you may need to adjust how much of the dough/batter you want in each ring since the smaller diameter rings may not need the ½ cup of dough that my large rings do. That may also mean that you need less total dough/batter and will need to reduce the quantities from what I have in the ingredient list in the recipe.
I welcome your feedback on this recipe and on the topic of gluten-free baking. Anything we can do to help each other out to put tasty baked goods in front of family or friends who have a gluten intolerance is good for all of us.
If you are new to gluten-free baking, these next two sections might be of interest to understand what gluten is and why it is used and what the alternatives are. If you have a good handle on gluten-free baking, feel free to ship these sections.
Gluten – What Is It and Why Do We Use It To Make Bread
Gluten is a protein found in wheat flour. “Proteins are chains of amino acids, which are the building blocks of life. Proteins are also the building blocks of baked goods, both wheat-based and gluten-free… Proteins do the opposite of tenderizers. They toughen the dough and build the framework for the structure of baked goods.”
Wheat-based flours are very consistent. “if you buy a bag of King Arthur Unbleached Bread Flour, it will have a protein content of 12.7% and will be milled from hard red spring wheat in the northern Great Plains.” Unfortunately, gluten free flours do not have that consistency. The amount of proteins vary widely between different flours and different batches of the same flour from the same vendor can have variations.
When moisture is added to wheat flour, the gluten proteins form long strings. Mixing and kneading the dough causes those strings to form a mesh or net. When yeast is added to the dough, the yeast consumes the sugar in the flour and produces alcohol, which evaporates away, and carbon dioxide (CO2). The gluten net catches the bubbles of CO2 and that causes the bread to rise. When the dough has been machine mixed and kneaded, like most supermarket breads, the bread that is produces has very uniform small holes, each of which was where a CO2 bubble had been trapped. When bread is hand kneaded, as for artisan breads, the gluten mesh is very uneven and the holes are of very different sizes.
The primary challenge in baking gluten free bread is to find an alternative to the gluten mesh to capture the CO2 so the bread rises. As noted above, the most common approach is to use xanthan gum which can capture the bubbles of CO2 as the yeast releases them. This works and there are commercial products in the frozen food section of your supermarket that use xanthan gum with some success. But I was totally unsuccessful in using xanthan gum and much of the criticism of gluten-free baked goods on the web seems to be the dense nature of those products.
I really liked the idea of other proteins that do not trigger the same response that wheat-based baked goods do for people that cannot have gluten. The success that Against The Grain Gourmet’s products have had in the retail stores got me solidly in their camp.
Two other thoughts on gluten before diving into the alternative protein approach to gluten-free baked goods.
Gluten can be found in many places, especially in processed foods. Just eliminating wheat based baked goods does not mean you have a gluten-free diet. If anyone in your family has a gluten intolerance, you should carefully check the list of ingredients in all processed or packaged foods to make sure that it does not use gluten as a thickener or binding agent. Even some medications can contain gluten.
Gluten-free diets have become popular with people who do not have any gluten intolerance. These diets are often perceived as a healthy alternative, largely because the primary source of gluten, baked goods, often have a high calorie content. In fact, studies have shown that there are minimal health benefits to a gluten-free diet and some risks to eliminating gluten from you diet when you do not have any gluten intolerance. Her is a link to a very good article on this topic – https://www.medicalnewstoday.com/articles/288406#foods-to-avoid .
What Are Gluten-free Alternatives?
Producing gluten-free baked goods is more than just using ingredients that do not contain gluten. Our kitchens have had numerous exposures to products that have gluten and some of that can remain on pots, pans, and utensils even after normal cleaning. The recipe I have here calls for cooking in a cast iron fry pan as the first stage in the cooking process. Below is an excellent article on preventing cross-contamination in your kitchen and it specifically calls out cast iron pans. The seasoning that makes cast iron fry pans so great to cook with, and that requires proper cleaning to maintain that seasoning, can trap gluten and transfer it to your english muffins. I have gotten a 2nd cast iron fry pan that I keep separate in my basement, along with a separate baguette pan, for when I am doing gluten-free baking. I am also comfortable putting some pots, pans, and utensils through a dishwasher cycle and them using them for gluten-free cooking instead of having all the duplicate items that this article suggests.
The following long italicized quote from Against The Grain” provides a great introduction to the alternative protein approach to making very good gluten-free baked goods.
“Bread bakers often refer to the ratio of liquid to flour by weight as the hydration ratio. Liquids include not only water but also ingredients like milk, vegetable oil, juice, and whole eggs (which are about 75% water). Typically, the hydration ratio for wheat-based breads ranges from 50% to 80%, depending on the type of flour used and the baked good. Since one cup of liquid weighs ½ pound, this means that a two-pound loaf contains two to over three cups of liquid. For wheat-based baking, high hydration ratios are used for breads like focaccia and ciabatta, with loose, open crumb structures. On the lower hydration end are dense breads like bagels.
Gluten-free breads require much higher hydration ratios, typically with a ration of more than 100%. These are very loose doughs and kneading many gluten-free doughs is more akin to folding the dough over and over with a spatula. The presence of more liquid in gluten-free breads also means that baking times are typically longer…
Typical wheat flour for bread baking is almost 13% protein. Very few gluten-free flours contain that much protein, and those that do would typically be used in a mixture of two or more flours. During the baking process, proteins, whether they come from the flour or added protein sources like eggs, milk, nuts, and seeds, thicken the dough or batter and add structure. There are many reasons why gluten-free baked goods rise beautifully and then fall, but chief among them is inadequate protein. As the dough begins to heat up and bake, there has to be sufficient proteins to set and form the walls, otherwise the dough will flatten or not create a resilient enough structure to hold in the gasses.
Pure starches get a bad rap when it comes to gluten-free baking, yet they are probably the least understood component of gluten-free baked goods. Like protein, starches are essential to the structure of gluten-free baked goods. All traditional flours, whether from cereals or grains, are at least 70% starch, and starch is made of chains of sugar molecules. These chains may be either straight or branched, and the percentage of each type varies with the type of starch.
Pure starch is insoluble in cold water, and unless starch granules are broken down by heat, the shearing action of mixing, or enzymes (as in fermentation with yeast), they are dead weight in gluten-free dough. Starch becomes soluble in water when heated and forms an elastic gel as the starch granules absorb water and swell. It is this gel that can help build structure, contribute to the crumb, and aid in moisture retention.”
If you read these last two sections, your feedback is helpful. I found it really interesting and helped me have an approach I had confidence in. It gets into the chemistry and physics a little so it might be pretty boring to some people.
