I really enjoy the spicy lamb Merguez sausages that originated in North Africa and are an ingredient in many Mediterranean dishes. When I go to a Spanish Tapas restaurant my short list of must have dishes includes how they are using Merguez. I have thought about making sausage for a while now and I finally got off my butt and did it last week. Merguez was the sausage that chose to make as my first effort. The results were delicious, and I plan to both make Merguez again when we have eaten the ones that I just made and froze, and to try making other sausages. That short list of future efforts includes Italian (both sweet and hot), Bratwurst, Kielbasa, and a Sriracha Andouille that I found an interesting recipe for. I did spend about 8 hours in the prep, grinding, stuffing, and clean up – so it is not a simple process. And if you do not have a Kitchen Aid Mixer, the time, effort, and cost could increase significantly.
If you have any curiosity on either Merguez sausages or how sausages are made, or both, this blog is about how I learned sausage making 101 from a great posting on the internet and how my initial effort making Merguez sausages was done and the results. I will also provide some links to recipes using Merguez that you might find interesting.
Merguez Sausages
I’ll start with a little background on Merguez Sausages for those who are not familiar with them. They are a lamb sausage that originated a long time ago in North Africa. They are very spicy, with cumin seed, coriander seed, fennel seed, paprika, garlic, and salt adding to the flavor. They also have Harissa, the chili paste from Tunisia, and some powdered chili pepper to give them a kick but they are more spicy than peppery. In my initial effort I found them hotter than the store-bought Merguez sausages that we have been using in our cooking and when I talk about the recipe below, I will cover how I plan to decrease the heat in the next batch that I make.
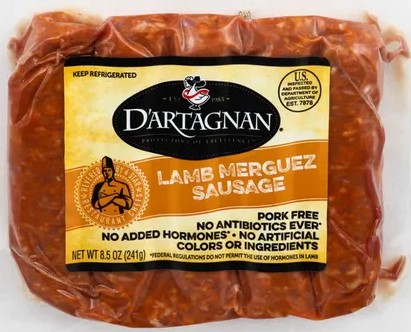
Merguez Sausages can be found in many supermarket chains. Use Google to search for “Merguez sausages near me” and you will very likely see at least one entry. The product most often seen is shown in the picture below, from D’Artagnan, and they are excellent. And their 8.5 oz package typically sells for $10-12 or about $1 per oz. I made a little over 4 lb. of sausage and my ingredients cost about $26 so my sausages were less than half the price of the D’Artagnan ones which is a reason to think about making your own.
Sausage Making 101
I found a 4 page write up, Homemade Merguez Sausage, written a few months ago by Joshua Bousel online and that convinced me to give it a try. You can find that article at https://www.seriouseats.com/homemade-merguez-sausage-recipe. I highly recommend it and I will talk about the minor variations I took from his recipe which is at the end of his write up. In the Needed Equipment section below I will cover the one major disagreement I have with his write up.
There were three things that I really like in his write up. The first was the importance of having the right amount of fat in your mixture. “Low fat and sausage are two things that you never want to see together.” The second is the importance of keeping everything very cold in the grinding process and again in the stuffing process. I thought I was doing a pretty good job of that but learned it really was important and ways to do it better that I will share. The last is the lesson I quickly learned when I started making bread and again when I started smoking meats on my Kamado Grill. The only way to learn to bake a baguette, smoke a brisket, or make delicious sausages is to try it and make mistakes. Learn from those mistakes and try it again. Don’t expect perfection, or an easy time of it, the first couple of times.
At the end of his write up he shows a total time of 2 ½ hours, not including clean up. I easily spent double that on this first effort. And the clean up was at least 30 minutes each after the grinding and after the stuffing. It would have been much worse if almost all the Kitchen Aid grinder and stuffing accessories had not been able to go in the dishwasher.
Needed Equipment
One of the best kitchen investments we made when we got married was a Kitchen Aid Stand mixer. I got one for Beth when we were first married and, when I started making bread and then homemade pasta, I was using it as much or more then she was. Our first one gave us over 35 years of great service, and after a minor repair it was moved to our youngest daughter’s home where it is still doing great work. Its replacement is still going strong after 16 years on the job. The Food Grinder Attachment that is available for this mixer is a good one and can be used for a variety of purposes. I used the fine grinding plate and got everything done in one pass.
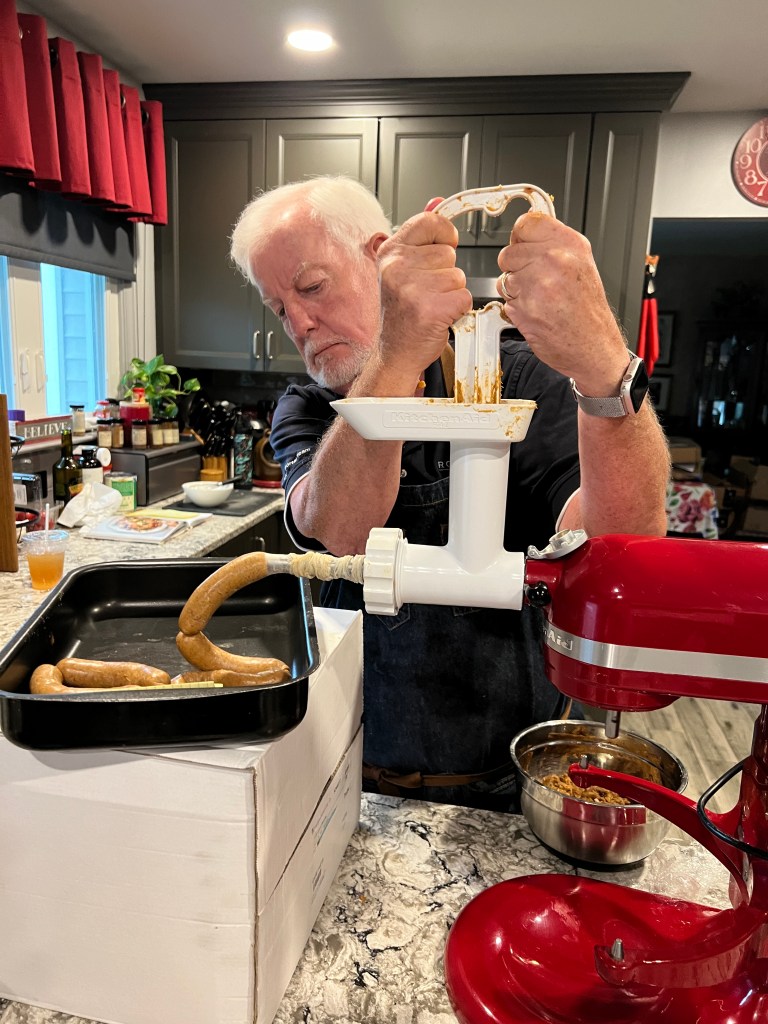
Joshua was not at all happy with the sausage stuffing capability of the Kitchen Aid but it worked fine for me. The biggest complaint that Joshua had was the sausages were filled about 10” off the counter and would tear with the weight of hanging down. To get the pan that catches the sausages right under the stuffer, I put an empty cardboard wine box under the mixer, as shown in initial the picture above, and that solved that problem for me. The sausage stuffer that Joshua recommends is an excellent one but it cost $175 on Amazon and I need to be making a lot of sausage to justify that investment. I purchased a set of three metal stuffing tubes that fit the Kitchen Aid Grinder.
The Food Grinder Attachment is priced at $60 on the Kitchen Aid website but Amazon has a metal Meat Grinder Attachment that includes the sausage stuffing tubes for $39 so adding that to your Kitchen Aid is not a huge cost.
You will also need to purchase the dried sausage casings. Amazon has a very good selection. Make sure you get the right size. Merguez is a smaller in diameter sausage and it calls for Sheep casings and a stuffing tube of 15 mm. The casings package I bought for $19 had two casings, each one would make about 26 sausages. I used one for this first batch and more on that in the Sausage Stuffing section below.
Recipe To Make Merguez Sausage
I made several minor adjustments to Joshua’s recipe based on some additional research I did on recipes for Merguez:
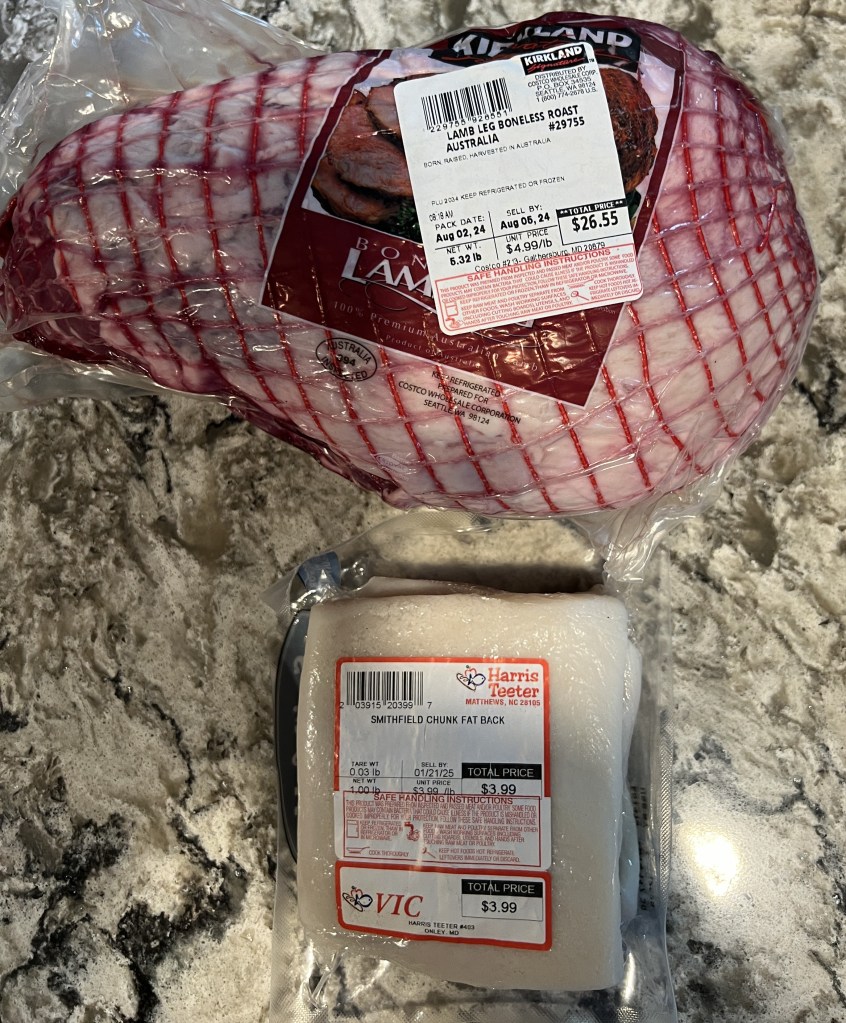
- I bought a 6.3 lb. boneless leg of lamb at Costco for $4.99/lb. This was a lot cheaper than any lamb shoulder I could find. I cut off 2.7 lb. of the leg, taking the parts that had the most fat to help with the fat content for the sausage. The rest we froze and will use for another lamb recipe like lamb stew.
- Harris Teeter showed up in my search as the closest source for fatback pork. I needed to ask someone where it was in the store, but they took me right to it. It was a 1 lb. package with three square pieces of fatback in the package for $4. I needed to trim off the skin but with a sharp boning knife that only took a couple of minutes and I had 10 oz of the fatback after removing the skin. That did not give me the same 3:1 ratio as the recipe calls for but because I had taken the pieces with the most fat off the boneless leg of lamb, I was comfortable with that mix and was very happy with the end product. The packages for the lamb and the port fatback pork that I bought are shown in the picture below.
- I used Smoked Hungarian Paprika which is a hot paprika but I like the taste that the Hungarian paprika adds and I wanted to bring that smoky flavor. Using the hot paprika, and having just over 3 lb. of fat and lamb instead of the 4 lb. called for in the recipe, gave me a sausage that was hotter than the D’Artagnan sausages that we had purchased. Next time I will cut the cayenne pepper back to ¼ tsp to bring that heat level down.
- I had dried ground versions of the cumin seed, coriander seed, and fennel seed on the shelf so I used them instead of toasting the seeds and grinding them. Grinding the seeds probably brings more flavor so I will do that next time but for the initial effort I took this shortcut and I think I had minimal if any loss of taste.
- I added to the seasoning mix:
- ½ TB Onion powder
- 1 Tsp freshly squeezed lemon juice and ½ Tsp Lemon zest to add a little more citric taste to the sausage
- I followed the directions on the package for the lamb casings to prep them, not the ones in Joshua’s write up.
Grinding the Sausage Mixture
I put the grinder attachment in the refrigerator overnight and then in the freezer while I cut up the lamb and the fatback and coated it with the spice mixture. I then put the bowl of cut up pieces in the freezer for 20 minutes before I started grinding them. Next time I will get the mixture ready for grinding the day before and keep it in the refrigerator overnight and then in the freezer for at least an hour before grinding. I will also take the mixture out of the freezer 1/3 at a time so it stays colder. The picture below is the mixture ready to be ground.

I really want to do a better job getting all the pieces coated with the spice mixture next time. When I got to the bottom of the bowl, there was a lot of the spice mixture sitting in the bottom of the bowl. I ended up pouring that remaining spice mixture into the bowl of the ground mixture and following Joshua’s recommendation for one minute under the Kitchen Aid paddle to get everything evenly added into the mixture.
Pushing the pieces down the feed tube with the food pusher was more of an effort than I had expected. I think it got harder as the mix warmed up in the bowl as I was grinding. I ended up with 4.2 lb. of ground mixture. I could not figure out how 2.7 lb of lamb and 10 oz of fatback could become 4.2 lb. of mixture until Beth explained that it was the air that was captured in the ground mixture that added to the weight.
I was really happy that everything but the cutting blade could go into the dishwasher. It did take a little time to rinse off all the debris from the grinding attachment parts for the grinding step and the sausage stuffing step as our dishwasher does not have a way of processing that, just catching it in a filter that is not easy to clean.
After I was finished the grinding process I cooked the test patty that Joshua suggested and got Beth’s agreement that the mix was good, I kept the mixture overnight in the refrigerator covered with plastic wrap and did the sausage stuffing the next day.
Sausage Stuffing
The picture below shoes the lamb casing on the smallest feeding tube and the end tied in a knot. I struggled to get that knot done but, as discussed below having to do it several times, I got a little better at it with multiple tries. I needed to wash the fat and residue off my hands each time to get a good grip on the casing to tie it.

Several of the recipes that we have for Merguez call for it to be removed from the casing then cooked. Beth had the brilliant suggestion that we freeze some of the mixture as patties so we did not go to the effort of putting in a casing and then taking it out of the casing to cook it. I made 4 patties that were 8 oz each and froze each in a small zip lock bag. The remainder made the 14 sausages shown in the picture below.
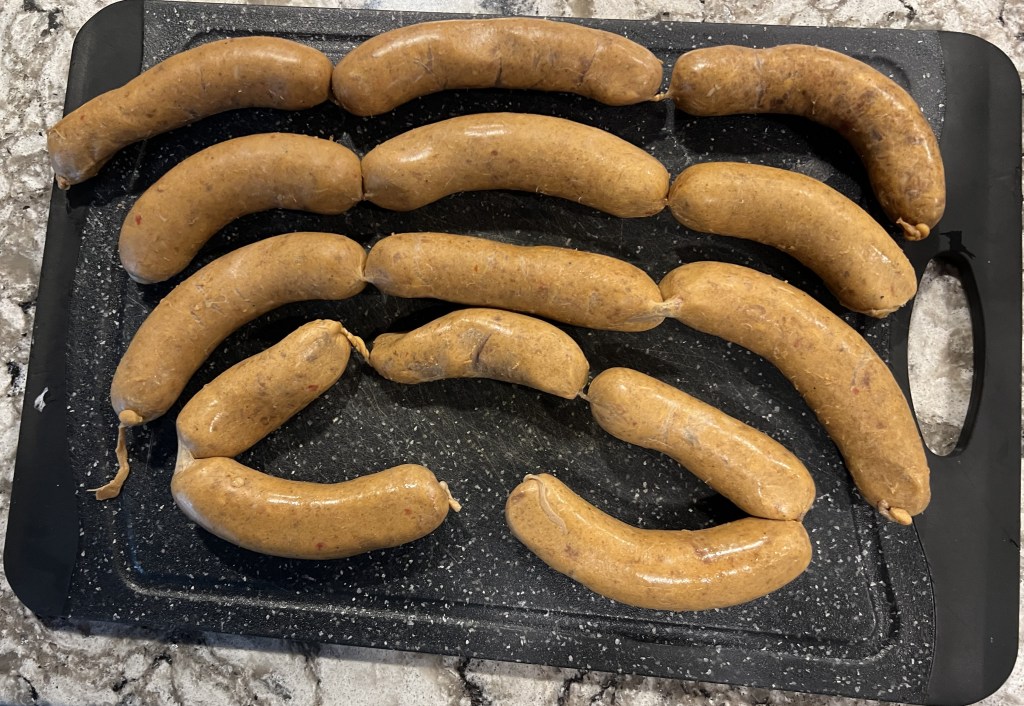
I did have a learning curve with the stuffing and several times had to stop the Kitchen Aid to cut off the casing, take out the mix from a casing that had a problem and start the process again. The set of five sausages of different sizes at the bottom of the picture are ones that I kept even though they were not the right size and shape. The nine ones above that came out pretty good but not in one stream of nine linked sausages, just three sets of three links each. I think I will do better next time and even better with more practice. I also struggled with the food feeder pushing the mix down into the body of the grinder to be fed into the tube and casing. As the mix got warmer some if it would go around the edges of the food processor and when I went to pull it out to add more mixture, bring a lot of the mixture back up with it. Taking only 1/3 of the mixture out of the freezer at a time should help keep it cold enough to lessen that problem.
When all the sausages were stuffed I followed Joshua’s suggestion and put them in a bowl covered just with some paper towels overnight in the refrigerator to let the all the flavors blend. We then froze the links in four packages and will be using them in the recipes below over the next two months.
Merguez Recipes
Here are links to six different recipes that use Merguez sausages. I think they show the range of different dishes that are complemented by this spicy sausage. I made the first on on the list with the D’Artagnan Merguez and that convinced me I wanted to try to make the Merguez myself. Three of these recipes are from celebratory chefs that have good recipes: bobby Flay, Narc Murphy, and Chris Santos.
- http://• https://cooking.nytimes.com/recipes/1018359-fettuccine-with-merguez-and-mint-pesto
- https://www.linsfood.com/chicken-basquaise-merguez/
- https://www.foodnetwork.com/recipes/chris-santos/rigatoni-with-merguez-ricotta-salata-and-brown-butter-3630188
- https://www.foodnetwork.com/recipes/marc-murphy/chicken-and-merguez-tagine-9919358
- https://www.foodnetwork.com/recipes/bobby-flay/souvlaki-with-merguez-sausage-and-piquillo-pepper-yogurt-sauce-recipe-2013728
- https://thelemonapron.com/north-african-harira-soup/
Summary
- Merguez sausages are delicious and can be used in a many different dishes
- You can make them yourself for about half the price of store-bought Merguez
- Like putting up a batch of canned items from your garden, making sausage takes time and effort, but the results are delicious and well worth the effort
- I enjoyed making the sausages and plan to both make Merguez again and experiment with other sausage recipes
Note: I have not done any blog posts for a while due to lots going on with the family, all positive things. I have several other posts on wine and travel I have been planning to do all lined up. Thanks for your patience during this lull in my blog posts.

One thought on “Homemade Merguez Sausage”