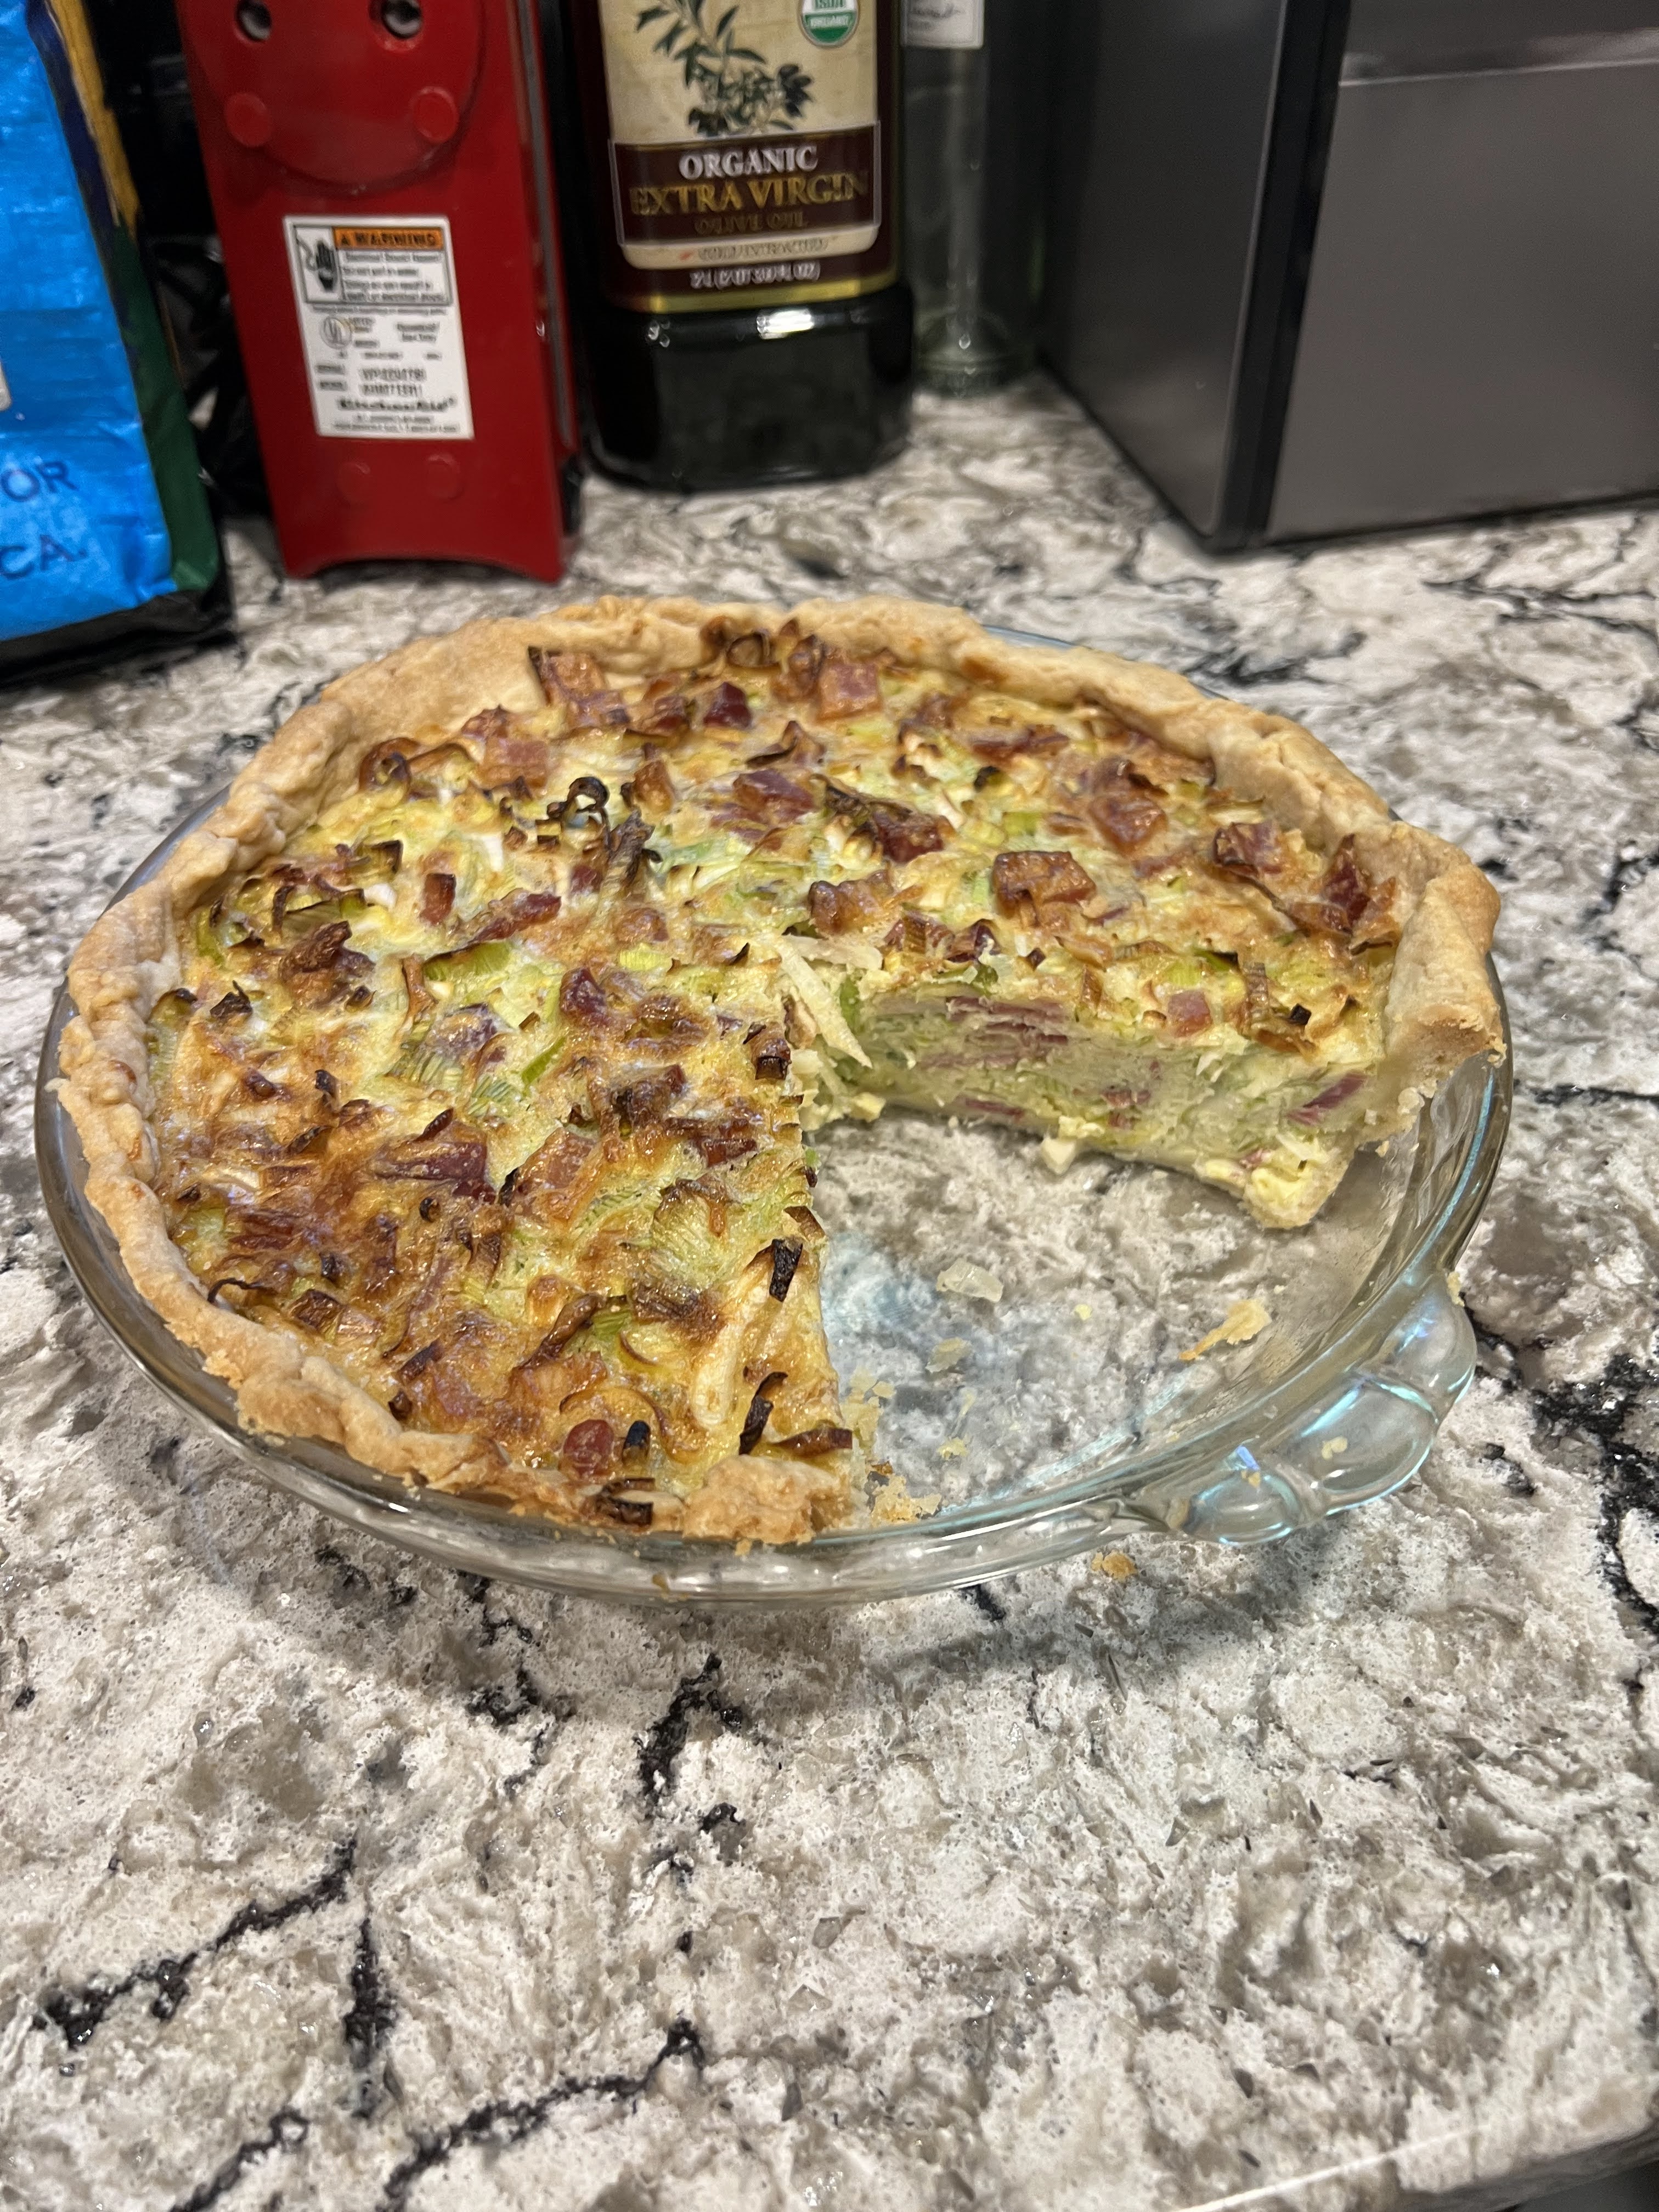
For breakfast this morning Beth made a Bacon & Leek Quiche using some of our homemade bacon. It was delicious and would be equally good for lunch. Beth used Joanna Gaines’s recipe from her excellent Magnolia Table cookbook and you can find a youtube video of it under Bacon & Leek Quiche Joanna Gaines. There were a number of recipes for bacon and leek quiche but this is the one she used and it was excellent. The bacon flavor was distinct but not dominating, probably because my bacon was so well made.😁
I always try to give attribution to the author of the recipe, including their cookbook if we have it. I also check that their recipe is posted on the web before including it in a post. Even when we make some significant modifications, I think it only fair to give credit to the person whose recipe we started with.
This morning we enjoyed our first home made bacon. I used the recipe from Michael Symon’s excellent cookbook, Carnivore, and it was as simple as he suggests. We bought a large pork belly at COSTCO and cut off 4 ½ lbs. to make bacon and used the rest in several other pork belly recipes. The recipe is below, and I will walk through the steps with pictures here and encourage you to give it a try using that recipe.
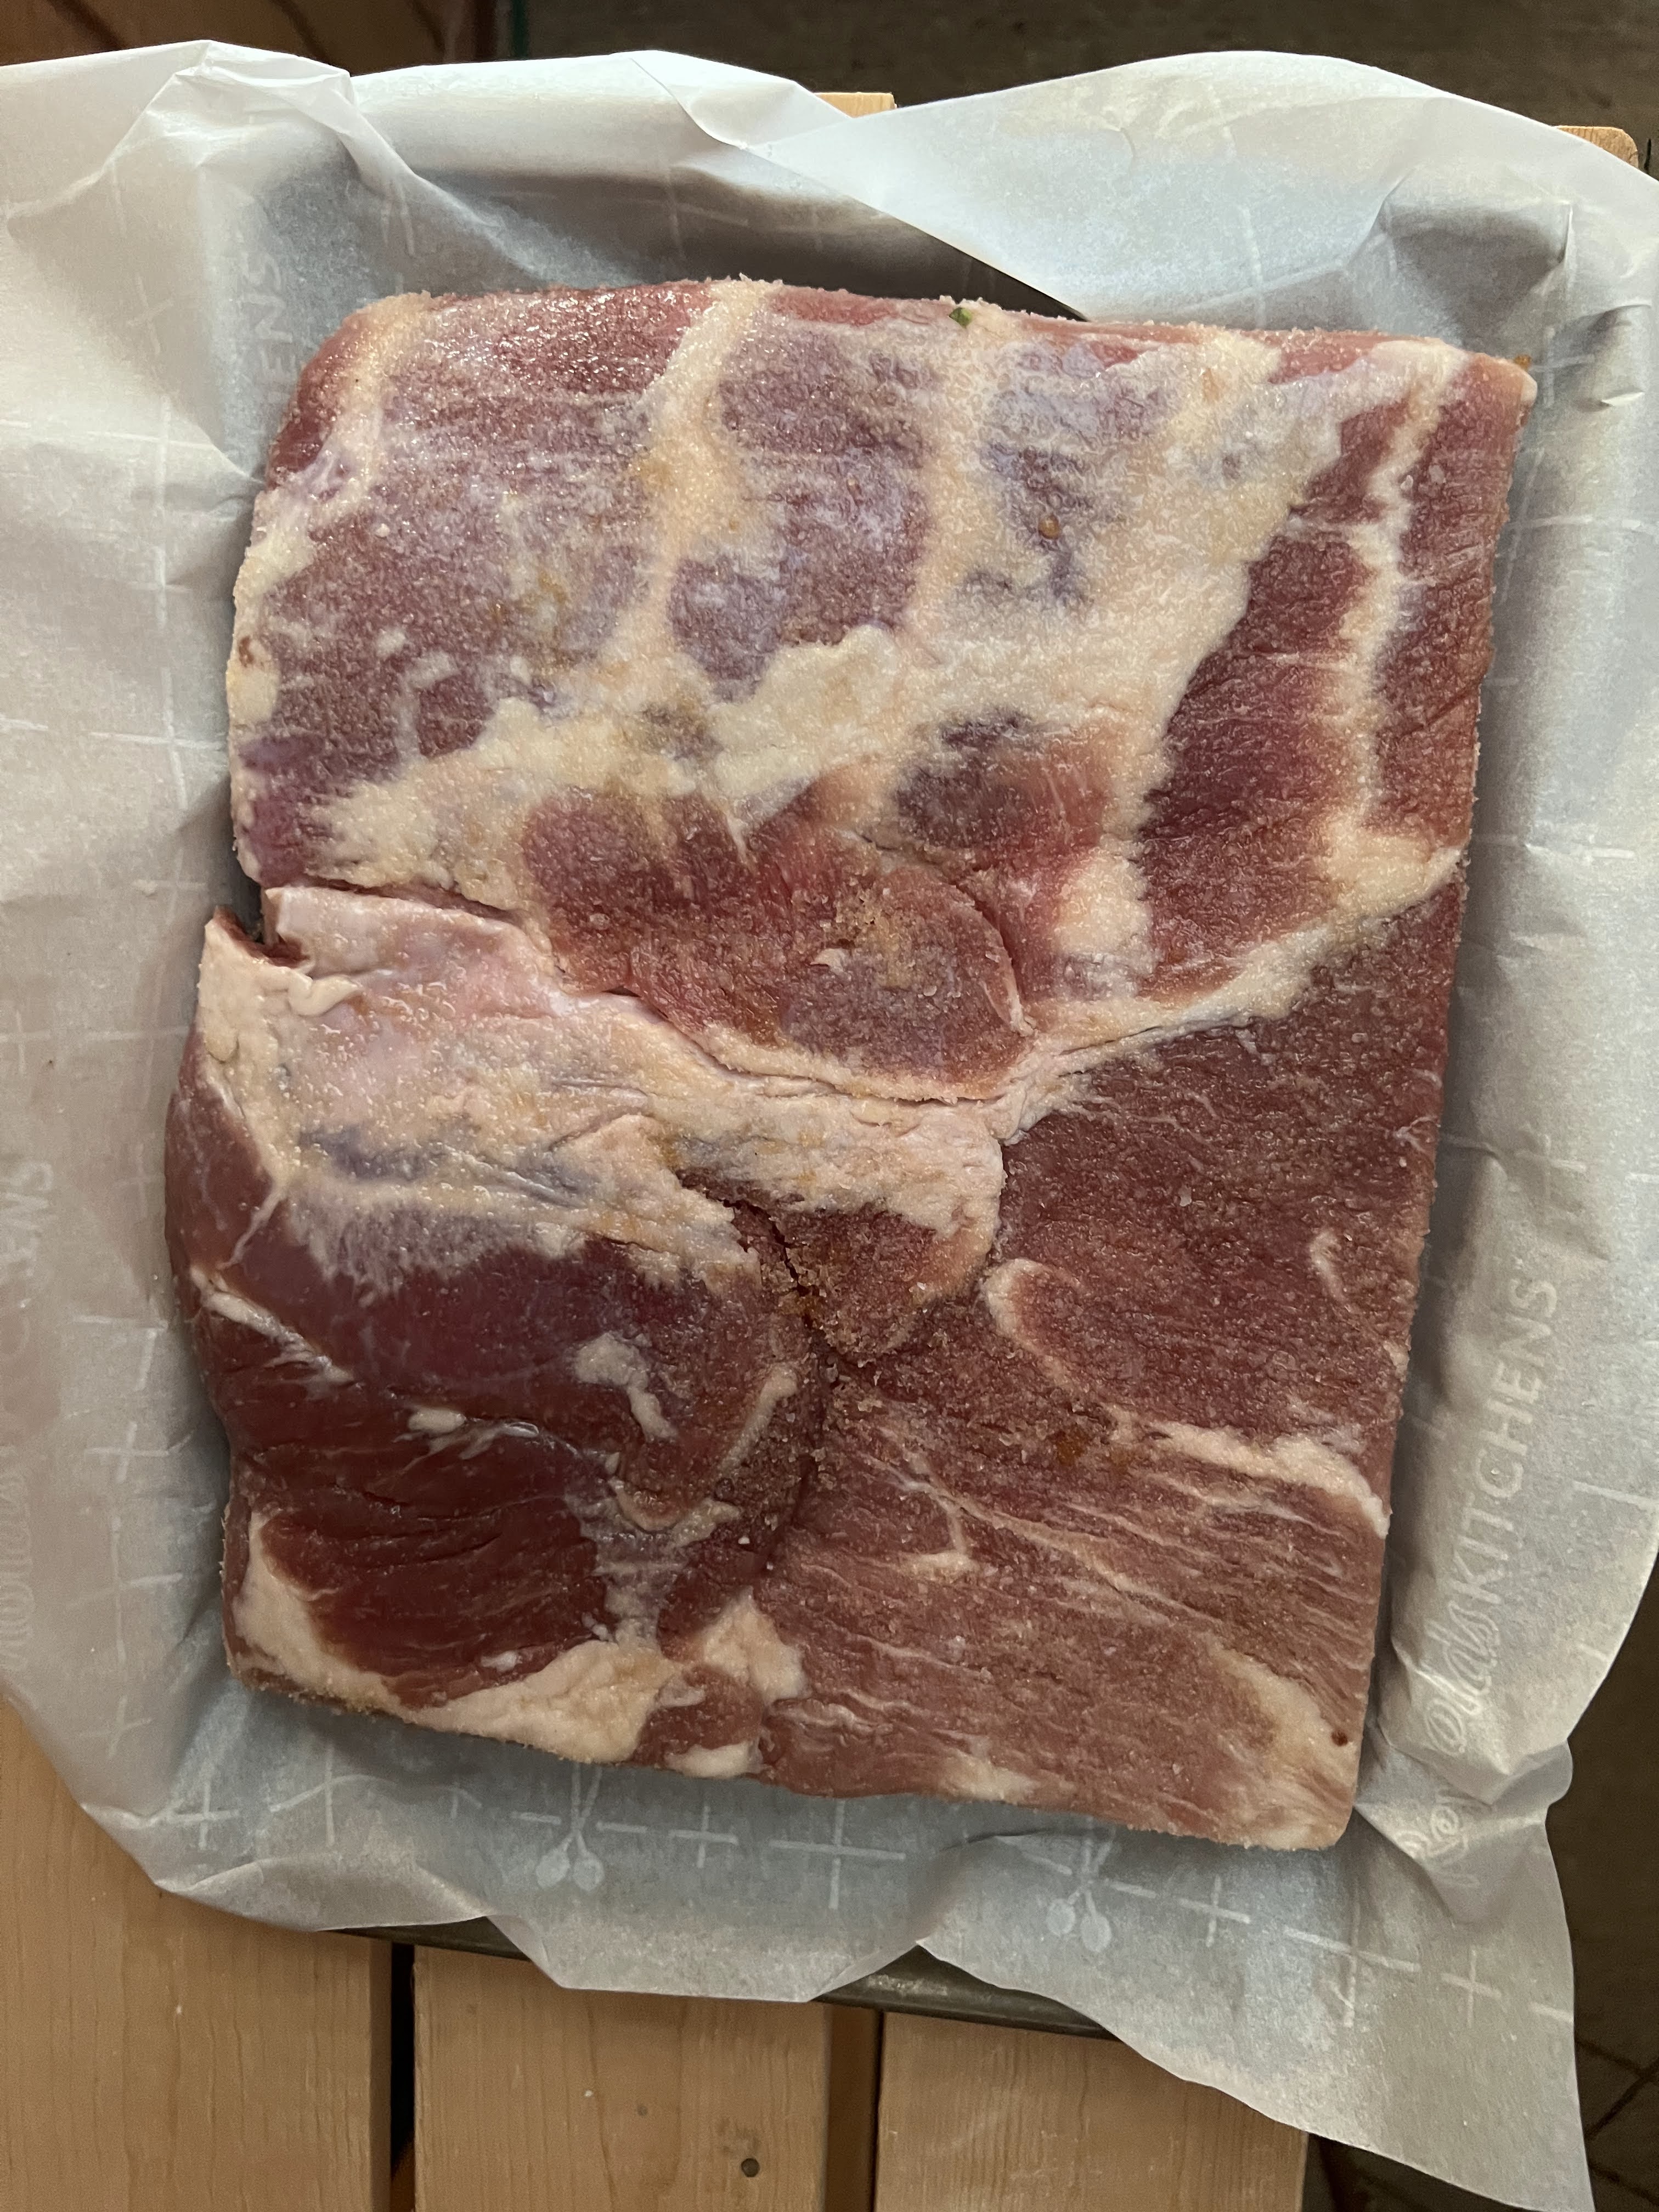
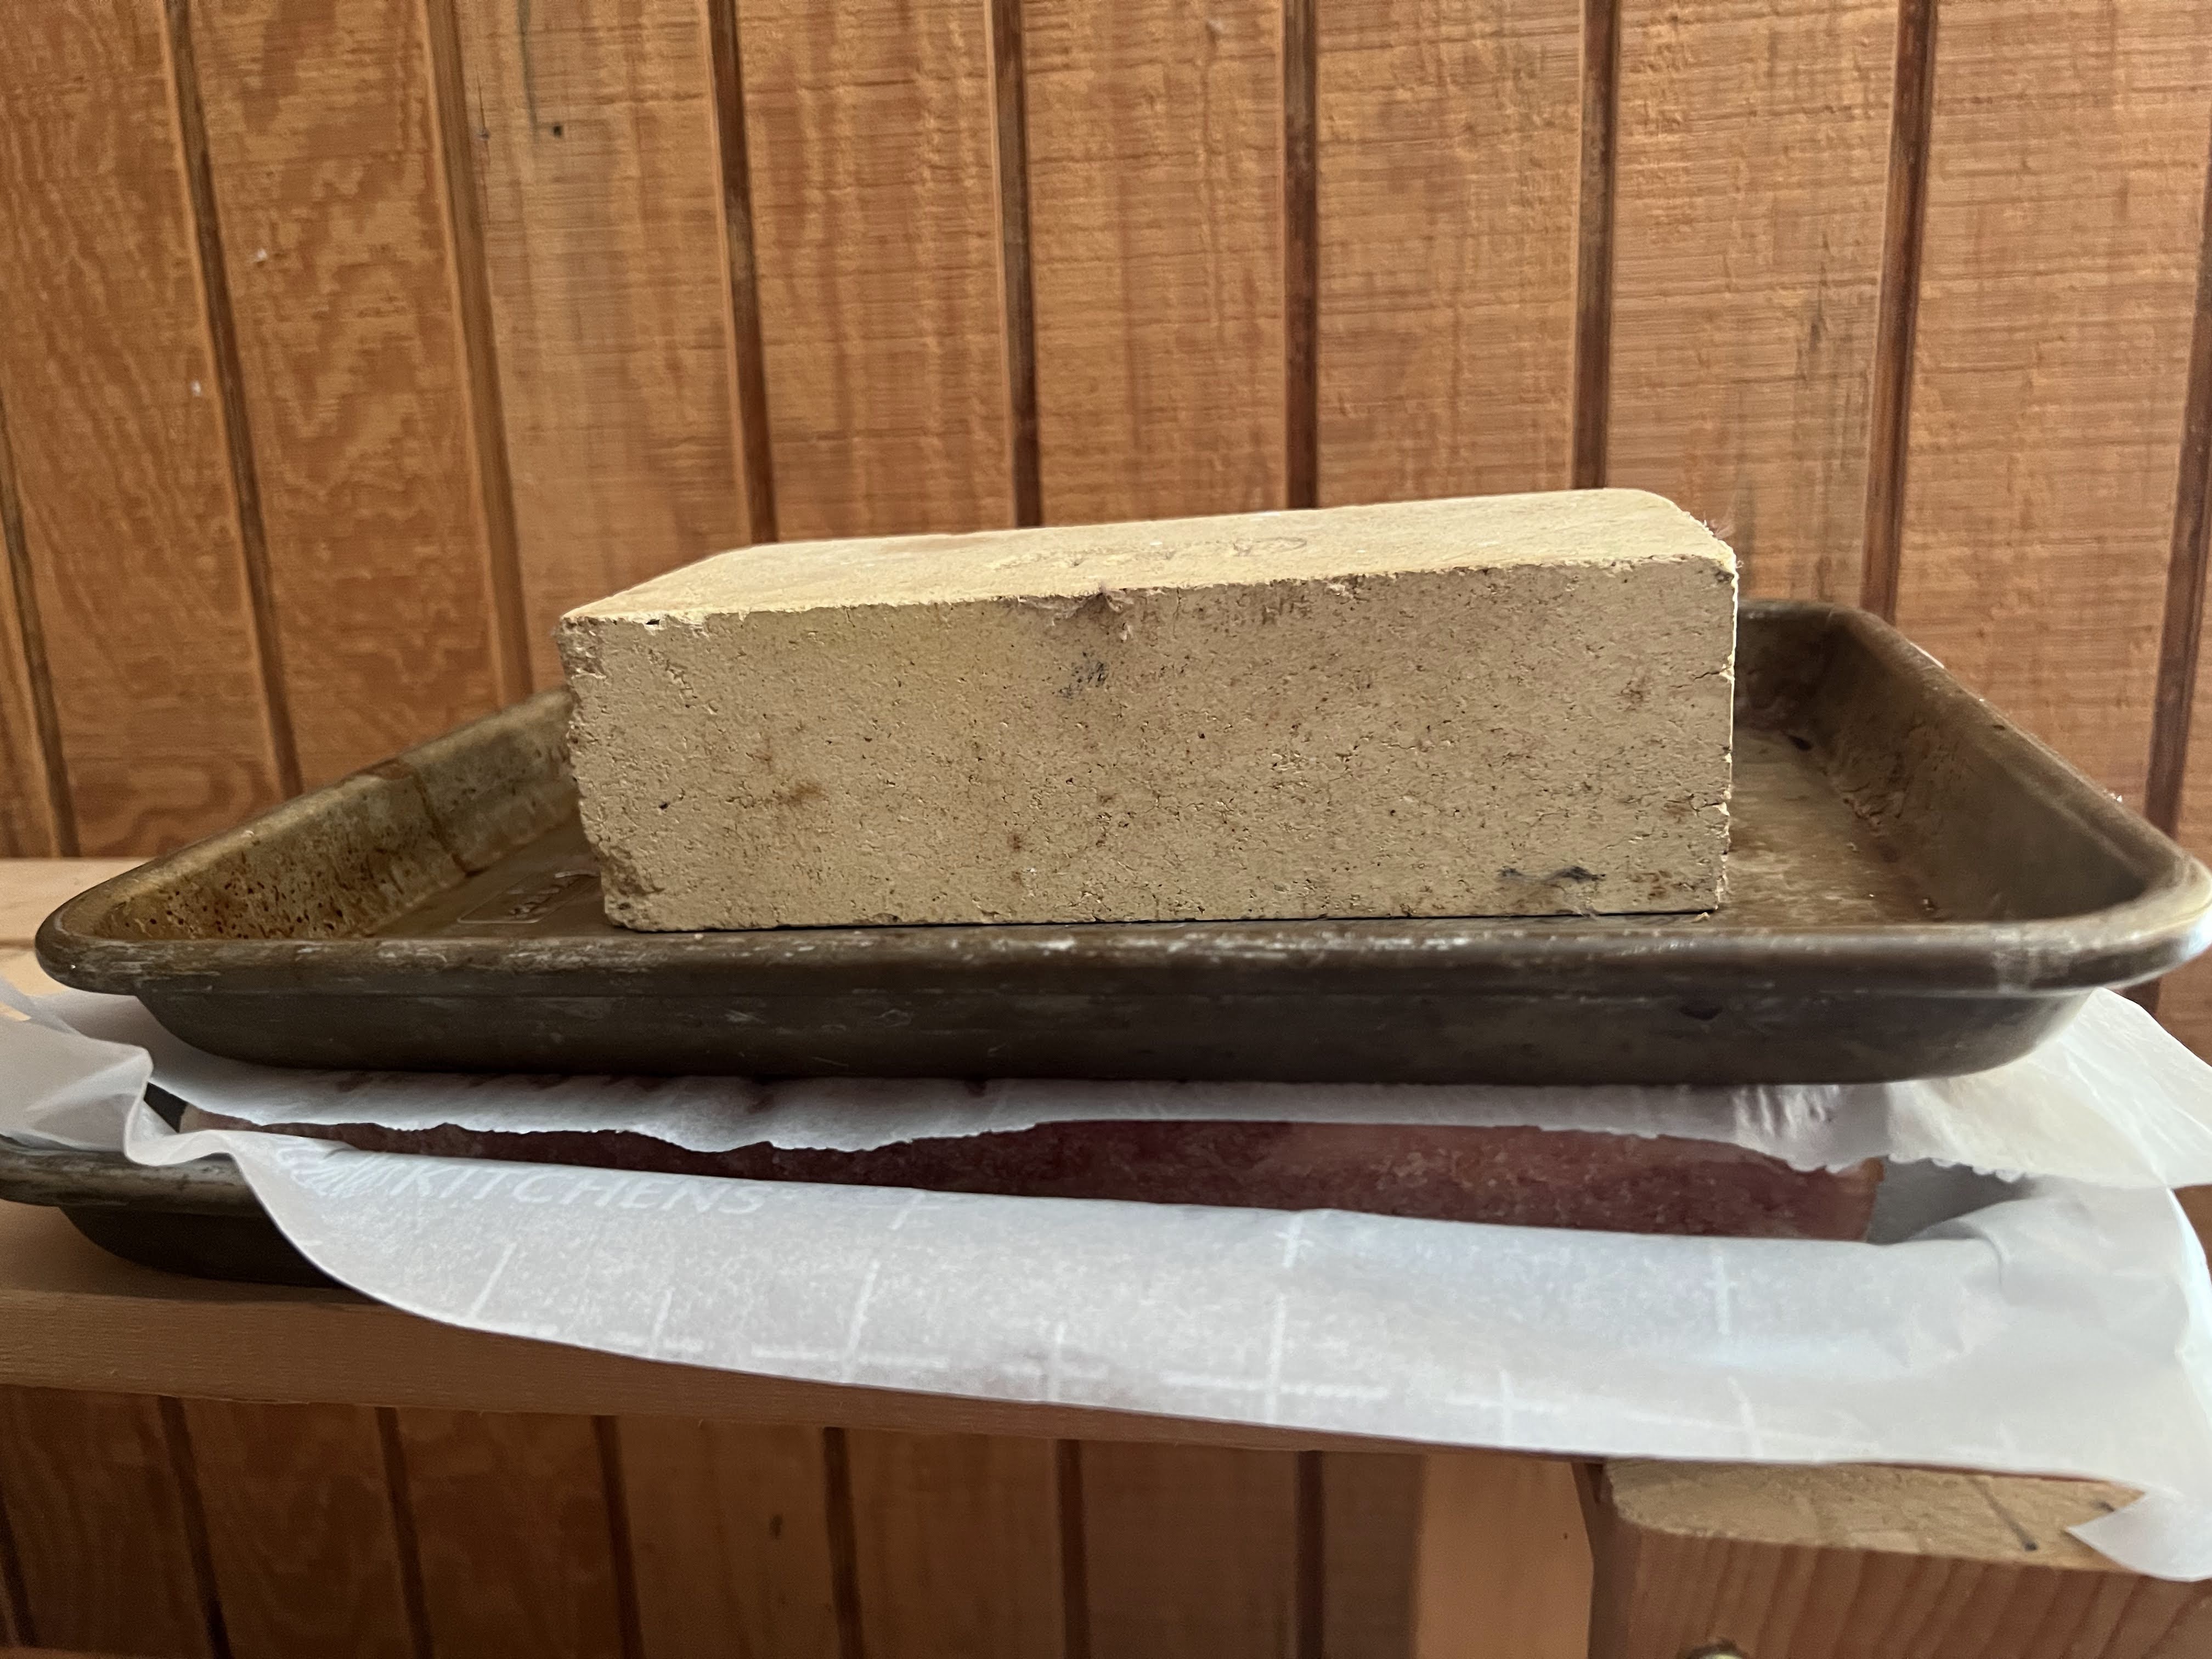
The first step was to cure the pork belly with kosher salt, dark brown sugar, and pink curing salt. We did not have the pink curing salt and there is no substitute for it so we went on line and bought the smallest size we could. It will last us years even if we make bacon several times a year, but it was not expensive and we now have it on the shelf. I rubbed the pork with the mixture and the first picture is that piece of the pork belly with the rub on it. I set it on a sheet of parchment in a ¼ sheet pan and then I covered it with another sheet of parchment paper and then a second ¼ sheet pan and then put a brick in that pan to weigh it down. The second picture shows it ready to go into the refrigerator for 7 days to cure.
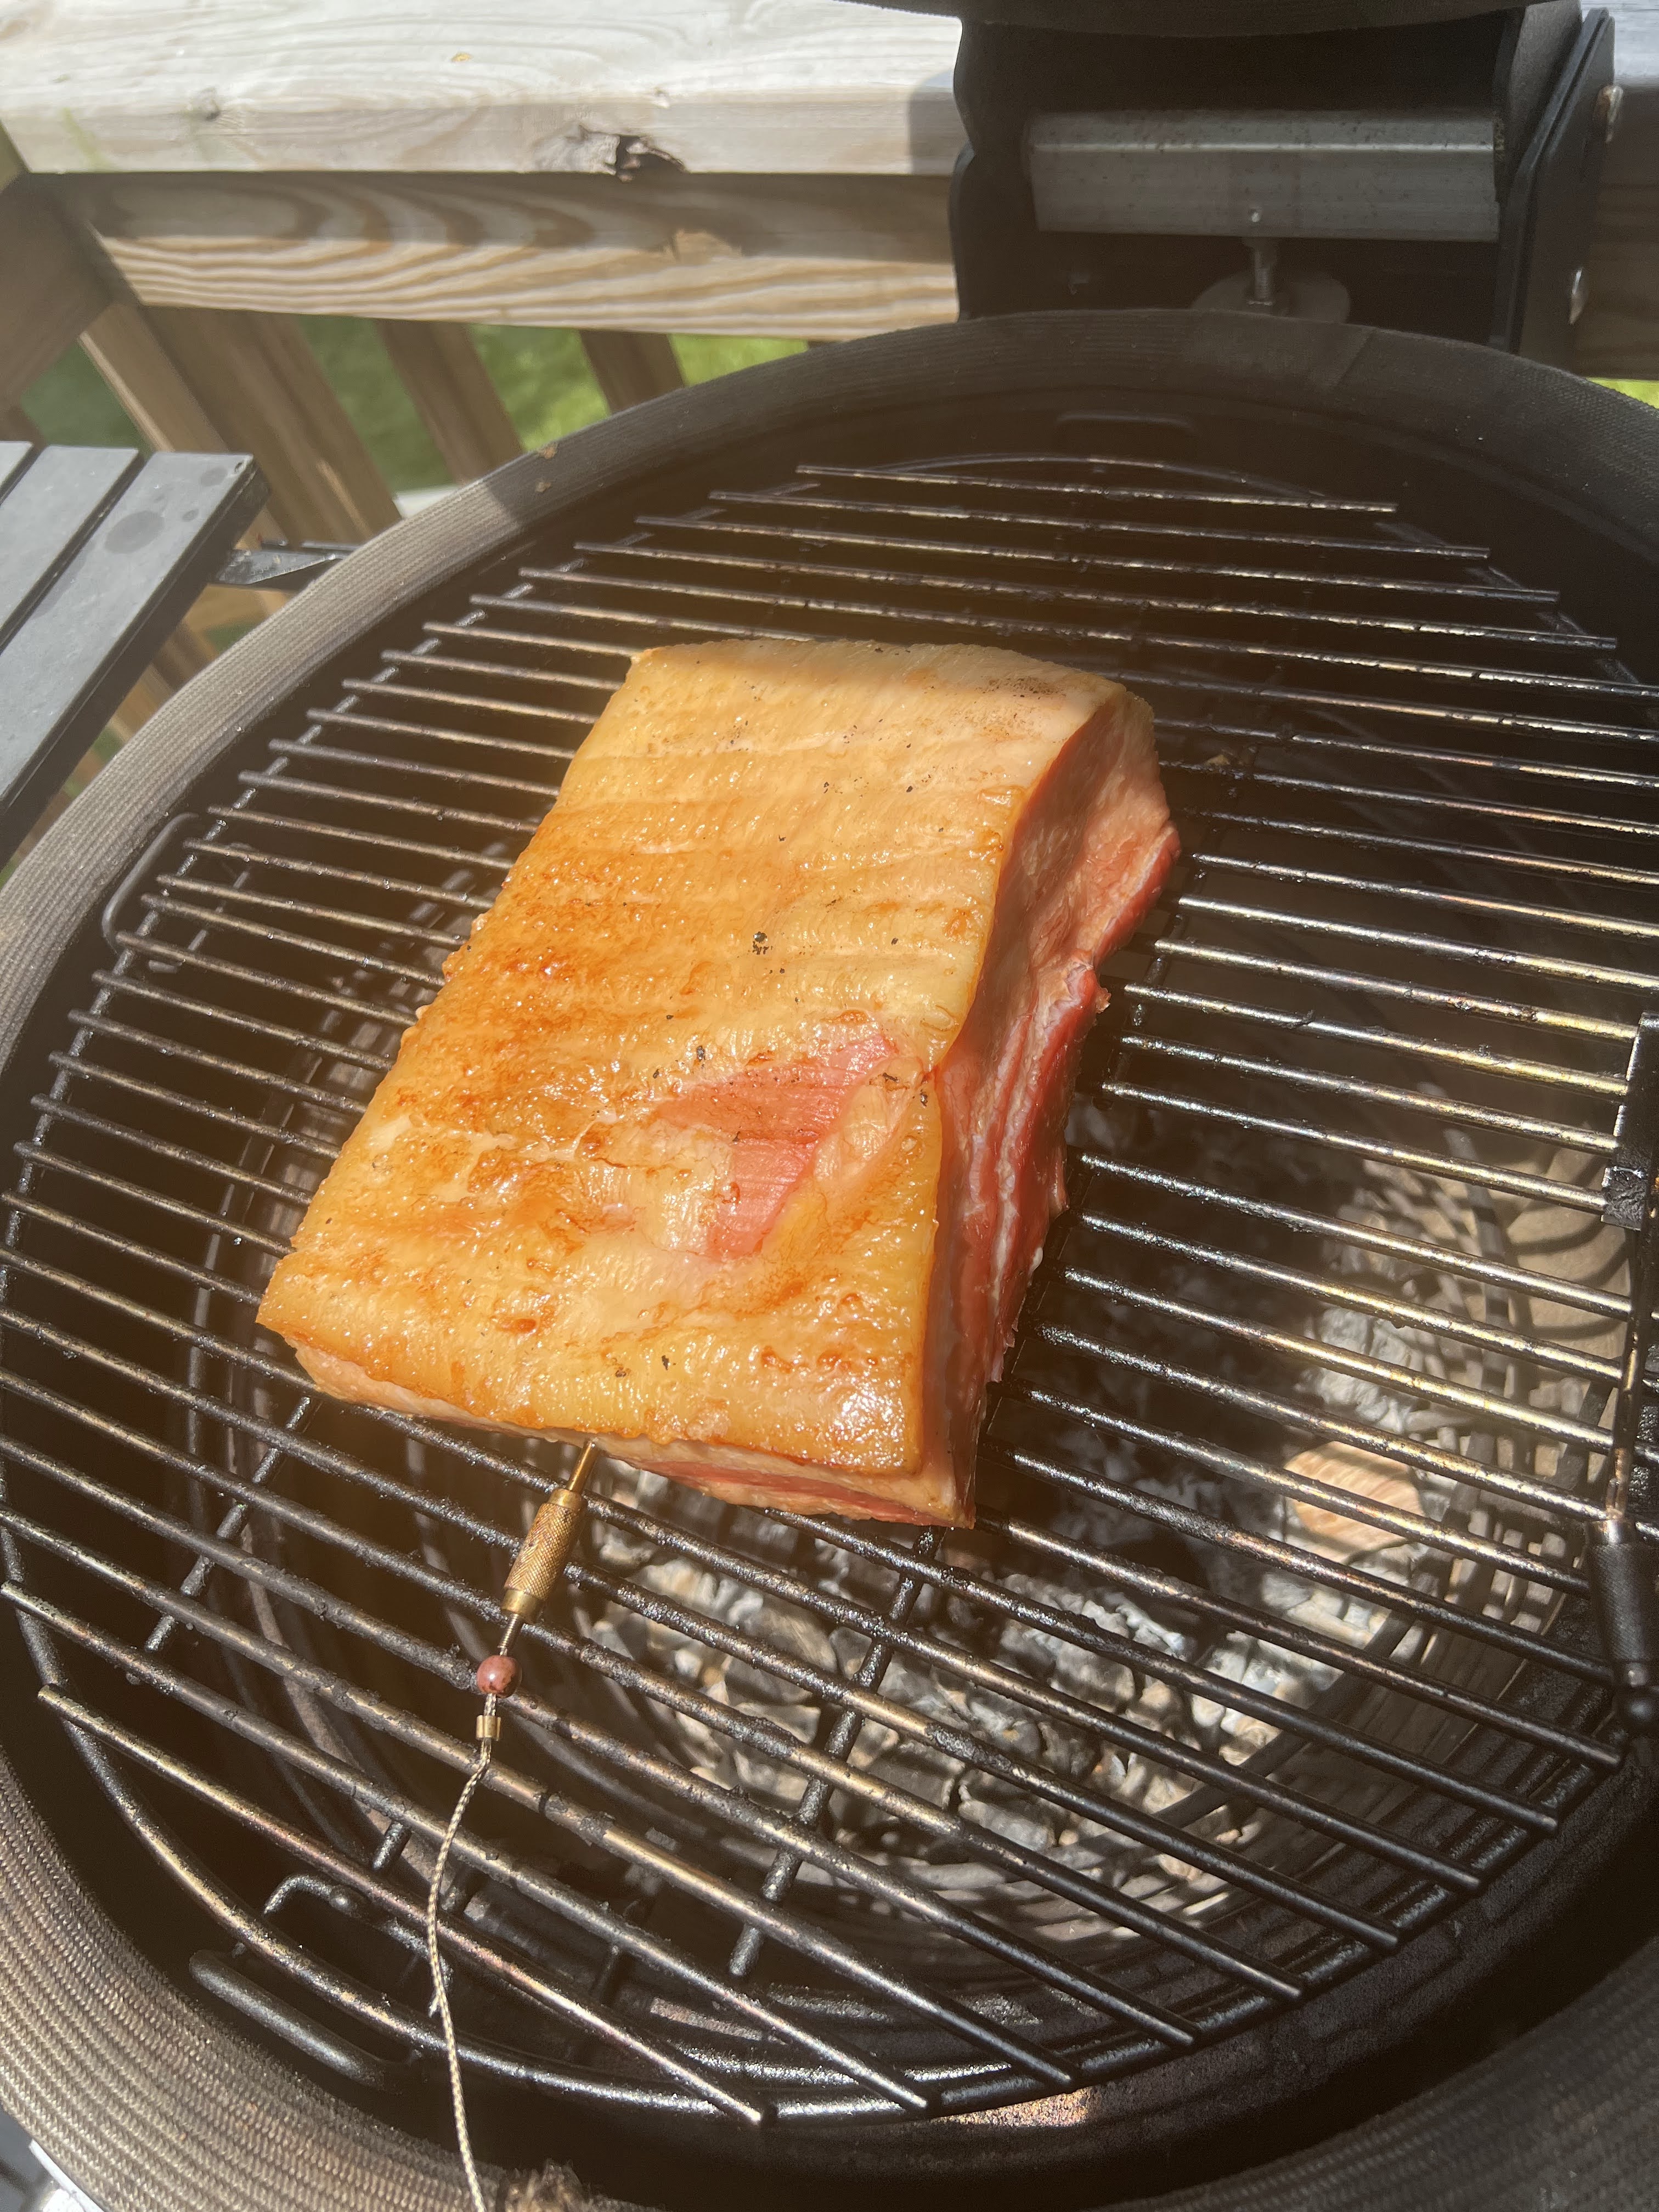
After it cured for a week, I rinsed it off and thoroughly dried it and let it sit overnight on a rack in the refrigerator to thoroughly dry out. I then smoked it for 3 hours on the Kamado with some apple wood chunks until it got to 160° internal. The picture shows it coming off the Kamado.
I am a big fan of the Kamado grills like the Kamado Joe that I have and the Big Green Egg that has the most name recognition. I can cook things anywhere from 180° to over 700° and slow cook to begin with and then reverse sear at high heat on the same grill. But the one thing I do struggle with on my Kamado is smoking at low temperatures. I can’t go below 180° without having the fire go out. This smoke was at 200° and it required constant attention and was probably more like 220° over the 3 hours. The end result was great, but on my Kamado it was not put it on the grill and walk away for three hours.
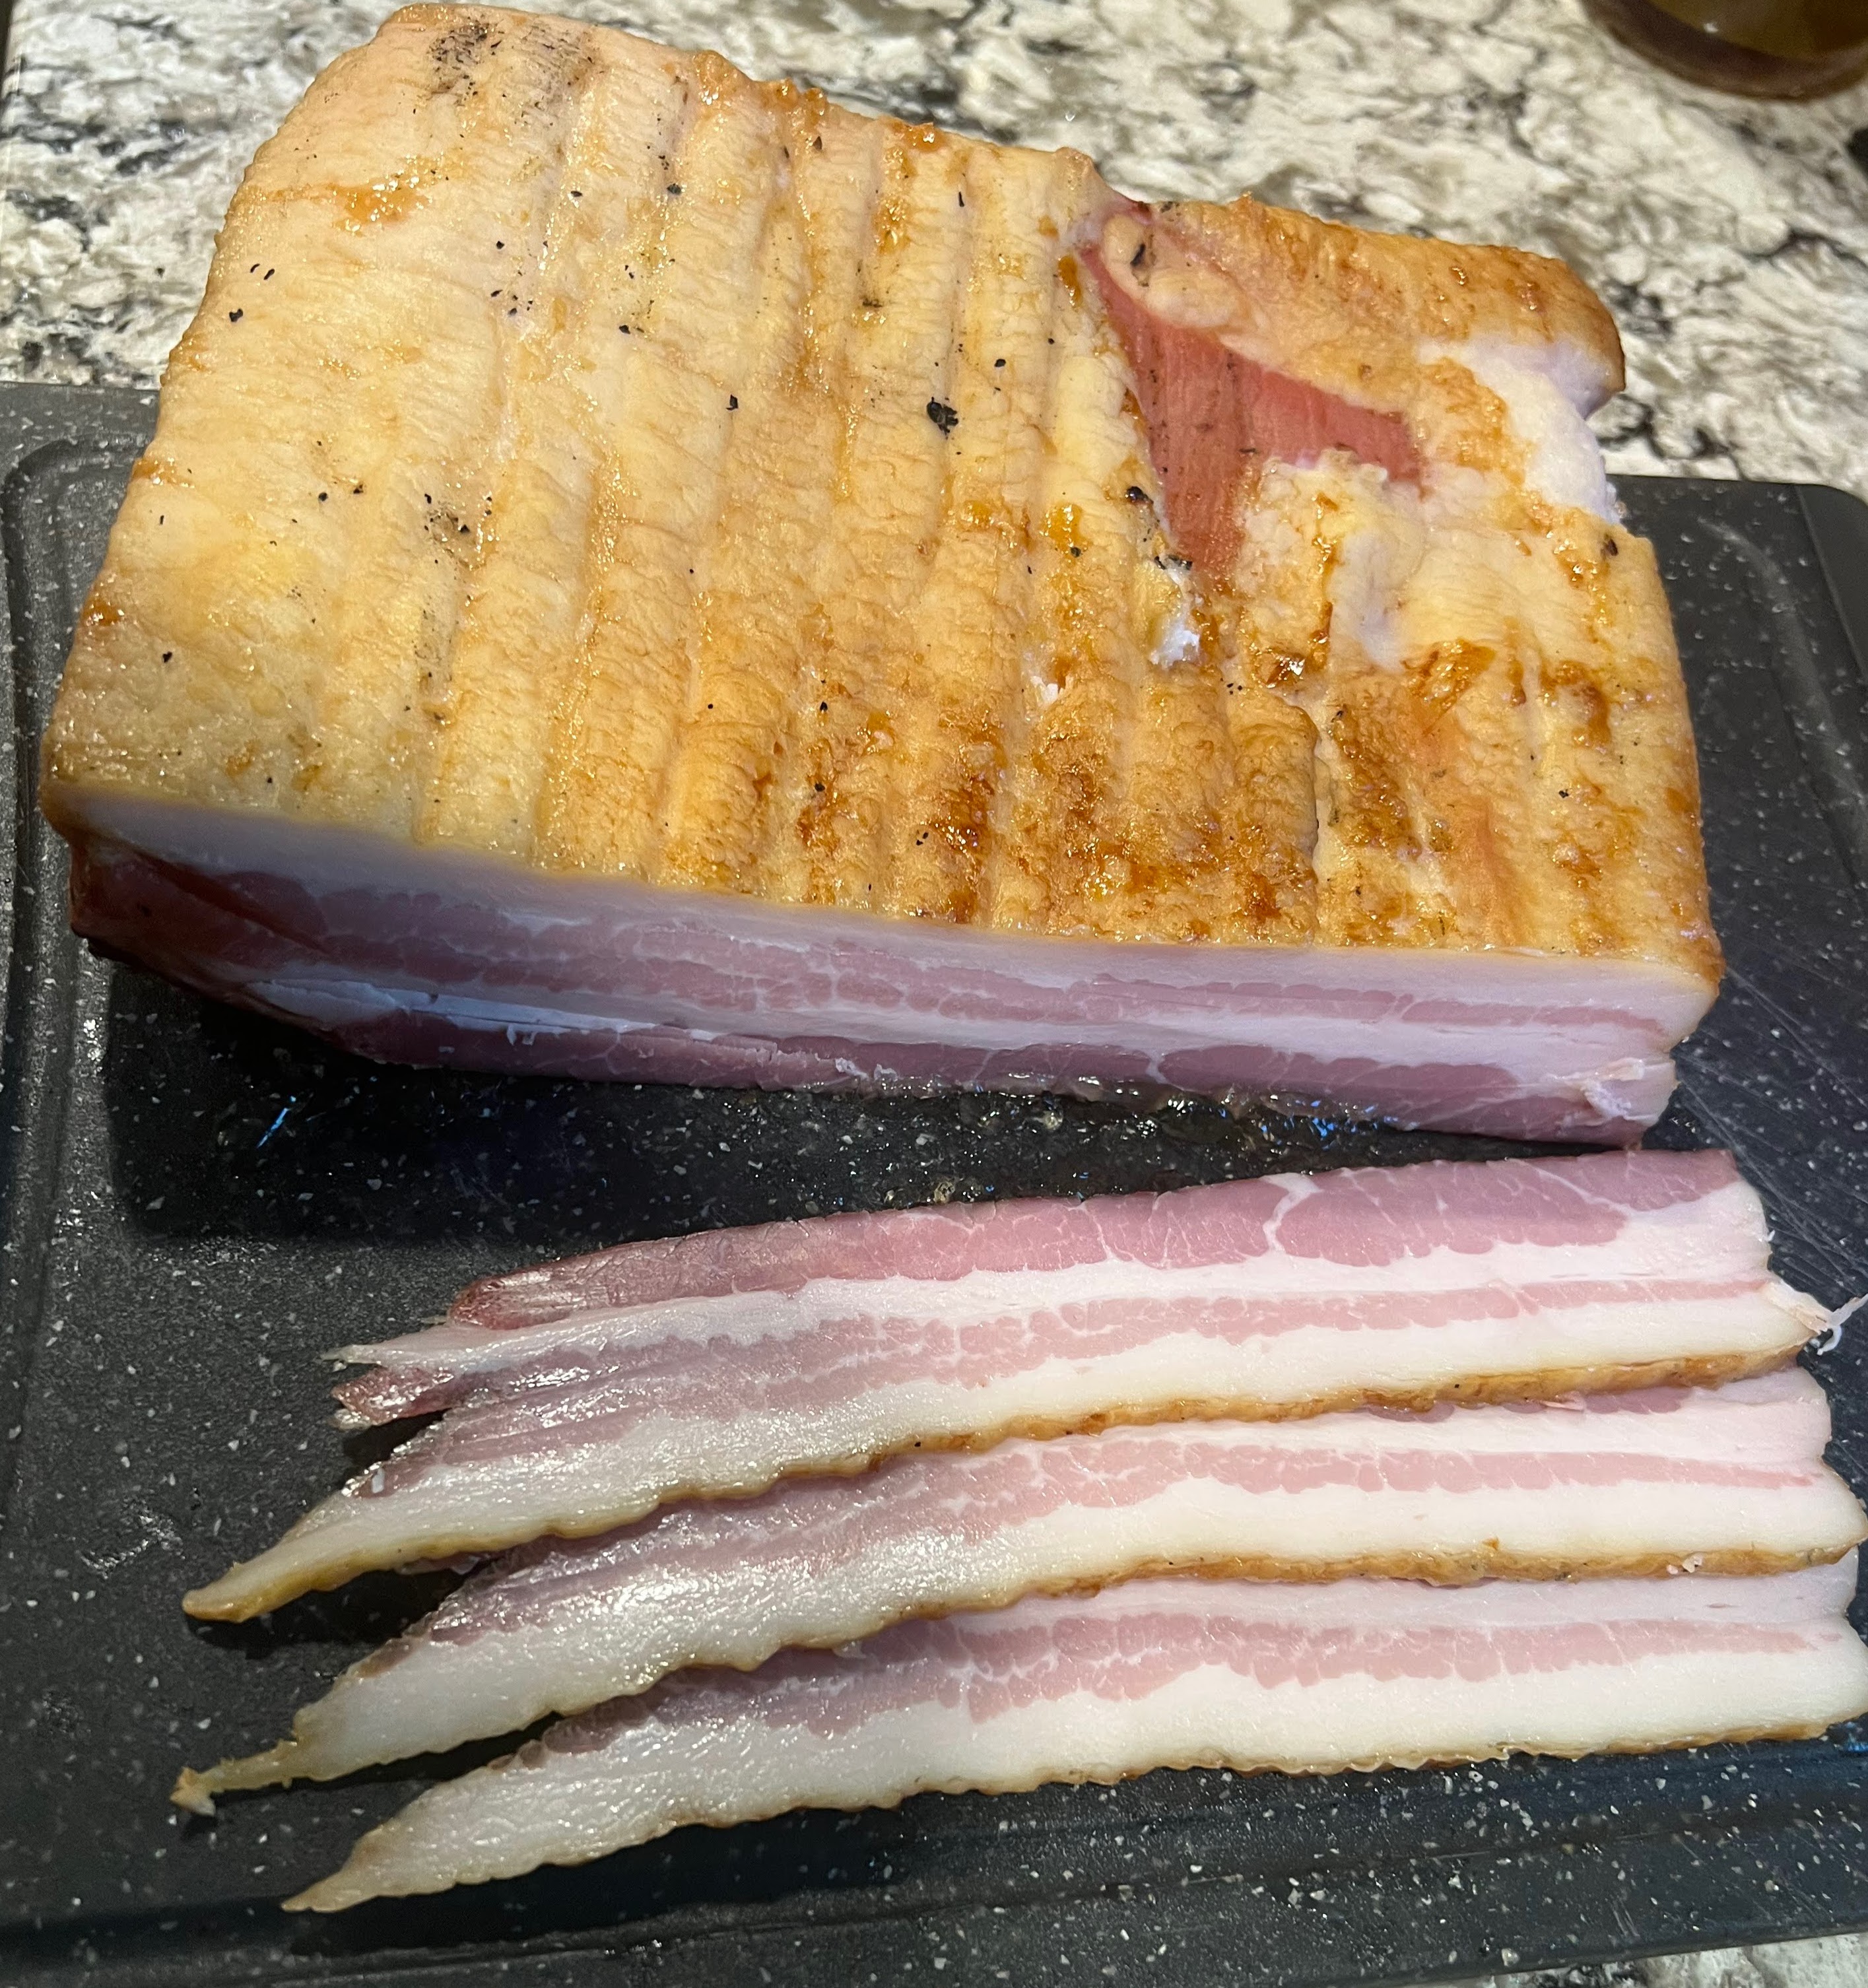
I then put the bacon in the refrigerator overnight to cool and the initial picture at the start of the post shows it sliced this morning. Because I am hand slicing, it is thick slices of bacon.
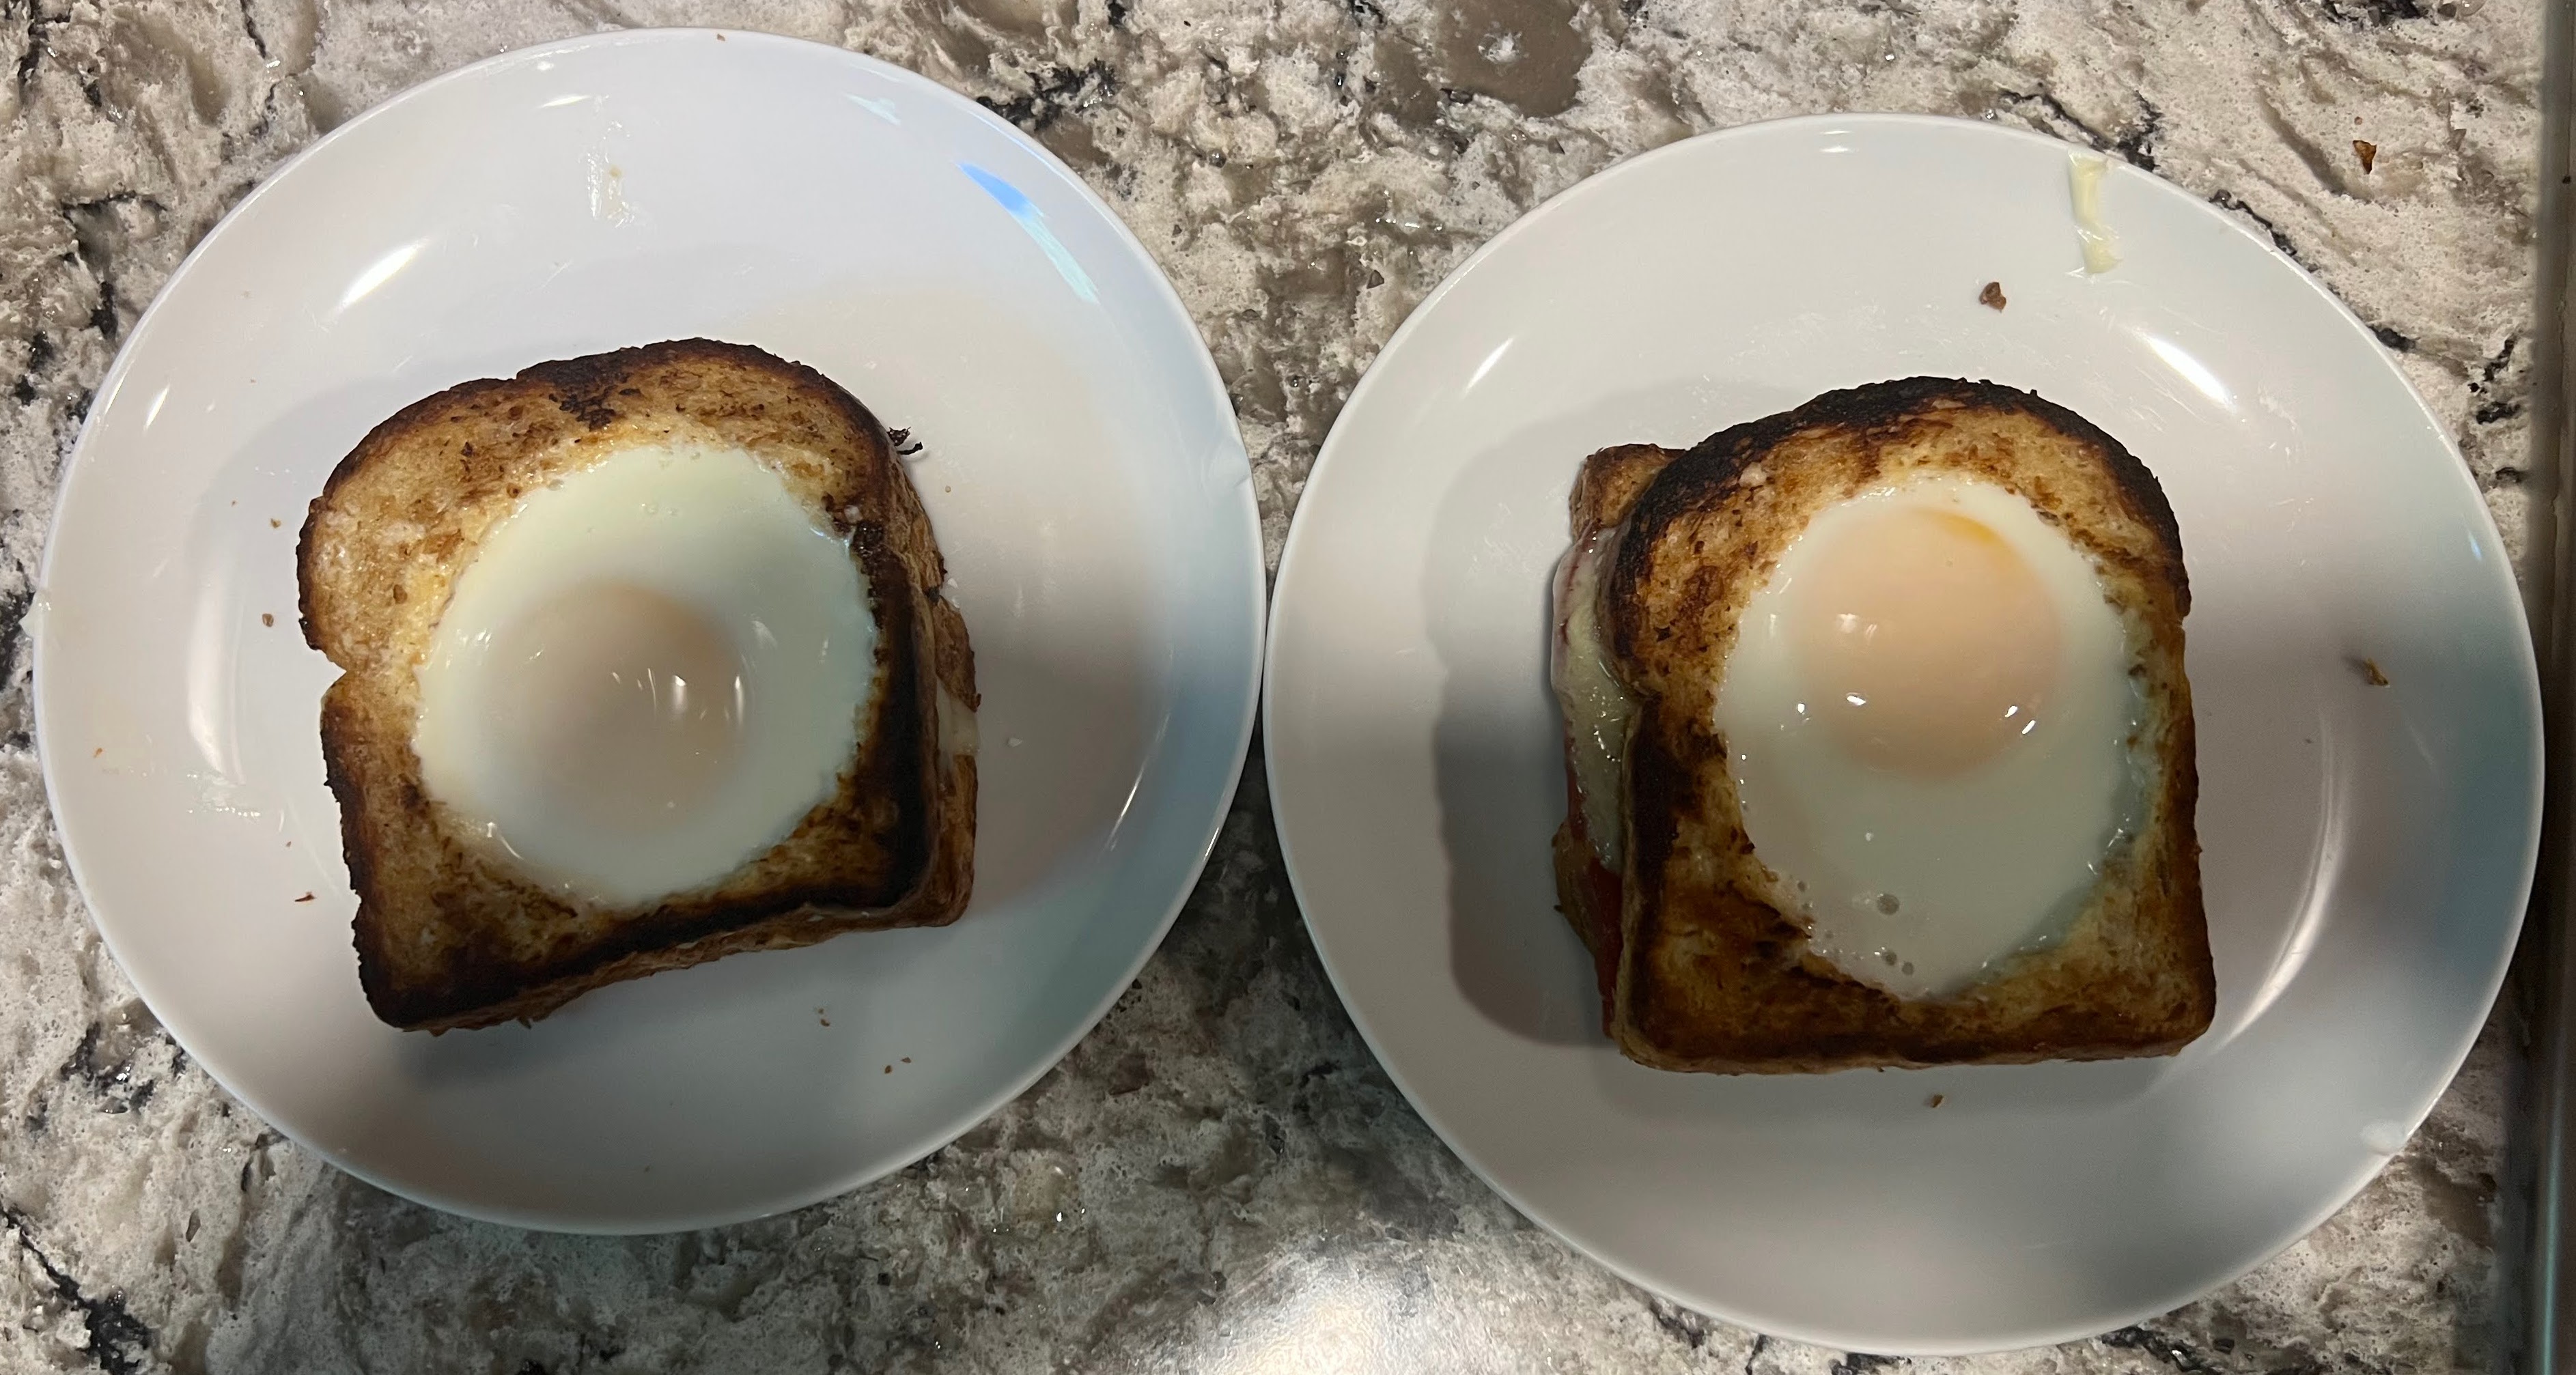
To celebrate I made Toad In A Hole sandwiches for Beth and I for breakfast with the bacon, Swiss Cheese, and an egg. I cut out a hole in one slice of the bread and covered one side of each slice with mayonnaise. I then put the full slice in my cast iron fry pan with the mayonnaise side down to toast it with the cooked bacon and Swiss Cheese on the top side. I then slid it under the broiler for 20 seconds to get the cheese fully melted. I then toasted the slice with the hole in it in my fry pan mayonnaise side down and then flipped it so the toasted side was up. I cracked an egg into the hole in each slice and let it cook until the white as mostly cooked. As discussed in my earlier post of cooking fried eggs, if you let the egg cook in the fry pan until it white is fully cooked, the yolk will no longer be runny, so I built the sandwich in the pan with the bottom slice, bacon and cheese and then used the spatula to put the slice with egg inside on top of that. I then put the pan under the broiler for about 30 seconds until the white was fully cooked but that still left the yolk runny. The picture does not show the bacon since it is at the bottom of the sandwich, but it was delicious.
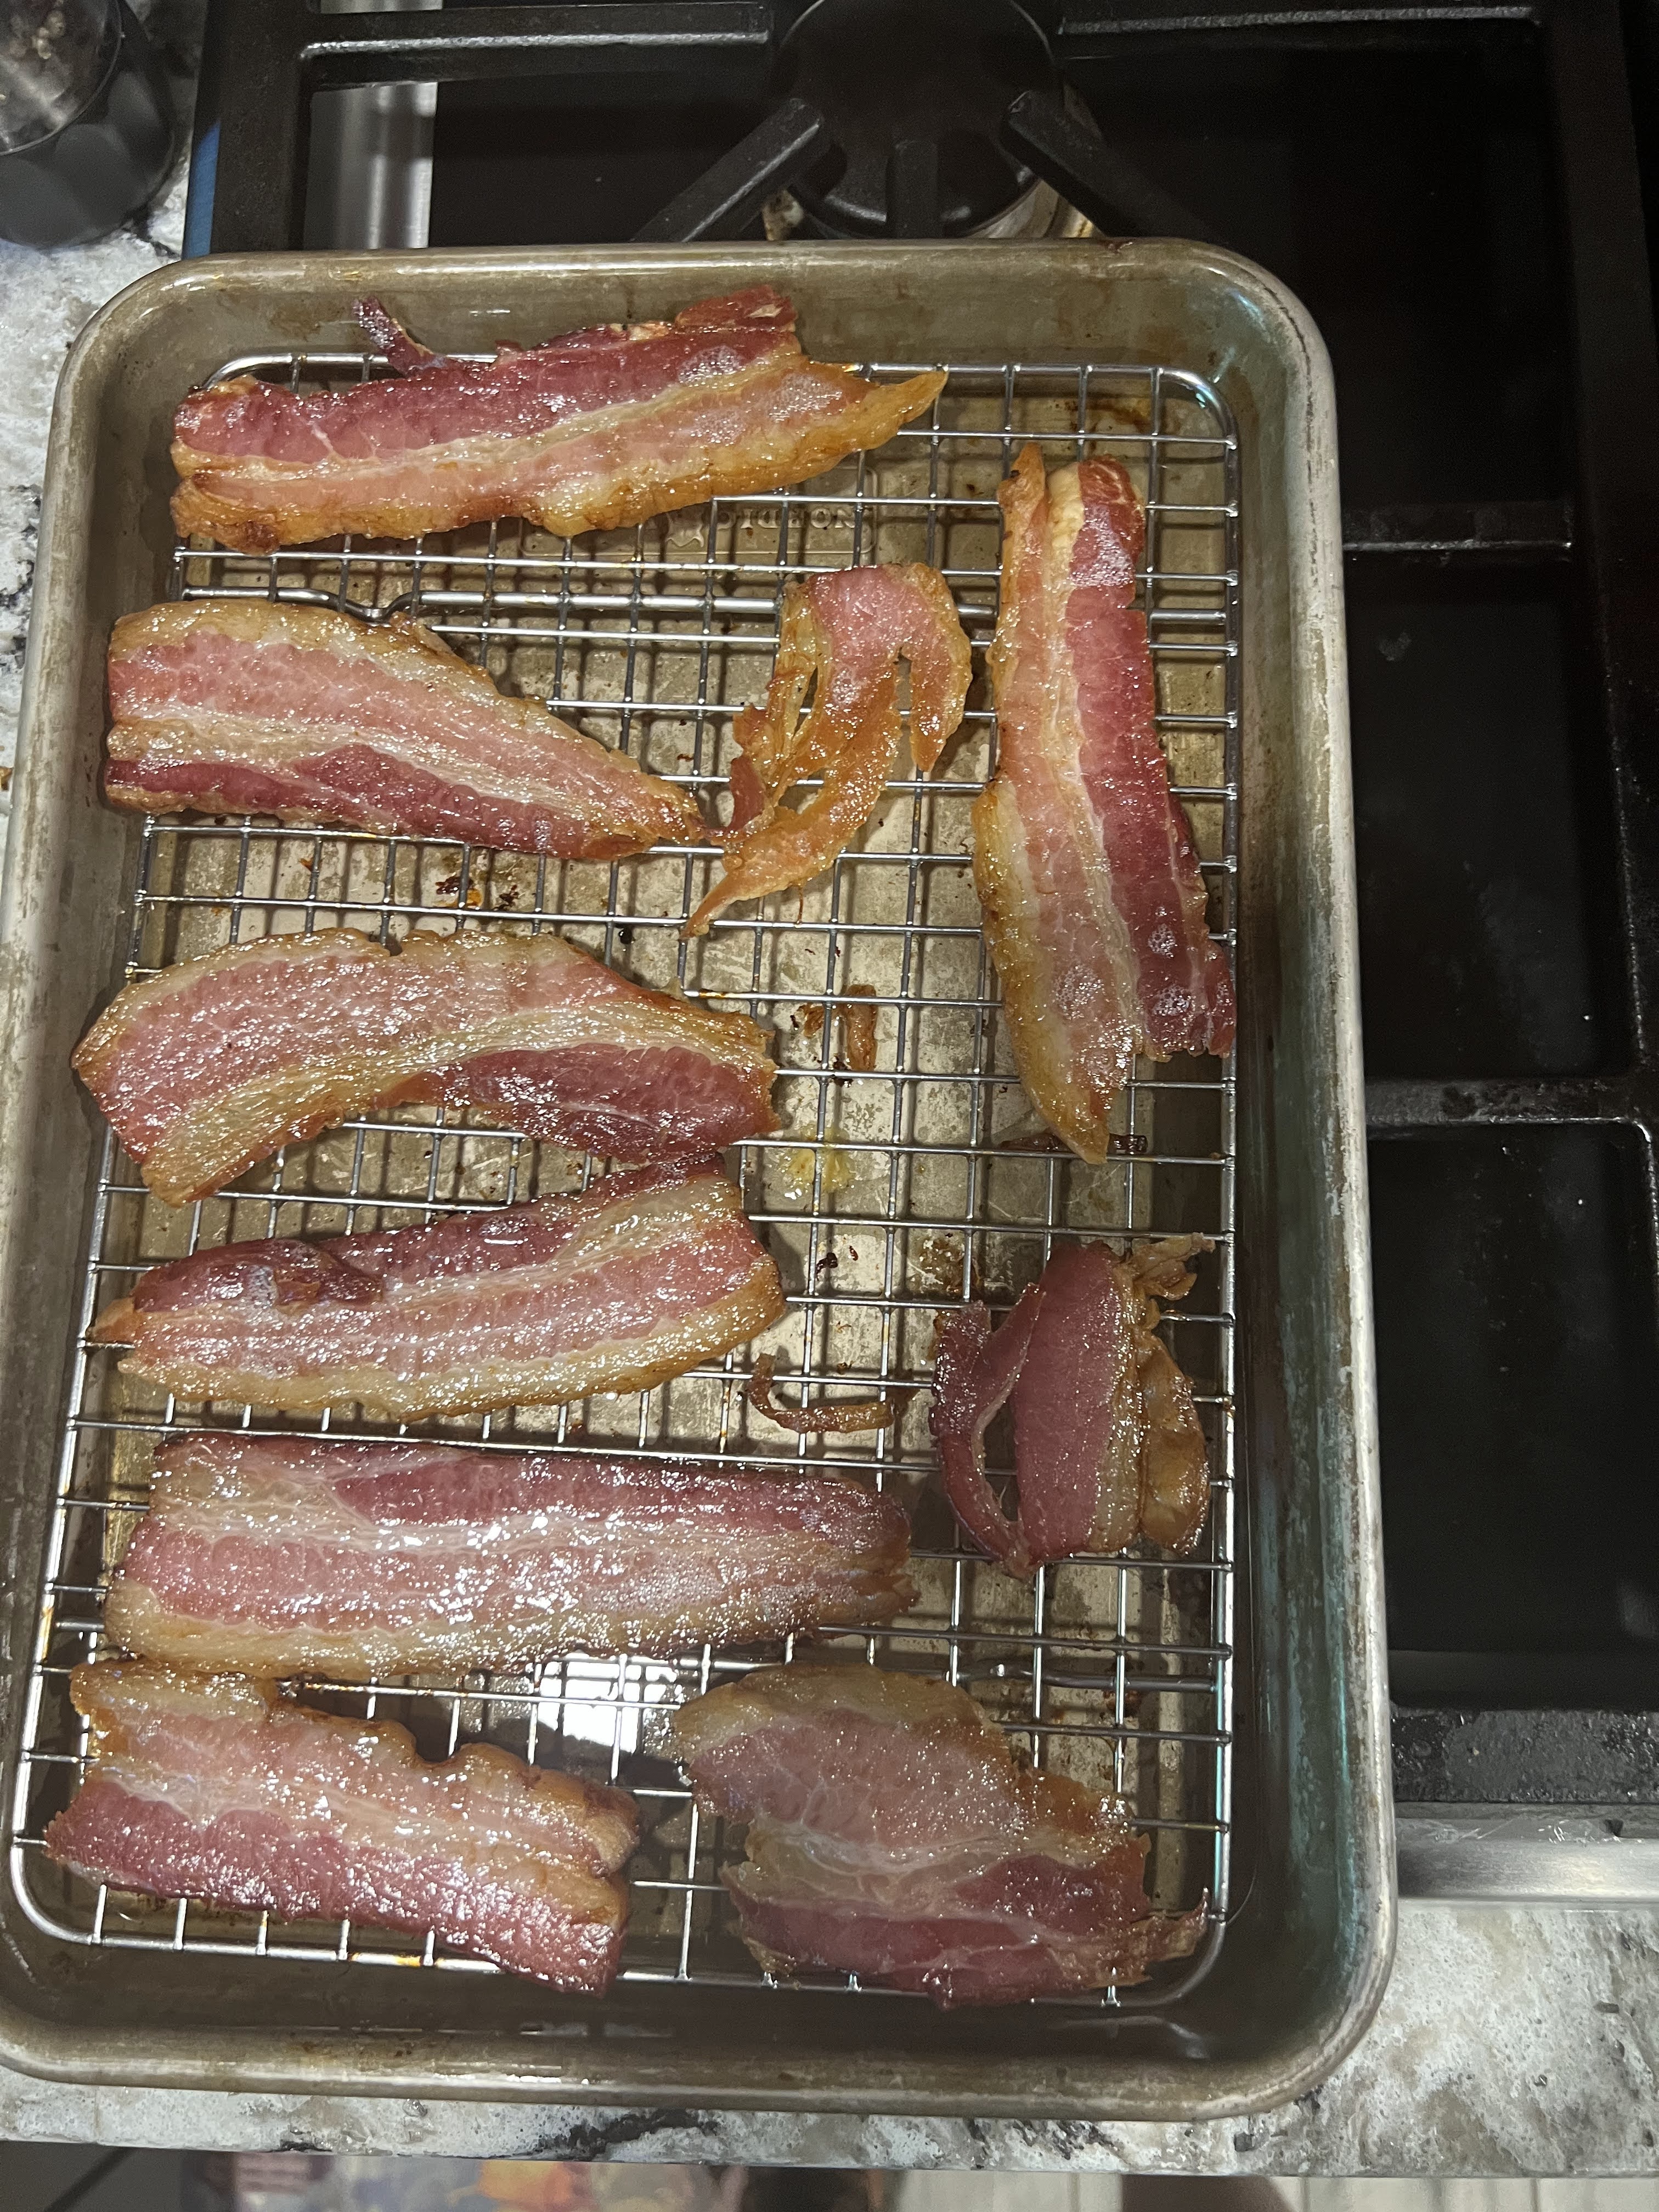
I then sliced and cooked a pound of the bacon for Beth who is making a delicious quiche today that we can have for breakfast and/or lunch tomorrow. The recommended approach to cook the bacon is on a rack in the oven at 350 degrees for about 30 minutes. Because these were thick slices and we wanted them crispy for the quiche, I went to 36 minutes.
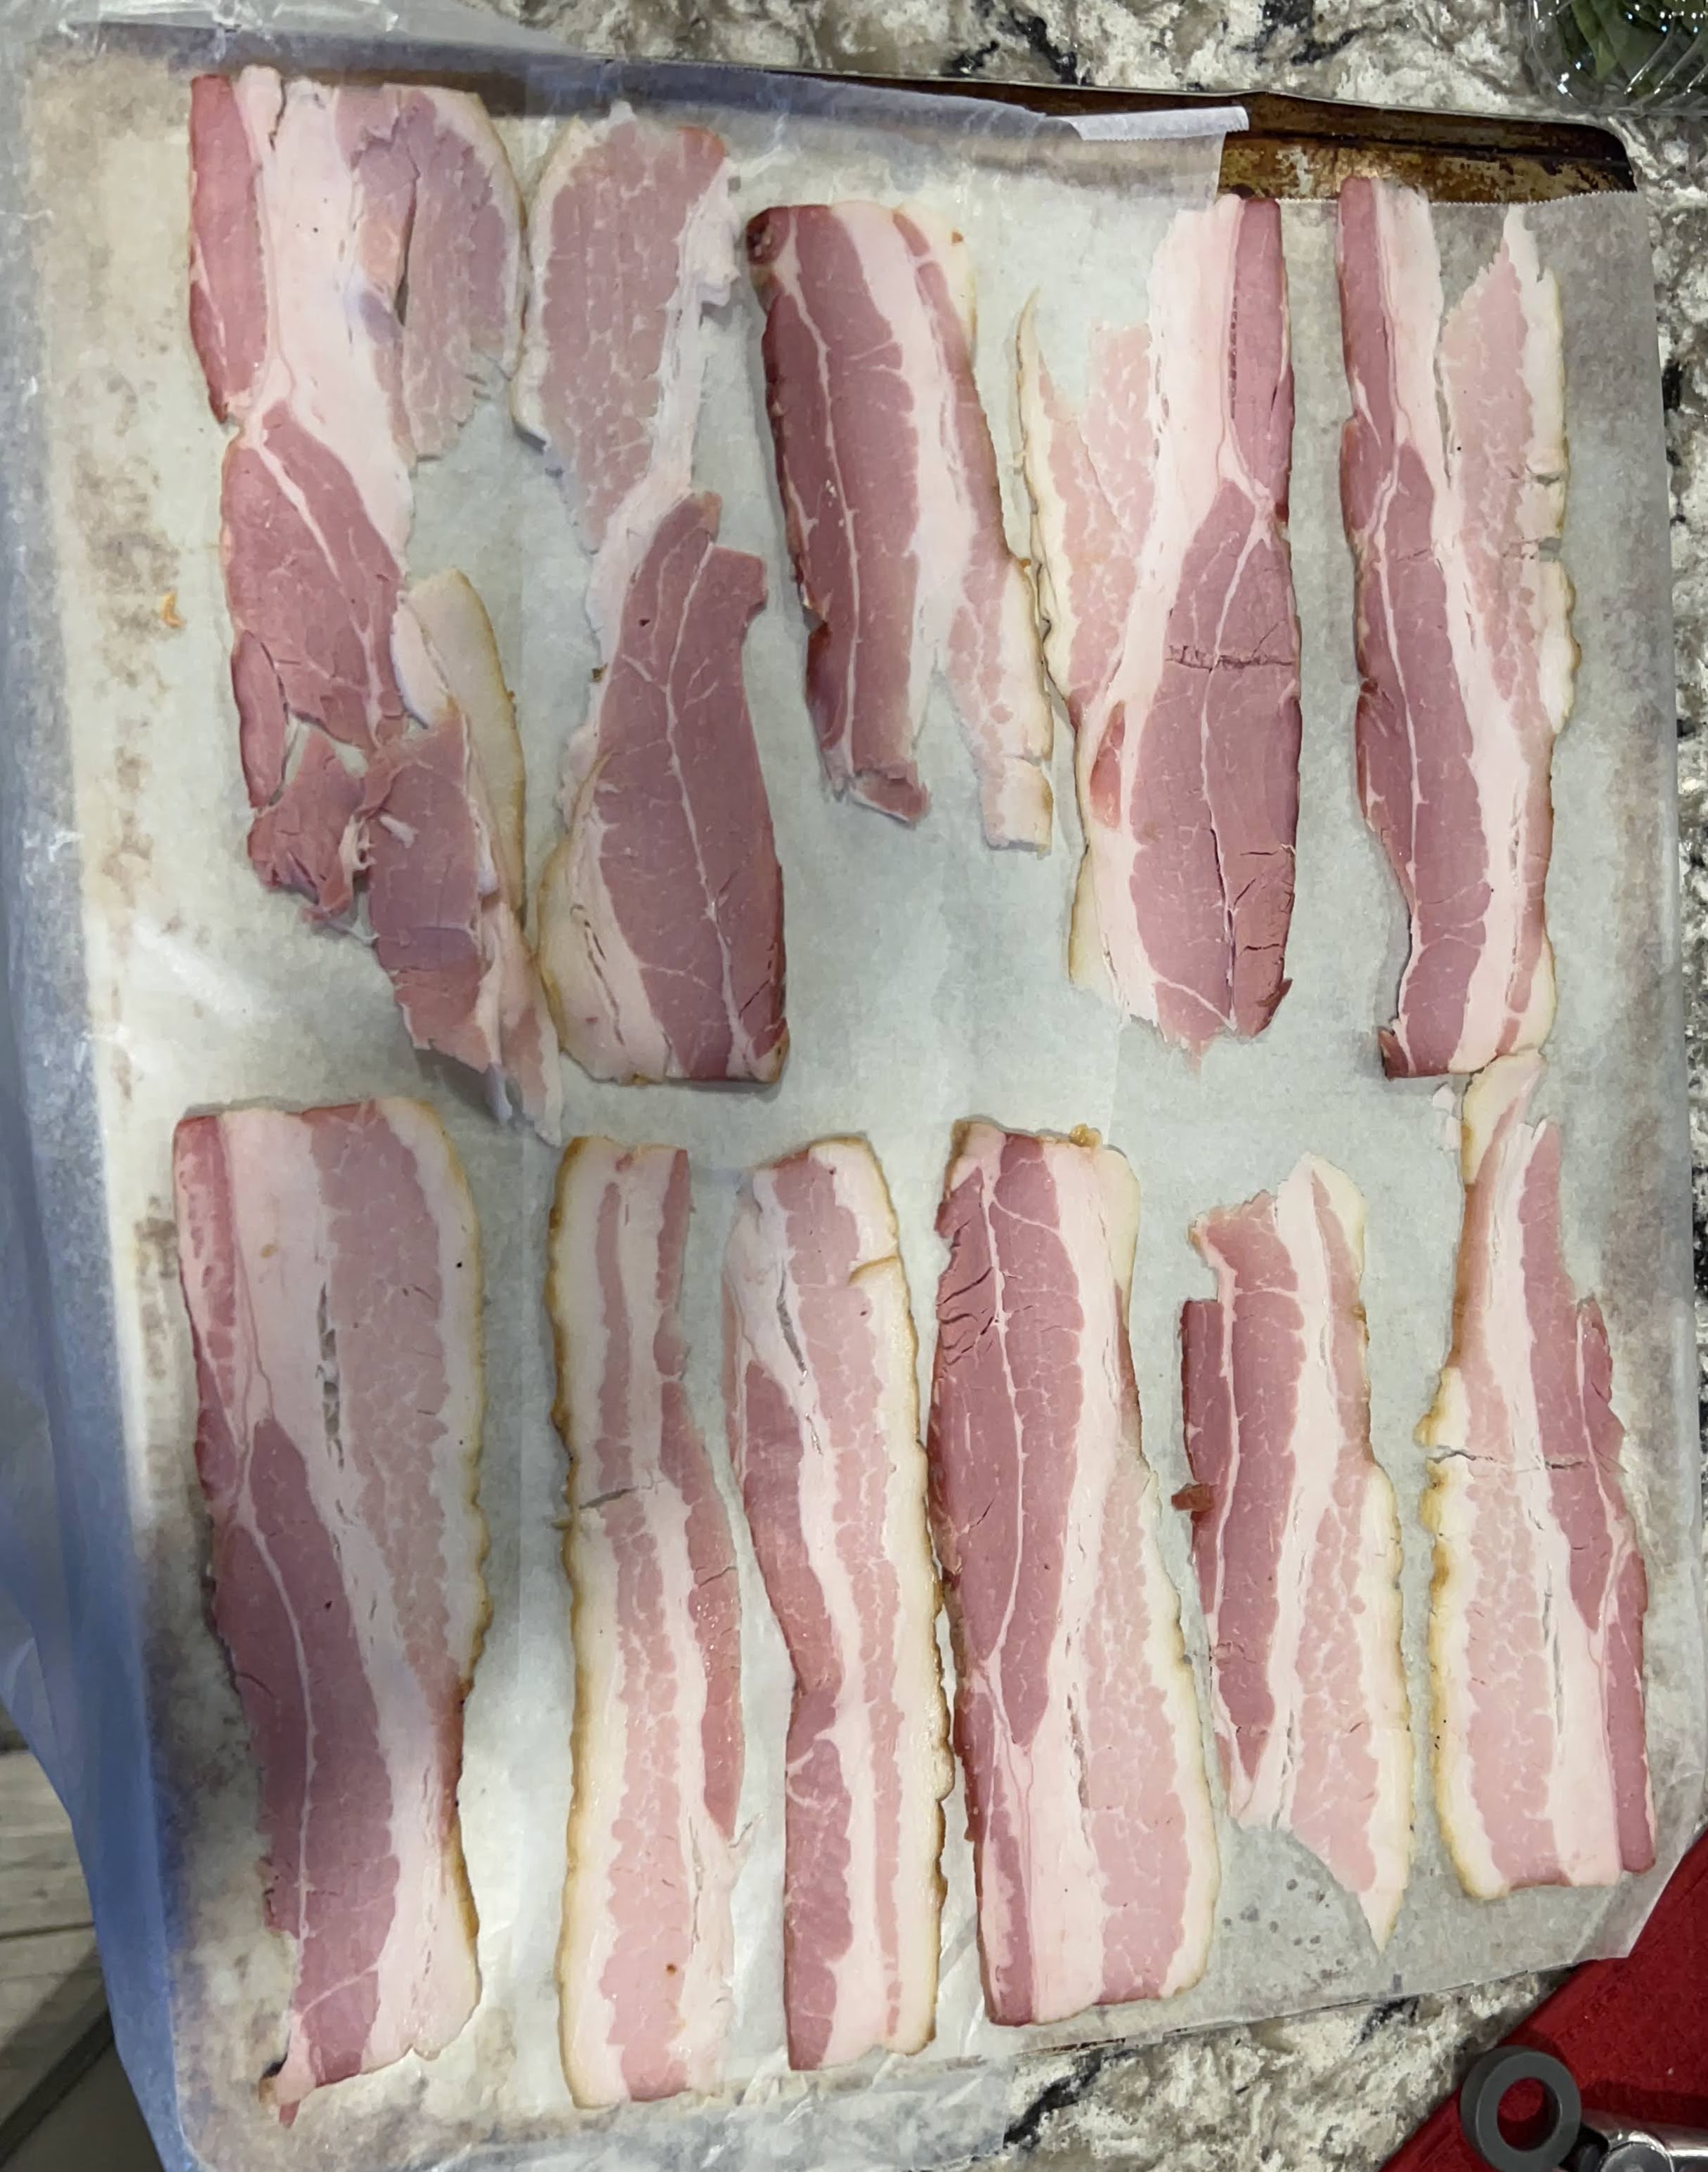
While that was cooking, I sliced the rest of the bacon and put the slices on a sheet and froze the slices individually and then wrapped them up. That will let us take as many slices as the two of us need and defrost them, leaving the remainder still frozen.
For lunch Beth made delicious club sandwiches on sourdough bread with our bacon. We are not planning on any bacon with dinner tonight!
Yes, it was 9 days from when I rubbed the cure onto the bacon until I put some in my mouth. But the first 8 days took less than an hour of total work time. The most difficult thing was making space in the refrigerator for the two pans with the brick on top for a week. Yesterday I had to pay attention to the smoking process but I had my temperature probe giving me the cooking temp on the grill night next to the bacon and the other probe giving me the internal temp. I had them showing on my phone so I spent a few hours reading a good book on my screened in porch, checking my phone for the temps every 5 minutes or so. I will also take credit for some exercise getting up and down to adjust the vents on the grill as needed to keep the cooking temp close to 200°.
This bacon got rave reviews from Beth so this will be repeated, and I may look at things like adding bourbon to the cure or some maple syrup. I will let you know how that works out and if you give this a try, let us know on the blog how that worked for you.
Recipe
Ingredients
5 pounds pork belly
2 Tbs kosher salt
1Tsp pink curing salt
1 ½ Tbs packed dark brown sugar
Directions (All temperatures are in Fahrenheit):
Mix the kosher salt, pink curing salt, and brown sugar together in a bowl. Thoroughly coat the pork belly with this mixture, making sure to use it all. Put the pork belly on a sheet of parchment in a rimmed baking sheet. A ¼ sheet pan should be a good fit for this size pork belly. Put another parchment sheet on top of the belly and cover it with another baking sheet. Weigh it down with a few heavy cans or something else heavy. I used a brick. Put it in the refrigerator for at least 7 days. Flip the pork belly once each day.
NOTE: You are working with raw pork here. Wash your hands frequently and thoroughly. After it is in the refrigerator, wash everything thoroughly that came into contact or close contact with the pork belly, including the countertop you were working on.
After the 7 day cure period rinse the pork belly in cold water to wash all the cure off of it. Dry it and put in on a rack on a baking sheet. Refrigerate, uncovered, overnight to dry it out a bit.
Get the fire going in your smoker and get it to 200°. Add chunks of apple wood and give it a few minutes to get rid of the initial smoke. Put the pork belly in the smoker with a temperature probe all the way into the pork belly giving you the internal temp while it cooks. Cook until it reaches an internal temp of 160°, about 3 hours. Cook to the 160° temp, not for a specified time period.
When the bacon is done, remove from the smoker and refrigerate for at least several hours. It will keep for 1 week in the refrigerator or up to 2 months frozen.
Below are the wines I will be talking about for our Cab Franc tasting. Two of them are widely available and two of them are each only available from a single source. If you have trouble finding these wines you can check wine-searcher.com and put in the wine you are looking for and they will give you a list of web sites that have it for sale.
Lazy Bones Cab Franc – Trader Joes pretty much has an exclusive on this wine so you will need to get to one of the Trader Joes that carries wine to get it. Our local ones do not, but there are two 30 minutes away ln Virginia that do. This was one of the wines that I highly recommended in my earlier Blog post on Red House Wines under $15. I enjoy the $7 price tag more than the naked woman on the label. It is a very good wine for that price and will give us a good intro to the Cab Franc grape. Since you will be going over to Trader Joes to get this, you might check out both the Red House Wines and White Wines under $15 posts that I did for several other great buys that Trader Joes has. None of them is even remotely related to “Two Buck Chuck”.
Chateau Laroque Cabernet Franc – This wine got me hooked on Cab Franc as a single varietal about 5 years ago. It is widely available in the $12-18 range and one source noted below has it on sale for $10. It Is a step up from the initial wine and a very good example of good Cab Franc at reasonable prices from France. Chateau Laroque has many wines at different price points. This one is their Cabernet Franc and the label tells us is from the Citi de Carcassonne. Sources:
Wine.com carries it for $15
Saratogawine.com has it for $12
Empirewine.com has it on sale as of this writing for $10
For those local to the DC area, Calvert Woodly has it in stock for $11 and no shipping charges
Barboursville Cabernet Franc Reserve – My favorite Virginia winery makes an excellent Cab Franc and at $22-30 it is again a step up from the Chateau Laroque. Sources:
Wine.com carries it but at $31 it is the most expensive source. Wineworksonline.com has it for $24.
This is the only one of the four that is carried by Total Wine for $21. Chain stores like Wegmans and Safeway that carry wines often have this one, particularly in the DC area. Calvert Woodley also has it on the shelf for $22.50.
You can get it from the Barboursville web site for $25 and they ship to most states.
We will finish with the 2018 Griffin Creek Cabernet Franc from the Willamette Valley Vineyards in Oregon. At this time it is only available from their website and the price is $55. The link for it is: https://www.wvv.com/product/2018-Griffin-Creek-Cabernet-Franc?pageID=3095651D-FA06-E86B-D3F3-300668D7518B&sortBy=DisplayOrder&maxRows=999&&productListName=Browse%20All&position=24 . For each of the wines we will be moving up to higher price points to see how the wines compare. I will be recommending that you pour this one into the glass 30 minutes before the tasting starts so it really opens up and shows the rich flavor and silky tannins that it has. Batting cleanup, I think it will be a great way to finish our exploration of Cab Franc.
I am looking at the week of July 11 for this tasting to give everyone time to get the wines and avoid conflicts with people going away for the week of July 4. Probably Tuesday, Wednesday or Thursday of that week at 6:00 Pm Eastern for an hour. Does that date/time represent a problem for anyone?
This wine tasting will be on Tuesday July 26 at 6:00 Eastern and use Google Meet. If you send your email address to bill@billwinetravelfood.com, I will send you an invite with the link to this wine tasting. There is no cost to you other then you need to purchase your own wines to taste.
We will have a Winery Ambassador from the Willamette Valley Vineyards join the call and talk about their Griffin Creek Cabernet Franc and you will see below that she is also making that wine available at a discount to those participating in this wine tasting. We are also working with Barboursville and they may also have someone join the call to discuss their Cabernet Franc Reserve.
Below are the wines we will be talking about for our Cab Franc tasting. Two of them are widely available and two of them are each only available from a single source.
Lazy Bones Cab Franc – Trader Joes pretty much has an exclusive on this wine so you will need to get to one of the Trader Joes that carries wine to get it. Price is usually $7.
Chateau Laroque Cabernet Franc –Chateau Laroque has many wines at different price points so be sure you are ordering their Cabernet Franc. The label tells us is from the Citi de Carcassonne. Sources:
Wine.com carries it for $15
Saratogawine.com has it for $12
Empirewine.com has it on sale as of this writing for $10
For those local to the DC area, Calvert Woodly has it in stock for $11 and no shipping charges
Barboursville Cabernet Franc Reserve –. Sources:
Wine.com carries it but at $31 it is the most expensive source. Wineworksonline.com has it for $24.
This is the only one of the four that is carried by Total Wine for $21. Chain stores like Wegmans and Safeway that carry wines often have this one, particularly in the DC area. Calvert Woodley also has it on the shelf for $22.50.
You can get it from the Barboursville web site for $25 and they ship to most states.
If you have trouble finding these wines you can check www.wine-searcher.com and put in the wine you are looking for and they will give you a list of web sites that have it for sale.
Let me know if you have any questions on this virtual wine tasting.
This is a follow up to my earlier post What Is The Best Fry Pan For Cooking. The answer was Cast Iron and Carbon Steel pans for many dishes but the biggest issue that many people have is how to clean them and keep the seasoning that makes them a non-stick pan. My favorite TV chef, Michael Symon, recently posted a short video on how he cleans his cast iron pans, which is what he primarily uses for his cooking. The same process is ideal for carbon steel. Here is the link for that video – pic.twitter.com/vILXViMwXn.
Chef Symon is a great competitor and won status as an Iron Chef as well as many other food competitions. But his favorite show is Symon’s Dinner’s – Cooking Out where he and his wife cook a meal in their back yard. It is all about the recipes and processes that he uses and I really enjoy the educational cooking shows over the reality cooking shows that are all about ridiculous challenges.
Not all of us keep large boxes of salt handy to pour into a pan to clean it but the fact that the salt is a very effective antibiotic and at the same time the process improves the seasoning on the pan make it something to consider. For those watching their salt, this is just for cleaning and does not add any salt to the dishes that you cook after using this process to clean the pan.
I found it interesting but have not tried it yet. Let me know what you think. My apology that youtube has a short commercial at the start of the video that you cannot skip over, but it is very short.
This is not a simple recipe, but it was very delicious. Peking Duck is a classic Chinese dish with delicious crispy skin served in thin pancakes with Hoisin sauce. I’ve heard that some purists only put the wonderful skin inside the pancake and use the duck meat for other dishes but every time I have had it in a Chinese restaurant we got both meat and skin and that is the way we ate this dish.
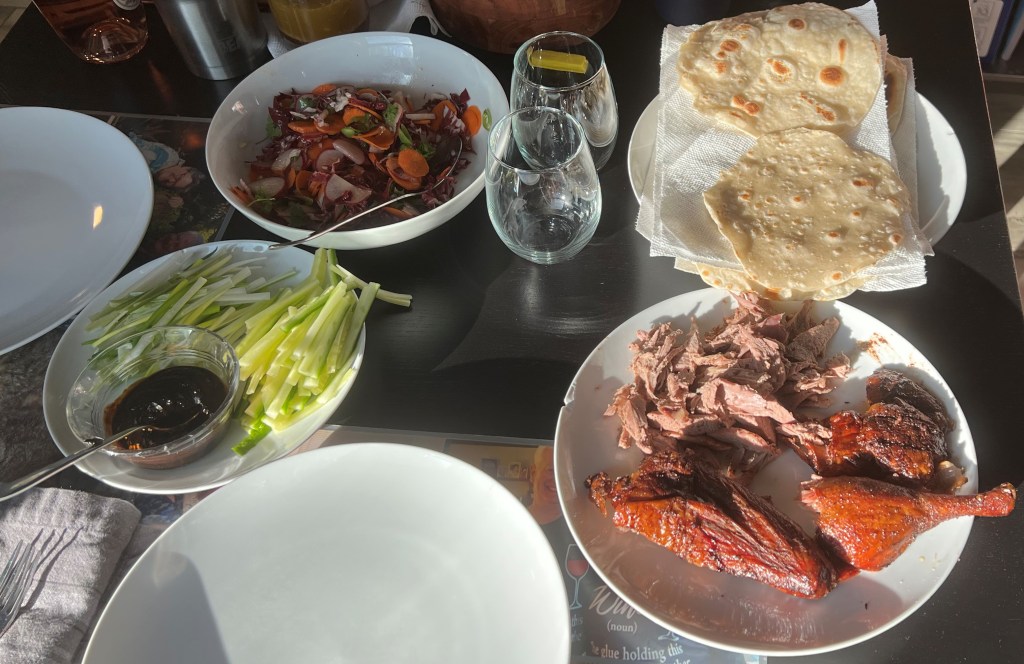
You do not need any special kind of duck to make this dish. The ingredients and timing are for a 5 lb. bird and that is a pretty standard size for a duck. Ours had been frozen and we defrosted it and used the recipe below. The picture shows the shredded meat, along with the wing and leg for anyone who just wanted duck meat, the pancakes, the cucumber and scallion garnishes along with the Hoisin Sauce, and the delicious salad that Beth made to round out the plate. This recipe is for a Kamado Joe grill but can be easily adapted to other smoking grills like a Big Green Egg. In the paragraphs below I have some discussion and pictures and the full recipes for the duck and the pancakes are at the bottom of this post.
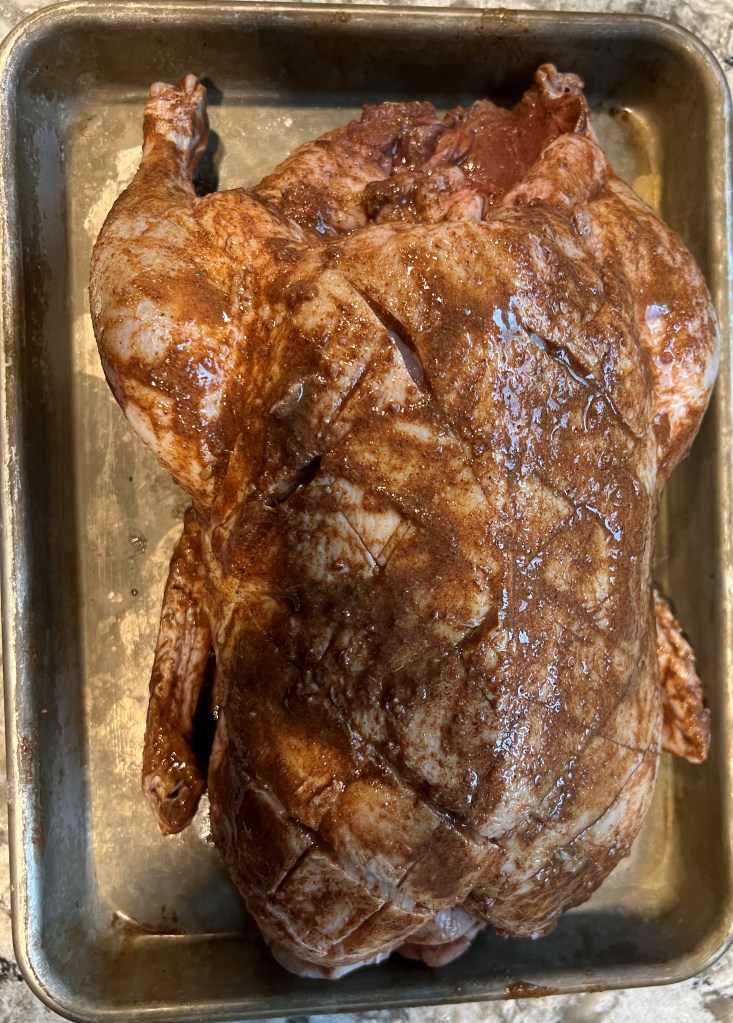
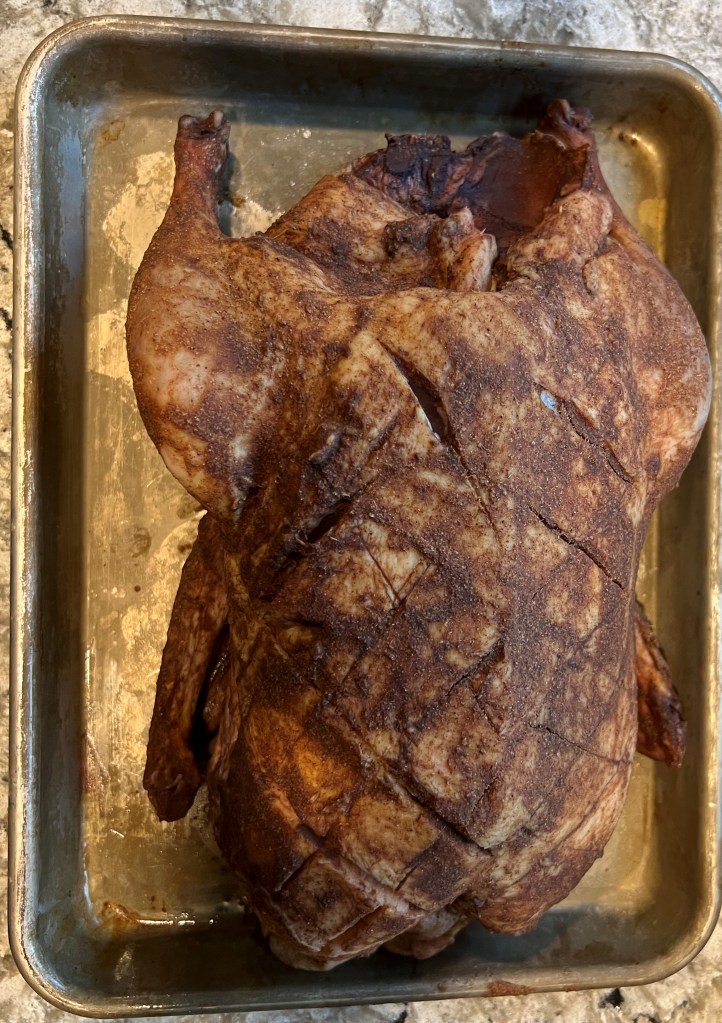
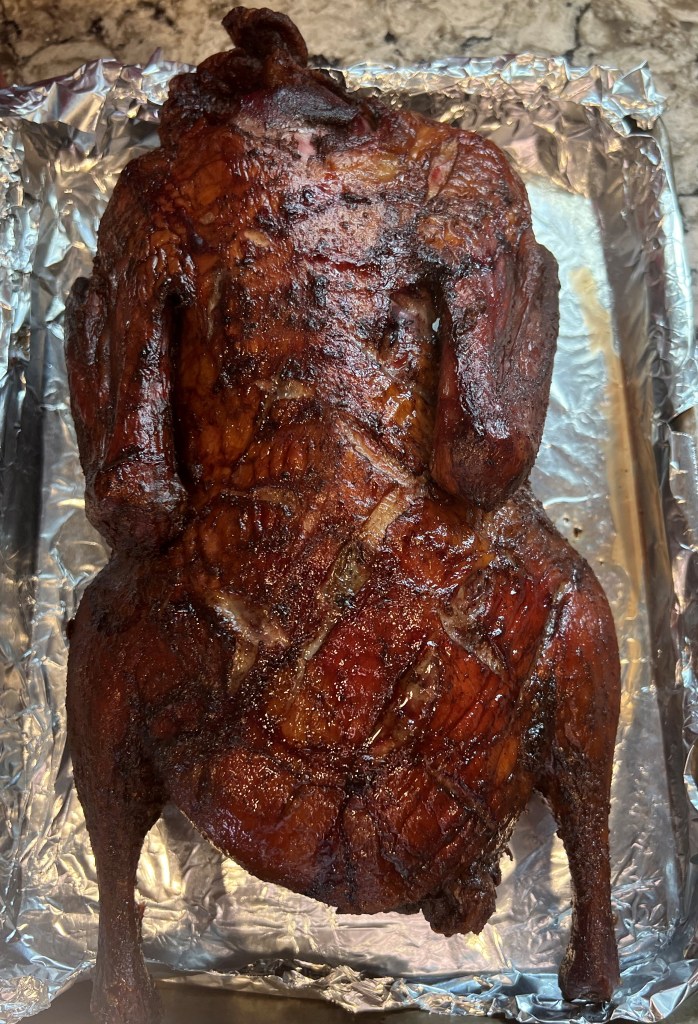
The approach is to create a paste that you rub all over the skin of the duck and let it sit uncovered in your refrigerator for 48 hours before cooking. The picture on the left is when I first put the rub on and the picture on the right is when I took it out of the refrigerator two days later. You then smoke it for 60 minutes per pound or 5 hours for a 5 lb. bird at 250°. It should be at 180° internal temperature at the end of the smoking, and I used my multi probe ThermoPro to have one probe monitoring the internal temp on the bird and one measuring the temp at the grill level where the bird is so I can keep that at 250°. You then take the bird out and quickly bring the grill temp up to 400° for 15 minutes to crisp up the skin.
One key thing to remember when cooking any duck, and this is even more true if you want to take on roasting a Goose (really delicious). Both birds have a layer of subcutaneous fat surrounding their bodies so they can handle cold temperatures. If you just roast them that fat will render inside the skin under the heat and you will be boiling the meat in fat the entire time, and the result is very unappealing. As you can see in the three pictures, I cross hatched the duck skin on both breast side and underside, going just through the skin but not deep enough to go through the fat and into the duck meat. If I had gone that deep the juices of the duck meat would have run out and the meat would have been dry. By just cutting the skin down to but not through the fat layer, the rendered fat runs out into a drip pan as the bird cooks. During the smoking process I had the bird breast side down for half the time and then using my poultry forks, I turned it breast side up for the remaining cooking time. This lets both sides drip their rendered fat into the drip pan. When I turned it, I tilted it up so that any rendered fat that had accumulated in the cavity ran into the drip pan. I did the same thing when I pulled the duck off at the end of the smoking period.
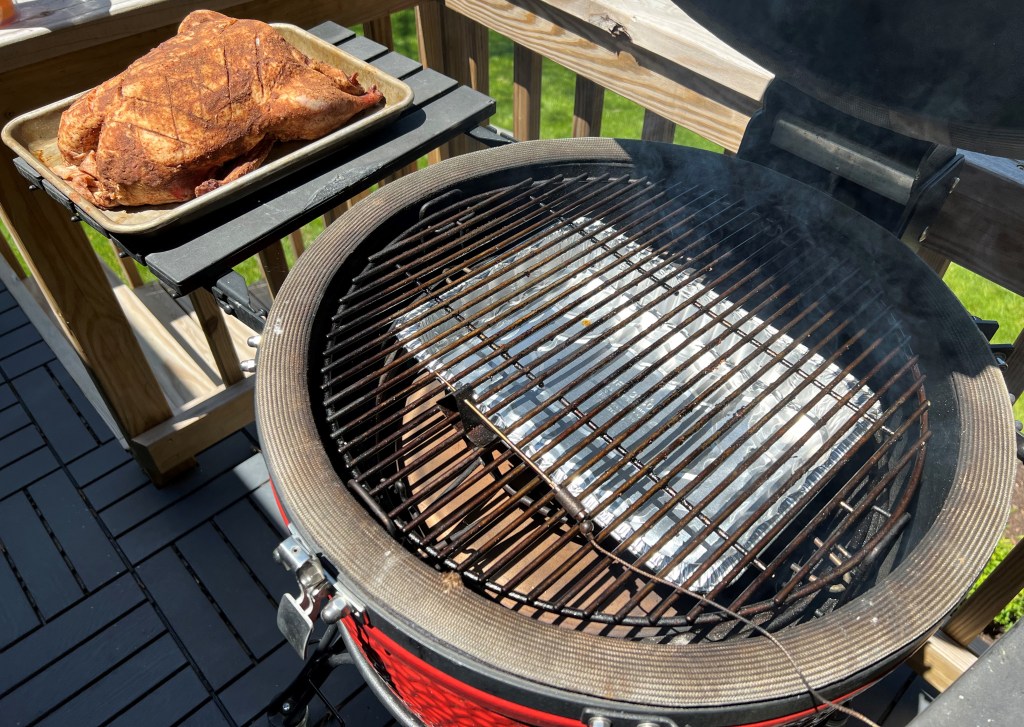
Because I was doing this on the grill, I wanted the bird on the grill grates, so it was surrounded by the heat, but I did not want the rendered fat dripping down onto the heat deflectors, so as the above picture shows, I had the accessory rack in the lower position and a throw away aluminum pan on it under the bird to capture all the rendered fat. I had the heat deflectors in the low position, so it was indirect heat but sufficient circulation for the smoke from the apple wood I used to add a little smoke flavor to the duck.
You do not want to have a strong smoke flavor for this dish, so a fruit wood is best and either apple or cherry is very good with duck. The picture shows the duck as it came off the grill into the kitchen to carve. The skin is dark and really crispy from this cooking process. Because shredded meet is what this calls for, I used by knife to remove strips of the crispy skin and put them on the platter and then used a fork and my fingers to shred the meat. The bird was hot so I used a carving fork and my knife to get large pieces and then once they were off the bone they quickly cooled down enough hand shred.
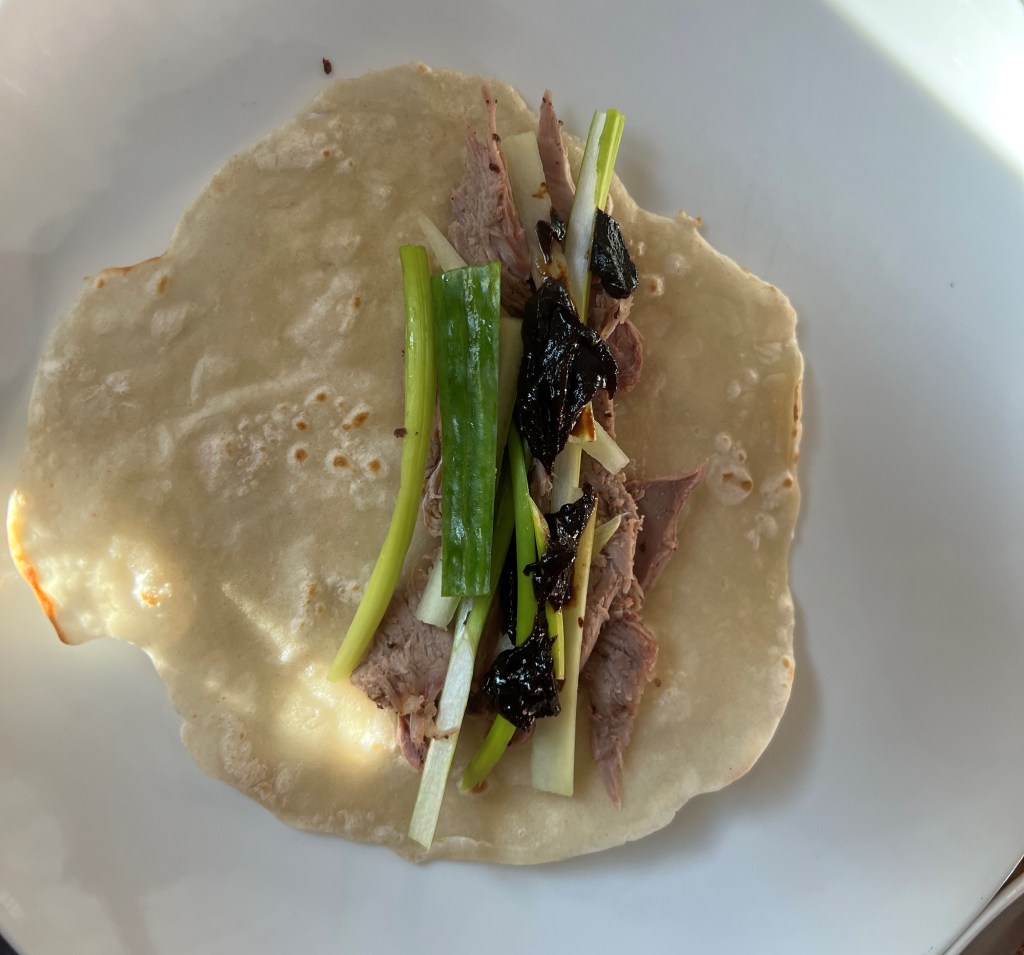
To eat Peking Duck you take one of the thin Chinese pancakes and put some Hoisin Sauce on it. You then put some of shredded meat and then some of the crispy skin on top of the sauce. The last step is to add some thin strips of scallion and cucumber (with the wet center of the cucumber removed) and fold it up and eat it. The pancakes are a key ingredient, and you can order frozen pancakes on line, but I chose to make them and that recipe is also below. It was not difficult but a little time consuming. I started when I flipped the duck breast side up and thought I would have plenty of time while it finished the cooking process, but I actually did the last pancakes when the duck was in the final 15 minutes under higher heat to crisp up the skin. Next time I plan to make the pancakes right after I put the rub on the duck and put it in the oven for 2 days. I will then freeze the pancakes and simply reheat them as discussed in the recipe below, so I don’t have that distraction when I am cooking the duck.
One of the very interesting things about this recipe is that you divide up the dough into 16 balls the same size. I used our scale to make sure they were all pretty close to the same weight. You then take two of the balls and flatted them with your hand and put one on top of the other and roll them out to about 7” in diameter. You cook the two pancakes together in the frypan and then after all the pancakes are cooked you separate the 8 double pancakes into 16 single pancakes. It was as strange to do it as it sounds but it worked, and we really liked the pancakes.
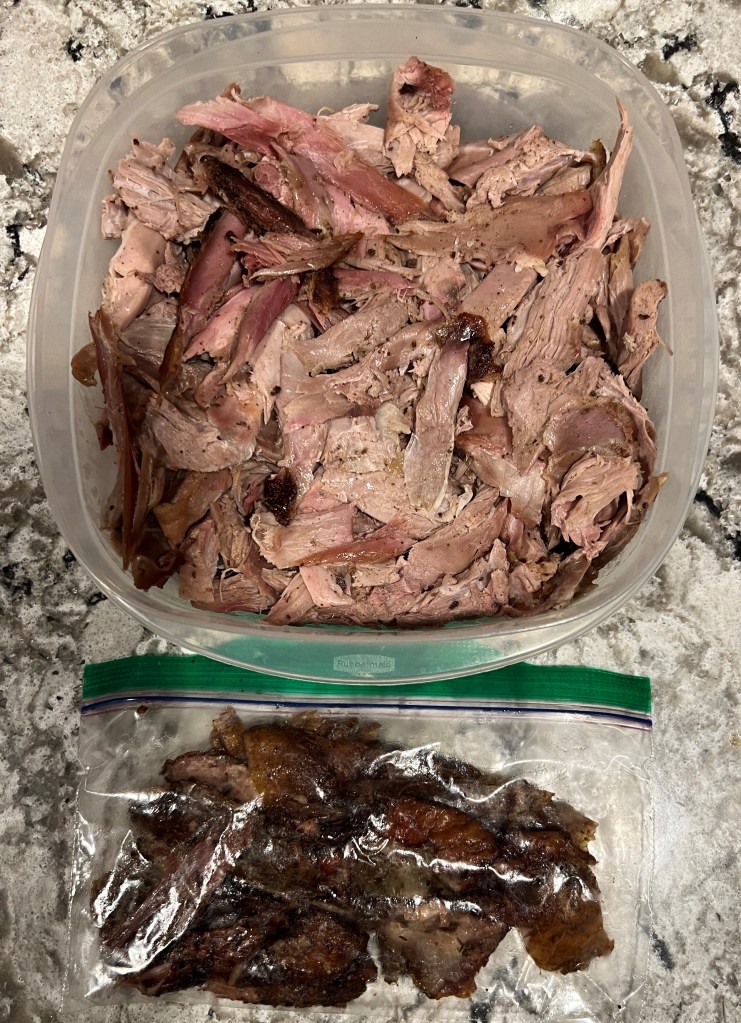
One very strong tradition of Chinese cooking to use every part of an animal because peasants were poor and needed to get everything possible out of any animal they were cooking. If I had just done roast duck, we would have made a duck stock with the carcass and put the remaining shredded meat into a soup made with that stock. In this case we wanted to have a second meal of Peking Duck, so after dinner I stripped every shred of meat off the bones and ended up with a nice container of meat for that second meal along with a bag of the crispy skin.
As mentioned above, Beth made a very nice Chinese salad and if there is interest in that I will ask her for the recipe and post that. We had the Coppola Sofia Rose with this meal, and it was the perfect accompaniment.
RECIPE: Smoked Duck Peking Style – adopted from barbeque-smoker-recipes.com
Ingredients:
One duck
1 tablespoon cider vinegar
4 teaspoons salt
2 Tsp star anise or 2 Star Anise ground in a mortar and pestle
2 teaspoons soy sauce
2 teaspoons Chinese 5 spice
2 teaspoons sesame paste (tahini)
1 teaspoon sesame oil
1 teaspoon powdered ginger
1 teaspoon sugar
For the “garnish”
Chinese pancakes – recipe below
1 cucumber
6 spring onions (scallions)
Hoisin sauce
Method:
Grind up the star anise in a pestle and mortar if you don’t have already ground star anise. Add to a bowl with the salt and the other ingredients and mix well until a rich paste is formed.
Remove the duck from any packaging and using a dish towel, thoroughly dry the duck. Raw poultry should never be washed in your sink because anywhere the water splashes you can have contamination. All poultry should be completely dry before you start to work with it. Immediately put that dish towel used to dry the duck into a place where it will go into your next hot water wash for your laundry and not be used for anything until then. Take your duck and with a sharp knife score the skin surface on both sides taking care to not to cut too deeply into the fat. Rub the paste all over the bird and set aside uncovered for 48 hours in the refrigerator.
Remember that you are working with raw poultry. Wash your hands frequently and very thoroughly after you put the duck with the rub into the refrigerator. Clean all your utensils and the cooking area very thoroughly to remove any traces of the duck. Chlorine wipes are a very good idea when cleaning up areas where you have had raw poultry.
Set your Kamado up for indirect cooking with the heat deflector stone in low position. Put the Accessory Rack in position below the grill grates and put a disposable drip pan large enough to capture all of the drippings from the bird on that rack. Stabilize your cooking temp to 250° and add your wood chunks for smoking. Light citrus woods like Apple or Cherry are recommended. Put the bird it breast side down to get the fat rendered out and halfway through the cooking reverse it to breast side up, tilting the bird so that any juices in the cavity run into the drip pan. Cook the duck low and slow 60 minutes per pound, 5 hours for a typical 5 lb. bird. The bird should have an internal temp of 180° at this point. That concludes the first stage of the cooking process, and you’ll now have a beautifully succulent bird.
The paste is salty so you can scrape off any that’s remaining before starting the second cooking stage.
Crank up your kamado to 400°F and put the duck back on the grill for 15 minutes to crisp up the skin. The bird is fully cooked when it hits 180° internal so you only need a short time to get the skin really crispy.
Note:- This is still using the indirect cooking set up.
Garnish – can be done anytime during the cooking cycle.
Top and tail the spring onions and slice length-ways to produce strips about 6” long.
Peel the cucumber, cut into thirds, and then cut each third length-ways into quarters. You can now easily cut out the watery center. Now cut what’s left of the cucumber lengthwise to produce thin cuboid lengths.
Spoon out some hoisin sauce into a saucer or bowl
Warm your pancakes if they are not made fresh while the bird is cooking
Now it’s time to take your bird out of the oven for the final assembly of smoked duck Peking style. Take two forks or bear paws and shred the duck meat. Coat a pancake on one side with hoisin sauce, add some shredded scallions and cucumber in a line along the center together with some shredded duck. Roll up the pancake and take a bite. It will be delicious.
RECIPE: Peking Duck Pancakes – from Redhousespice.com
An essential element of the classic Peking duck meal, Peking duck pancakes are known as Chun Bing meaning spring pancakes as they’re a traditional food for celebrating the beginning of Spring. Sometimes they might be referred to as Mandarin pancakes.
Made with wheat flour and water, Peking duck pancakes are cooked either in a steamer or a pan. Compared to the popular tortilla, they are much thinner and have a smoother appearance. Apart from Peking duck, many other Chinese dishes, such as Moo Shu Pork, Bean Sprout Stir-fry, etc., can be enjoyed inside these pancakes.
Ingredients:
360 g all-purpose flour
230 g hot water (just boiled)
cooking oil for brushing the pancakes
Method:
Peking duck pancakes are soft, moist and very thin. To achieve the right texture, you need to get the dough right.
All-purpose flour (aka plain flour) containing 10-12% of protein works very well for this recipe.
It’s important to use hot water (soon after being boiled) to mix with the dough. This way the dough is partially “cooked” thus taking less time to cook through in the pan. Also, hot water dough produces a supple and tender texture (It’s also used for making steamed dumplings). You can also heat the water in your microwave but you want it just below boiling point to get the partial cooking.
To make 16 pancakes, you’ll need 360g flour and 230g hot water. The finished dough should be soft but not sticky.
Put the flour in the bowl of your stand mixer with the dough hook. Add the water and let it run until the dough comes together in a rough mass. Turn off and let set for 10 minutes for the dough to hydrate. Turn the mixer back on for about 4 minutes to knead into a smooth dough. Take out of the bowl and check that it does not need any hand kneading to be nice and smooth. Transfer to a bowl, coat it with a little oil, and leave to rest for 30 minutes covered with a lid.
Afterwards, divide the dough into 4 equal size pieces and each of them into 4 small pieces and shape them into round balls. Try your best to divide them as equally as possible. This will make the next step neat and smooth. Using a kitchen scale to check the weight as you cut the dough into four pieces two times is a good way to make sure each of your pancakes will be the same size.
Once the dough pieces are ready, it takes two simple steps to turn them into Peking duck pancakes: flatten with a rolling pin until very thin, then briefly cook in a pan without any oil.
To make rolling easier and speed up the process, apply the “double pancake” method and follow a good workflow. Here are the procedures and tips:
Brush a layer of oil on the top of a dough piece, then place another piece on top. Repeat to stack up every two pieces. Roll out the first double-layer dough into a very thin circle (about 7 inches). See picture above.
Heat up a frying pan over medium heat. Transfer one of the rolled pancakes into the pan. Cover with a lid. As soon as air pockets appear, flip over to cook the other side. The pancakes should have a few light brown spots as shown in the pictures above. Be attentive and adjust the heat if needed. When the pan is too hot, the pancakes will burn easily. If it’s not hot enough, it will take longer to cook and the pancakes will be drier. It should take about 2 minutes to cook both sides. Repeat with each set of double layer pancakes. When finished separate each into single pancakes so you have a total of 16 pancakes.
HOW TO STORE AND REHEAT:
You may store leftover Peking duck pancakes in air-tight bags in the fridge for up to 3 days or in the freezer for 1 month or so. They can be reheated in two ways.
In a steamer: Steam for 3 minutes if chilled or 6 minutes if frozen.
In an oven: Defrost first if frozen. Sprinkle a little water between each pancake. Then wrap them in aluminum foil. Put into a preheated oven at 350°F. Heat for about 6 minutes.
Let me know what you think of these two recipes. We hope you enjoy them as much as we did.
Pinot Grigio is the Italian name for the same grape that is called Pinot Gris in France. Typical of France, the last letters of each word are not pronounced so it would be ordered as Pino Gre. But while there is a minor difference in name for the same grape, there is a MAJOR difference between what is in the bottle that says Pinot Grigio and in the bottle that says Pinot Gris.
Italians look to that grape for a dry, light bodied, very simple wine at low cost. They grow it to have a high yield (lots of grapes) and harvest those grapes very early to have high acidity. I consider this wine a great example of Plonk, wine this just not worth drinking, even if it is free. A fundamental principle of this blog is that I am only talking about my tastes and you are welcome to disagree and have Pinot Grigio as your favorite wine. We will not be competing for who gets the last glass out of the bottle.
There is one exception to my putting the Plonk label on all Pinot Grigio. In the tiny Alto Adige region that borders Switzerland and Austria in the very northern part of Italy, they have both great skiing in the Alps and excellent wine. They control the yield and harvest later which gives their Pinot Grigio some good character. But their wines typically start at $20 and go up from there, a big difference from the simple Pinot Grigio that is sold through out Italy.
The primary location in France that makes Pinot Gris is the Alsace region where people keep French and German flags in the closet since after each war they were part of a different country. In addition to excellent Rieslings, Alsace limits the yield so the fewer grapes have much more flavor and they harvest later so the grapes have more sugar and greater complexity. That additional sugar can be used to make wines that are off dry or slightly sweet but most of the Pinot Gris allows the yeast to consume the sugar during fermentation and the result is a very nice dry white wine that is full bodied with medium acidity and nice complexity for matching to a number of different foods.
A number of other regions of the world have chosen to keep the French name for the grape and to also produce wines that have very nice body and taste. South Africa, Australia, and Oregon are three places where they are making excellent Pinot Gris.
A very good example of that is the wine in the picture which is from the Willamette Valley Vineyard (WVV) in Oregon. I own a tiny amount of stock in this vineyard but the only reason it is in my cellar is that I really enjoy this wine. The grapes are picked at peak ripeness which lets the flavors and tannins (yes, there are tannins in white wines and they add to the flavors) have nutty, spicy, and earthy qualities. This wine has a big mouthfeel and the ability to age in the cellar. Whole clusters of grapes were lightly pressed and then cold settled. Fermentation was 5 weeks at temperature of 55-60 degrees F. The wine was sur-lie aged in stainless steel tanks for 6 months with the tanks being stirred monthly.
The aromas are yellow fruit – pear and grapefruit with some honeysuckle. The taste immediately tells you that this is no simple white wine. It has round juicy flavors of Meyer lemon, honeydew melon, and jasmine. The 13.3% alcohol comes from letting the yeast consume the sugars and create a crisp dry wine with a very nice lingering finish.
This is a great seafood wine, especially seafood with lots of flavor like crab, grilled shrimp and salmon. It is also excellent with poultry and should definitely be on your short list for Thanksgiving, especially is you have any members of the ABC Club (Anything But Chardonnay) at your table. With no oak flavors and the interesting complexity, they will really enjoy this wine with their turkey.
You can order this wine from the WVV website for $18. COSTCO often carries it as well as several other WVV wines in those states where they can sell wine. I hope you enjoy this wine as much as I do.
We love Thai food and get it most often as take-out. I like mine a little more spicy than Beth likes hers. Even with a restaurant we have used multiple times there can be some variation in the spiciness from day to day and if we are on travel and trying a new place, how hot is there recipe when i ask for it to be 3 out of five in spiciness.
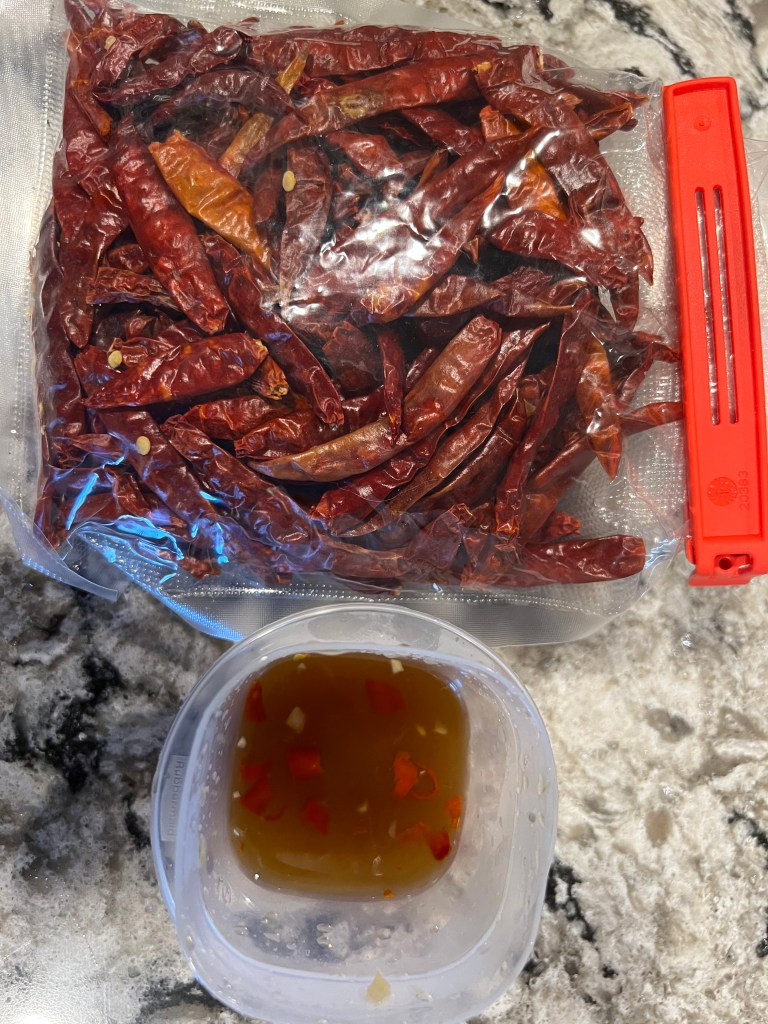
There is an easy answer to getting your dish just the way you want it. A simple Thai sauce called Prik Nam Pla lets you kick up the level of spiciness to what you want. it is often on the table in Thai restaurants and the picture shows what it looks like. if it is not on the table you can ask for it and they will bring it to you. We also ask for it when we order take-out and they put in a tiny take-out container with no questions asked. We generally ask for two Prik Na Pla when we order and are not charged anything for it. If we forget to ask when placing the order, we also have asked them to put some in the bag when we pick it up and they are happy to do that.
It is pronounced just the way it looks. If they don’t understand my terrible accent the first time i ask for it, generally they do understand what I am asking for when I repeat myself. “Spicy sauce” is the final fall back and that has always ended up working. I believe they are not used to round eyes like me asking for Prik Na Pla but they give the impression that they like it that I am.
A little goes a LONG way. I take a small taste to determine what the spice level, or heat, is when i ordered it as 3 out of 5. i then usually take about 1/2 teaspoon of the sauce, sprinkle it over, and stir to mix it in. My goal is to get it to about 3.8. Sometimes I add another couple of drops to get there. If halfway through I decide I want it a little hotter, I can add a little more. But if I put too much sauce on it and it gets too spicy, there is NO going back, I am stuck eating it that hot, so I use incremental steps. Beth wants hers about 2.5 so she orders it at the 2 level and adds a little sauce to kick it up to that level of spiciness.
if you want to make your own it is a pretty simple sauce and will keep for a week or so in your refrigerator. Jet Tila has the recipe I use in his excellent new cookbook, 101 Thai Recipies. The only tricky ingredient is getting the Thai chili peppers which one the ones in the bag next to the sauce I made. The dried chilis will keep for a long time and I just hydrate one for a few minutes in water and then slice it up for the sauce. Beth got these from Amazon.
I am now making two different curries and I am cooking out the green curry paste for at least 20 minutes to have the curry at about a 2 level and the we can each use the Prik Na Pla sauce to get to the level of heat that we want. There are a number of other recipes that Jet has in his cookbook that I plan to try and expand my Thai repertoire. I will post the two curry recipes and any other ones that I really like.
Let me know if this helps you get your Thai food to the level of heat that you like.
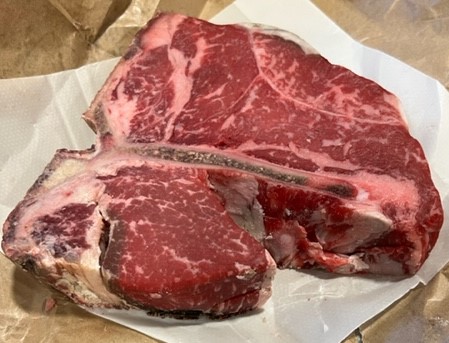
It is two steaks, one on each side of the bone. They are cut from the rear end of the short loin and the larger of the two steaks is a strip steak. When solo on the menu it usually called a NY Strip Steak. On the other side of the bone the smaller steak is the tenderloin, generally called Filet Mignon when served as by itself. T-bone steaks have the same two components but are cut closer to the front so the filet piece is much smaller. Porterhouse steaks are great when cut at least 1 ½ inches thick and one steak can feed at least two people and more if it is thicker.
Second – What Is A Dry Aged Steak?
Dry aging beef is a process that breaks down the connective tissue in the cut and the result is a much more tender and flavorful steak. As you can see in the above picture, the steak is a deeper ruby red from the dry aging. While the Porterhouse is a great steak, it moves into a whole new class when it is dry aged. The strip steak portion becomes very tender and easy to cut. The tenderloin is the most tender cut of beef but with not much flavor. For that side of the Porterhouse, the dry aging process really adds flavor to the tenderloin steak. You can do dry aging at home but it is not easy and the best results come from at least two weeks of dry aging which is hard to do in a home kitchen. A dry aged steak that has aged for at least two weeks or longer carries a very premium price per pound. There are companies that will ship you dry agreed steaks, some of them are able to do it where the steak is never frozen which is important when you want a taste that is fully worth the price you are paying for a nice dry aged Porterhouse steak.
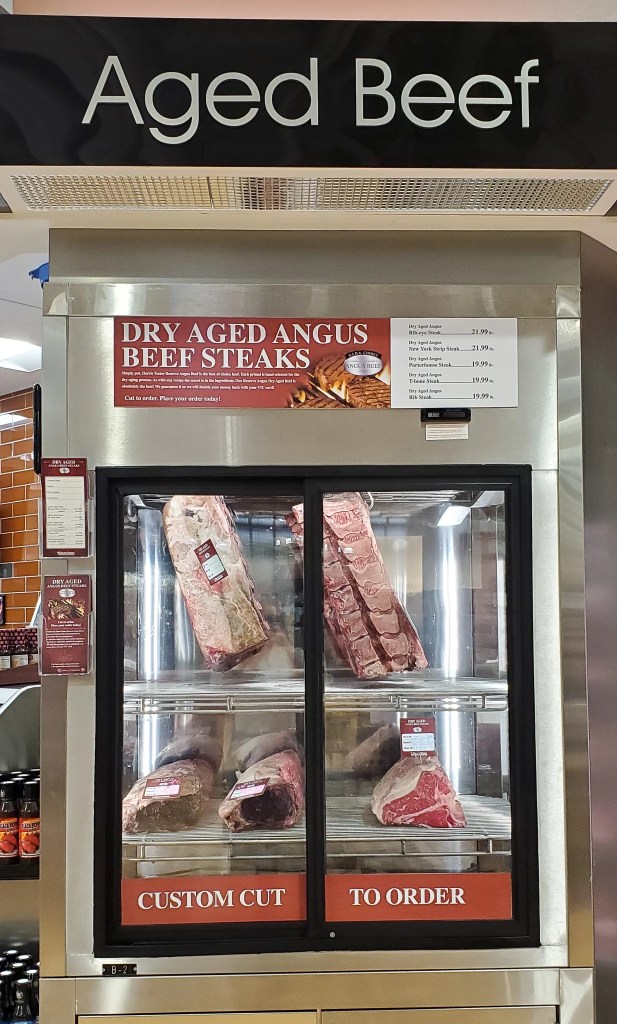
We are fortunate that one of the very large Harris Teeter stores that does Dry Aged Beef in the store is only a 10 minute drive. Not all the Harris Teeter stores have the dry aging apparatus as shown in the picture. The Porterhouse steak is on the right side of the loser shelf. Each cut in the ager has a tag that says when it went in, when it is sufficiently aged that they will cut steaks from if for you, and when it has reached the limit and must come out of dry ager. If they have a Porterhouse that is in the time zone where they are cutting and selling it, you just tell them how big a cut you would like. They will cut it from the large piece being dry aged and wrap it up, and weight it out for you. As I mentioned above, the steak that we get is 1 ½” thick and that gives us a great dinner for two of us and enough leftovers for lunch or a great steak salad for a second dinner. The last one we got was $55 so it carries a very premium price but it is a really great steak for a special occasion.
Third – What Is The Origin Of This Recipe
One of the legendary steak houses is Peter Luger’s in Brooklyn, NY. On any list of the top 10 steakhouses in the US, it generally is very close to the top of the list. You can order one steak for however many people are at your table and they will go into their aging room and cut that steak to the thickness needed for that many people. It is served on a platter in thick slices, perfectly cooked. When TV chef Bobby Flay had a chance to go into their kitchen and see them cook the steak, his reaction was they are breaking all the rules but the end result is fantastic. He now only cooks his Porterhouse steaks this way. If you search the web for Bobby Flay Porterhouse Steak Recipe you will find a Bon Appetit article with the recipe I used.
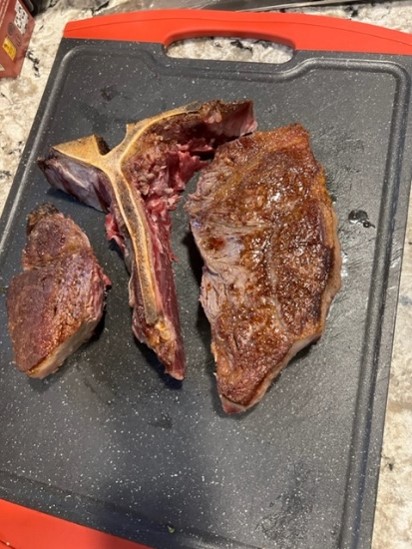
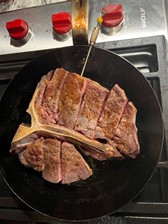
The first thing is to heavily salt the steak on both sides – “make it rain” salt. Turn on the broiler in your oven and then get your cast iron skillet really hot over medium heat on your stove top and then add just a dash of a neutral oil like Canola. Gently place your steak in the pan so you don’t splatter any very hot oil. Don’t touch it for 4 minutes. Take it out of the pan and put it cooked side up on a cutting board. Like the picture below shows, it should have a beautiful brown crust. Now the recipe really gets crazy.
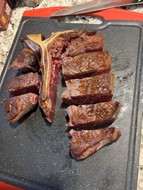
Cut each of the two steaks off the bone, the strip on one side and the filet on the other. Then cut each into slices about 1” wide cutting straight down perpendicular to the bone. The two pictures shows the steak through this stage.
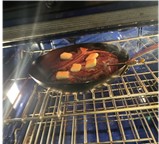
Put the bone back in the hot cast iron pan and reassemble each of the steaks alongside it, crust side up. I then inserted one of the temperature probes I use when grilling into one of the thick slices so I know when to pull it out of the broiler but it needs to be a probe that can handle the heat under the broiler. Top the steak with a few pats of butter. I soften the butter and add some chopped tarragon and sliced garlic and then chill that mixture and slice it into pats so I add some garlic and tarragon flavor to the steak in this way.
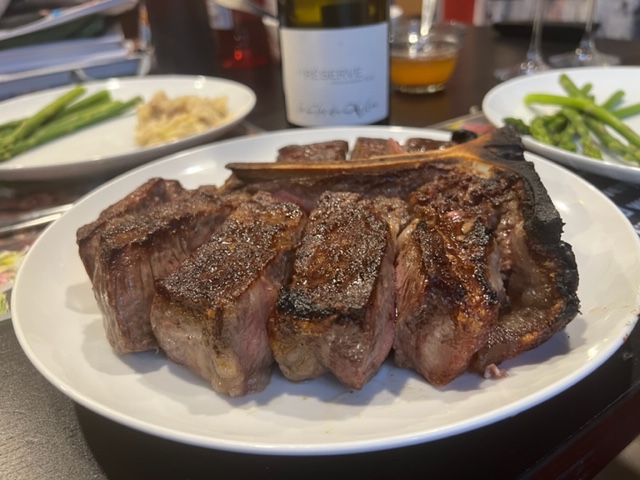
Put the pan under the broiler and broil until sizzling and gorgeous. This can be 4-6 minutes depending on how thick your steak is. The side you are seeing is the one that was face down in the skillet on the stove so between that and going under the broiler, it is developing a great crust. The side that was face up in the fry pan and not cooked is now face down and cooking from the heat of the fry pan under the broiler. It seems wrong that all the attention is on one side of the steak but the results can’t be argued with. I keep it under the broiler until it gets to 115 degrees internal temp. I then pull the steak out, tilt the pan, and baste the steak with the brown butter for another minute or so and the steak will come up to 120 degrees internal. Serve it from the pan and spoon some of the buttery pan sauce over each portion. Because of the butter basting the outside of each slice will look more like it is cooked medium but the steak inside should be a bright rosy red rare to med-rare when you cut into your portion. If you like your steak more medium, you can adjust the temperature when you pull it out from under the broiler accordingly.


You must be logged in to post a comment.