I am a long-time home bread baker. My focus has been on artisan breads like baguettes, boules, and focaccia with many different toppings. King Arthur Bread Flour is my staple. But our oldest grandson was recently diagnosed with celiac disease. Bread was a great love of his and I am now learning to make gluten-free breads for him. I was very happy with some gluten-free English muffins that I recently made and am sharing that recipe here. We do not have a gluten-free kitchen and are learning what we need to do to have him continue to enjoy family meals at our house.
It has been an interesting learning curve for me so in addition to providing this recipe for you to download below, this post provides some and some lessons learned from my first attempts at gluten-free baking. At the end, for those new to gluten-free baking, I have some background on gluten-free baking that I found very interesting and helpful.
Being a big fan of King Arthur Flour’s products, I went first to their web site for gluten-free recipes and ingredients. I also looked at a number of gluten-free bread recipes that have been posted on line and tried some for focaccia and baguettes. The standard approach in almost all of the recipes that I saw was to purchase one of the mixes of gluten-free flours at a grocery store and use and xanthan gum to replace gluten as the way to capture the CO2 released by the yeast so the bread rises. I was very disappointed with the results I got with this approach. The breads were very dense and gummy.
My wife found a great cookbook, Against The Grain which takes a totally different approach to gluten-free baking that I really like. Nancy Cain was a very good home baker who had to convert her kitchen to gluten-free when her husband and younger son both were diagnosed with celiac disease. Much of the discussion below extensively uses material from the first 53 pages of that cookbook. I have one very long page length quote below and several smaller quotes from that book in the discussion at the end of this post. All quotes in this post are from that cookbook. Any mistakes in the information below, or misunderstandings of what Nancy has in her book are totally my fault.
Nancy was so successful that she created a company, Against The Grain Gourmet and their products are widely available in grocery stores. Their web site is https://againstthegraingourmet.com/ and it has tabs for what products they offer through retail stores and where you can find stores close to you that carry those products. To get the recipes you need to purchase her book and if you are at all interested in gluten-free baking, I strongly encourage you to do that.
My recipe that you can download indicates that it was adapted from the recipe in the Against The Grain Cookbook. I have made wheat-based english muffins that I really like and part of that is an overnight slow rise in the refrigerator. I also use large english muffin rings that I got from King Arthur Flour and wanted to make 8 muffins in a batch, so I adjusted the recipe to be larger. The last significant difference is that Nancy’s recipes are based on using a food processor, but with the increased ingredients, it was too large for my food processor, so I used my Kitchen Aide stand mixer. The dough here has a thick batter like consistency and I find it much easier to get the batter like dough out of the bowl of the mixer than out of the food processor bowl with the large cylinder in the center that holds the blade. I do have some notes at the bottom of the recipe for people who want to use a food processor. I put the bowl and blade through the dishwasher before using them for any gluten-free bread to minimize any cross contamination.
When you bake with gluten, that is the mortar that holds the dough together. In the absence of gluten, you want flours with different sized granules to improve your structure. Mixing at least two different flours with different granule sizes – one of those a pure starch – will significantly improve the structure and integrity of your baked goods. Most commercial gluten-free flours contain three or more different flours for this reason. This english muffin recipe uses Tapioca Starch and light buckwheat flour to provide the alternative proteins. Some additional proteins are added by the milk and whole egg. I am not using any commercial mix of different gluten-free flours.
Buckwheat produces a heavy, earth-flavored flour that is good in pancakes but not much else. But light buckwheat flour is a great ingredient that is suitable for all types of baked goods. It adds a little color to the breads but no buckwheat flavor that I can taste. I use Organic Hulled Buckwheat Flour that I buy in 5 lb. bags from Amazon. It has a cost of only $0.34/ounce making it much less expensive than the small bags sold in supermarkets.
Tapioca flour is tapioca starch with fiber included. Many bags have both Tapioca starch and tapioca flour on the label suggesting they are the same thing. Bringing the milk and butter to a boil before adding them to the dry ingredients is needed to make the starch become soluble. As discussed in long quote below, starch is insoluble in cold water and becomes a dead weight in the bread unless the liquid is hot. I use Anthony’s Organic Tapioca Flour that I get from Amazon in 5 lb. bags. It has a cost of only $0.26/ounce. There can be a wide variation in Tapioca starch (flour) from the same vendor. Doing ingredients by weight instead of by volume will give more consistent results. In the recipe I have both the weight and the volume measurements. As you probably know, good bakers strongly recommend adding ingredients by weight, not by volume.
Recipe Hints and Lessons Learned
The wheat-based english muffins that I have made in the past had a slow overnight rise in the refrigerator and I have incorporated that approach to this recipe. The dough/batter is put into the rings on a sheet pan and that sheet pan is covered in plastic and put in the refrigerator overnight. One of the important steps in planning for this recipe is making room in your refrigerator for this sheet pan. You want the dough and the rings to be at room temperature when you start the cooking process the next day. The recipe suggests at least two hours in a slightly warm oven to do that. Once they are at room temperature they can sit for a while with no problem before cooking them.
The biggest challenge in this recipe is to get some color on the sides so they have a little crispness coming out of the toaster but having the center of the muffin fully cooked, but not overcooked. This is done with a three-step process.
The muffins are initially cooked in a cast iron fry pan over low heat for 5 minutes on each side. The goal is to have each side lightly browned, like the ones in the package of Thomas’s English Muffins in the store. Just lightly browned since they will go in the toaster in stage 3 when you are ready to eat them.
Because of the thickness of the muffins, the centers will not be fully cooked when they come off the fry pan. Stage 2 is to put them in a 350° oven for 5-10 minutes until the center is fully cooked. The recipe talks about using a cake taster at the 5 minute mark to see if additional time is needed. We don’t want the muffins to be overcooked and dried out.
The final stage is when you want to eat the muffins to fork split them and put them in to toaster until they are nicely browned. That takes 1 ½ cycles in my toaster.
The timings for stages 1 and 2 in the recipe are approximate. They are what works for my cast iron fry pan at the setting I have on my Viking gas range and then in my Kitchen Aide electric oven. If you have an electric or induction burner range, your timing and heat levels are very likely to be different from mine and your oven may cook at a different speed than mine. I suggest the first time you try this recipe that you do one muffin at a time to start. This trial and error on one muffin at a time will let you get the timing and temperature that is right for your fry pan, range, and oven. I would keep the range temp low enough that at least 4 minutes is needed before they are lightly browned but high enough so it is not more than 6 minutes. I would be more inclined to drop the oven temp and add time than I would be to raise the oven temp and reduce time. We are trying to get the very moist center fully cooked but not overcooked. Going completely through that process for one muffin and after it comes out of the oven fork splitting it to see how the center is and the color of each side will let you adjust the settings on the range and oven and the times you want to use to get it properly cooked. Once you get a muffin that you really like, you can add your timings to the recipe and then you can cook the muffins in batches with confidence they are coming out right for your kitchen each time you make this recipe in the future.
Your cast iron fry pan must be fully hot before starting the cooking process. A Carbon Steel fry pan is also a fine alternative to cast iron. I strongly prefer cast iron or carbon steel to nonstick pans, but you are free to do whatever works for you. A cast iron or carbon steel griddle also works.
I use 3.75” english muffin rings sold by King Arthur Flour in sets of four rings in each package. This size makes a larger muffin than the Thomas’s English muffins sold in the stores that we have enjoyed for years. If you are using a smaller size ring, and they are available on Amazon in many sizes, you may need to adjust how much of the dough/batter you want in each ring since the smaller diameter rings may not need the ½ cup of dough that my large rings do. That may also mean that you need less total dough/batter and will need to reduce the quantities from what I have in the ingredient list in the recipe.
I welcome your feedback on this recipe and on the topic of gluten-free baking. Anything we can do to help each other out to put tasty baked goods in front of family or friends who have a gluten intolerance is good for all of us.
If you are new to gluten-free baking, these next two sections might be of interest to understand what gluten is and why it is used and what the alternatives are. If you have a good handle on gluten-free baking, feel free to ship these sections.
Gluten – What Is It and Why Do We Use It To Make Bread
Gluten is a protein found in wheat flour. “Proteins are chains of amino acids, which are the building blocks of life. Proteins are also the building blocks of baked goods, both wheat-based and gluten-free… Proteins do the opposite of tenderizers. They toughen the dough and build the framework for the structure of baked goods.”
Wheat-based flours are very consistent. “if you buy a bag of King Arthur Unbleached Bread Flour, it will have a protein content of 12.7% and will be milled from hard red spring wheat in the northern Great Plains.” Unfortunately, gluten free flours do not have that consistency. The amount of proteins vary widely between different flours and different batches of the same flour from the same vendor can have variations.
When moisture is added to wheat flour, the gluten proteins form long strings. Mixing and kneading the dough causes those strings to form a mesh or net. When yeast is added to the dough, the yeast consumes the sugar in the flour and produces alcohol, which evaporates away, and carbon dioxide (CO2). The gluten net catches the bubbles of CO2 and that causes the bread to rise. When the dough has been machine mixed and kneaded, like most supermarket breads, the bread that is produces has very uniform small holes, each of which was where a CO2 bubble had been trapped. When bread is hand kneaded, as for artisan breads, the gluten mesh is very uneven and the holes are of very different sizes.
The primary challenge in baking gluten free bread is to find an alternative to the gluten mesh to capture the CO2 so the bread rises. As noted above, the most common approach is to use xanthan gum which can capture the bubbles of CO2 as the yeast releases them. This works and there are commercial products in the frozen food section of your supermarket that use xanthan gum with some success. But I was totally unsuccessful in using xanthan gum and much of the criticism of gluten-free baked goods on the web seems to be the dense nature of those products.
I really liked the idea of other proteins that do not trigger the same response that wheat-based baked goods do for people that cannot have gluten. The success that Against The Grain Gourmet’s products have had in the retail stores got me solidly in their camp.
Two other thoughts on gluten before diving into the alternative protein approach to gluten-free baked goods.
Gluten can be found in many places, especially in processed foods. Just eliminating wheat based baked goods does not mean you have a gluten-free diet. If anyone in your family has a gluten intolerance, you should carefully check the list of ingredients in all processed or packaged foods to make sure that it does not use gluten as a thickener or binding agent. Even some medications can contain gluten.
Gluten-free diets have become popular with people who do not have any gluten intolerance. These diets are often perceived as a healthy alternative, largely because the primary source of gluten, baked goods, often have a high calorie content. In fact, studies have shown that there are minimal health benefits to a gluten-free diet and some risks to eliminating gluten from you diet when you do not have any gluten intolerance. Her is a link to a very good article on this topic – https://www.medicalnewstoday.com/articles/288406#foods-to-avoid .
What Are Gluten-free Alternatives?
Producing gluten-free baked goods is more than just using ingredients that do not contain gluten. Our kitchens have had numerous exposures to products that have gluten and some of that can remain on pots, pans, and utensils even after normal cleaning. The recipe I have here calls for cooking in a cast iron fry pan as the first stage in the cooking process. Below is an excellent article on preventing cross-contamination in your kitchen and it specifically calls out cast iron pans. The seasoning that makes cast iron fry pans so great to cook with, and that requires proper cleaning to maintain that seasoning, can trap gluten and transfer it to your english muffins. I have gotten a 2nd cast iron fry pan that I keep separate in my basement, along with a separate baguette pan, for when I am doing gluten-free baking. I am also comfortable putting some pots, pans, and utensils through a dishwasher cycle and them using them for gluten-free cooking instead of having all the duplicate items that this article suggests.
The following long italicized quote from Against The Grain” provides a great introduction to the alternative protein approach to making very good gluten-free baked goods.
“Bread bakers often refer to the ratio of liquid to flour by weight as the hydration ratio. Liquids include not only water but also ingredients like milk, vegetable oil, juice, and whole eggs (which are about 75% water). Typically, the hydration ratio for wheat-based breads ranges from 50% to 80%, depending on the type of flour used and the baked good. Since one cup of liquid weighs ½ pound, this means that a two-pound loaf contains two to over three cups of liquid. For wheat-based baking, high hydration ratios are used for breads like focaccia and ciabatta, with loose, open crumb structures. On the lower hydration end are dense breads like bagels.
Gluten-free breads require much higher hydration ratios, typically with a ration of more than 100%. These are very loose doughs and kneading many gluten-free doughs is more akin to folding the dough over and over with a spatula. The presence of more liquid in gluten-free breads also means that baking times are typically longer…
Typical wheat flour for bread baking is almost 13% protein. Very few gluten-free flours contain that much protein, and those that do would typically be used in a mixture of two or more flours. During the baking process, proteins, whether they come from the flour or added protein sources like eggs, milk, nuts, and seeds, thicken the dough or batter and add structure. There are many reasons why gluten-free baked goods rise beautifully and then fall, but chief among them is inadequate protein. As the dough begins to heat up and bake, there has to be sufficient proteins to set and form the walls, otherwise the dough will flatten or not create a resilient enough structure to hold in the gasses.
Pure starches get a bad rap when it comes to gluten-free baking, yet they are probably the least understood component of gluten-free baked goods. Like protein, starches are essential to the structure of gluten-free baked goods. All traditional flours, whether from cereals or grains, are at least 70% starch, and starch is made of chains of sugar molecules. These chains may be either straight or branched, and the percentage of each type varies with the type of starch.
Pure starch is insoluble in cold water, and unless starch granules are broken down by heat, the shearing action of mixing, or enzymes (as in fermentation with yeast), they are dead weight in gluten-free dough. Starch becomes soluble in water when heated and forms an elastic gel as the starch granules absorb water and swell. It is this gel that can help build structure, contribute to the crumb, and aid in moisture retention.”
If you read these last two sections, your feedback is helpful. I found it really interesting and helped me have an approach I had confidence in. It gets into the chemistry and physics a little so it might be pretty boring to some people.
I have done some earlier posts on the wine tasting trip my wife and I took in September. It was an 18 day wine tasting itinerary in northwestern Spain with 19 other people. It was organized by an importer of Spanish wines, Howard Freedman, who accompanied us on the trip. The picture below is the itinerary we had where we visited wineries that Howard represents and got VIP tours, tastings, and meals there. We visited eleven wineries and also ate at two Michelin 1 Star restaurants. Beth and I never learned so much about wines and wine making as we did on this trip. The blog summary of that trip is at https://billwinetravelfood.com/2022/10/10/two-week-spanish-wine-tasting-trip and there are also a handful of additional posts where I went into detail on some of the wineries, restaurants, hotels, and other sites that we visited.
Howard is doing this trip again in 2023, the twelfth time he has hosted this trip. If you are interested in Spanish wine, food, and culture, I highly recommend you consider this trip. You will learn far more than in any class about Spanish wines and have a lot more fun too. The web site for the 2023 trip is www.howardswinetour.com . We found several white wines in Spain that we really like: Albariño, Rueda, Godella, and Treixadura, and one new red wine grape Mencia that we really like. Visiting both La Rioja and Ribera del Duero for tastings let us understand why most of the critics say that the best Spanish red wines come from Ribera del Duero.
I am happy to answer any questions you put in the comments section about the trip we took. I have no financial incentive in recommending this trip. It is limited to 24 people at most, so I wanted to let people know about it and consider it since we enjoyed it so much. In the past it has sold out quickly. You are welcome to tell Howard that you heard about this trip in a post that I did.
Beth and I did the Viking Christmas on the Rhine cruise in early December, visiting 10 Christmas Markets. One was in the Netherlands, one in France, one in Switzerland, and seven were in Germany. We very much enjoyed the trip but quickly had our expectations reset on what to expect in a European Christmas market.
Christmas Market in Koblentz
Food booths just opening up
Christmas Markets have been done in these cities for hundreds of years and their origin was for families to come to the town square to celebrate the Christmas holiday with their neighbors. It was primarily a multiday party of eating and drinking with a few craftsmen hoping they could sell their wares to the partying crowd. We would call this a Christmas Fair or Party, not a Market as people came primarily to eat and drink, not to shop. Once we had that understanding, we enjoyed the different Christmas Markets and have some observations that may be of interest if you will be visiting any in the future.
Our cruise itinerary had us visiting the Christmas Market either just when it was opening, mostly 10:00 AM and 11:00 AM in one case, and returning to the ship at 12:30 for lunch, or in the late afternoon at 5:30 for a few hours before returning to the ship for dinner. We enjoyed the daytime visits much more. In the evening the crowds were much larger and people were doing more serious drinking. The largest of the markets we visited was in the city of Cologne and we were there on the Friday night when it had just opened earlier that week. The Friday night crowd was huge and very boisterous. Even though there were multiple market sites around the city, it was very hard to move through the crowds. We were very concerned about getting separated from each other in a foreign country, in the dark, in a very large crowd of people drinking heavily. From that point on we established a rendezvous point for every market we visited where we would go in case we got separated. Fortunately, that never happened, but the Christmas Market we enjoyed the least was Cologne, a really lovely city with a fantastic cathedral, but it was closed when we got there.
Crowded Christmas Market in Cologne
Smaller Christmas Market just opening
Many of the ones we visited when they opened in the morning were very small, but that was fine. They were friendlier and we had no crowd issues. The cruise we took started in Amsterdam and ended in Basel. It then turns around and reverses that itinerary. Our first visit to a market was in the very small town of Dordrecht in the Netherlands and they had about 8-10 booths each in two squares a short distance apart, very tiny. But it let us understand that at least half of those booths were selling food and drink and only a few had any kind of products you could buy. It was great to get this introduction up front and if we had taken the Basel to Amsterdam itinerary we would have ended at this tiny Market instead of starting at it and not gotten the same introduction to the Christmas Markets.
Glass blowing exhibition on the ship
Blowing glass in one of the booths
Understanding that people go to the markets to party, not to shop, let us establish our plan for each market we visited. We would have one or two snacks and something to drink (and I will talk about food and drink next). We would then walk the booths to see what was for sale. Most of the booths with products had exactly the same things made in factories in low labor cost countries, not in cottages outside that town. But we generally found a few that had local products of interest. Two of the markets had people blowing glass ornaments in the booth which we liked, and Viking brought a glass blower on board for an evening show which significantly impacted my wallet. We generally found something we liked at each of the markets either for us or as a present for the family. But most of the time was spent eating, drinking, walking, and observing the crowd at the market, usually all four of these things at the same time.
Booth selling Gluhwein
Enjoying a mug of Cluhwein
Very few of the food and drink booths took credit cards, Euros only. Some of the merchants did take credit cards, especially for the more expensive things like the blown glass ornaments. The primary beverage was Gluhwein – hot mulled wine. Every fourth booth was generally selling gluhwein. They had both red and white, but we only had the red. I could not taste any difference in the gluhwein from any of the 10 different markets we had it at, and in at least one of them we had it from two different booths. The recipe appears to be pretty standard. The best thing about Gluhwein is not the taste, it is that it is a hot beverage. The temperature ranged from the low 30s down to 19 degrees Fahrenheit and it was a damp cold from being on the river and often some wind blowing down the streets. Holding something hot in your hands was very pleasant and the warmth felt good running down your throat. It was sold in small glass mugs for 5-6€. If you returned the mug to the booth you got a deposit of 2-3€ back. I was very happy that Beth chose to only bring two mugs home. One of our friends that we met on the cruise pointed out to us that some of the gluhwein booths had the option to add a shot of rum, tequila, aquavit, or other liquors to the gluhwein for another 2€. We found that rum significantly improved the taste and did that several times. I did get an OK hot chocolate at one booth we were visiting in the daytime. Not thick enough to stand a spoon in but several orders of magnitude better than Nestle’s Quick. There were some booths selling beer and small bottles of wine, but gluhwein was the dominant beverage at every one of the Christmas Markets.
Booth making Potato Pancakes
Grilling different wurst
Two food items were also staples at all of the markets. About every fifth booth was selling a choice of different wursts or sausages. Most of them were about 12” long and you got them in a mini baguette about 4” long with sausage hanging out each end of it. We tried a couple of different ones and were happy to share with each of us eating from a different end and meeting in the middle. We were surprised to see Curry Wurst at many of the booths and tried it once. It was tasty but we had missed that the booth we bought it from put ketchup on as a default unless you told then not to. We scrapped most of it off and did enjoy the sausage which was not too spicy. The food we fell in love with was the potato pancakes or latke. For 3-4€we got either two pancakes about 6” in diameter or three about 4” in diameter, both about ½” thick. Perfect size to split. Apple sauce was the standard accompaniment, and we got that each time. While wurst and potato pancakes were the most common food booths there were some with flatbreads, only called pizza once that I saw, and with a baguette sliced in half horizontally and each half covered with different meats and cheeses and put under a broiler. We did not try any of them since we were getting either lunch or dinner back on the boat so the potato pancake with some gluhwein was our appetizer each time.
Most of the booth signs were in several languages and all of the people working the booths knew enough English to take your order and your money. And most of the time they were very friendly and appreciative of your business.
Booth with items made by local craftswoman
Our favorite Christmas Market was in Strasbourg, France. It had the most interesting crafts and was one of the larger ones we visited in the daytime with minimal crowds. We put Strasbourg and Lucerne on our list of places we want to visit for a few days in the summer on a future trip. Cologne was the only one that we did not enjoy and that was because the crowds were too much. I think if we were there on a Wednesday morning when it opened instead of a Friday night when everybody in Cologne wanted to party, it might have been one of our favorites.
Strasbourg Christmas Market
One final consideration when visiting the Christmas Markets as part of a cruise. The good news is that you don’t have to worry about parking a car and you do not want to drive in Europe if you have been drinking and that is a big part of going to a Christmas Market. The bad news is that there were only a few of the Markets that we could walk to from where our ship was docked. We generally had a short bus ride with a local driver who gave us history and things of interest about the city or town we were visiting and generally gave us a 30 minute walking tour ending up at the Christmas Market. That was nice but if we needed to be on the bus to return at 12:30 or 7:00, it was because the ship would be on the move 10 minutes after the bus dropped us off and if you missed the bus, you missed the boat. Only in Strasbourg did we have an option to stay longer with buses back to the boat at 2:00, 3:00, and 4:00. We enjoyed having more time to walk around Strasbourg and chose to have lunch at a small café there instead of going back to the ship for lunch.
Beth had pretty much given up hope that I would ever consider doing a Christmas Market cruise and she was totally surprised when I suggested it this year. We very much enjoyed it and remain strong advocates for Viking.
If this is the first of my posts on the Spanish Wine Tasting that you are seeing, it is the 8th one in a series covering each day of the great wine tasting trip that we did in September/October of this year. The first post is a summary of the entire trip and you can find that at https://billwinetravelfood.com/2022/10/10/two-week-spanish-wine-tasting-trip/ . The posts for each day get into the details of the wines we tasted, the wineries we visited and what we learned there, the hotels we stayed at, the restaurants we ate at, and the historic, architecture, and geographic sites that we visited.
On Saturday we spent the full day in Bilbao, no bus rides 😊! We had a lovely breakfast on their roof top overlooking the Museum and the river. Excellent food and fantastic service. We then had a guided tour of the Guggenheim Museum. After the tour we walked around to the river side of the Museum to Nerua, a Michelin 1 Star restaurant that is in the Museum building but not directly accessible from the Museum. We had a fantastic 10 course tasting menu there with five lovely Spanish wines. After this long, delightful lunch we walked around the outside of the museum taking more pictures, this time in daylight.
It is very hard to give full credit to the Guggenheim Museum in this short post. I’ll try to show how much we liked it in two sentences. The town of Bilbao is not an easy place to get to in Spain and not near any of the other major locations you would want to visit. But it is absolutely worth making the effort to go to Bilbao just to visit the Guggenheim Museum. A number of cities were considered by the Museum Planning Commission, and when they established a shot list of cities, each gave presentations on why they should be selected. Bilbao was chosen. The portions of the building that have the metallic facing on the outside are sculpture wings. Those with white stone walls are art wings. But both art and sculpture are given new meanings in this Museum. The only artists that I really like are the Impressionists like Monet, Picasso, and Van Gough. I have little interest in other schools of art and least interest of all in Modern Art. The art at the Guggenheim does not fall into a specific school, in my opinion, but is probably closest to Modern Art. But I found both the art and the sculpture at the Guggenheim very impressive and truly enjoyable. Below I will try to give a hint of the magic that the Guggenheim presents with three examples and then add a few other pictures. Howard and Antonio had arranged for our group to be split in two and each of us had a guide for about 14 people, so it was very interactive and added greatly to our appreciation of the displays.
If there is one thing that really stands out at the Guggenheim, it is size. These are not statures on a table or pictures in frames hung on the wall.
The first wing we went in was a sculpture wing and many of the huge sculptures in this wing were focused on motion. There was a maze that we walked through. This picture shows the one sculpture that really stood out for me. When we walked inside it, our sight perspective was altered somehow so we had great difficulty keeping our balance. We had not had any wine yet! The floor was flat but we could not easily walk in a straight line, we had to keep trying to catch our balance. The Guide suggested lightly touching one of the walls while we walked and that immediately restored my balance. If I took my hand off the wall, I again was disoriented. The picture cannot convey how this happens and we were all talking as to how the curved walls made this happen. We were actively part of this sculpture.
This table display was in one of the Art wings, not Sculpture. It is dynamic art that captures the evolution of technology. It starts on the left with an electric light going on as shown in the first picture. Over about three minutes it moves across the table turning on and off different devices to show how electricity was used in more and more ways. The second picture shows the end of the process. I thought the approach to show creativity and evolution with technology was very interesting.
When you walk into the huge main lobby of the Museum, over in one corner is a wall of moving red lights. When you walk up to it you see that each pillar is streaming words from different news sources in many different languages. Then you see that you can walk between the different light streams through to a room behind. The reverse side of those streaming red lights is streaming blue lights with just a few repeating messages alternating in Spanish, Basque, and English. To leave you walk back through the lights into the main lobby.
Having a guide gave us background and color on the things we were seeing and helped the three examples above really jump out to me. We could ask her questions which made it much better than the headsets that play recorded messages for most if not all of the things on display like many museums have today. The recorded messages are a giant step over a printed visitor guide, but a live guide who really knows the museum is another giant step better. If you are able to get to the Guggenheim Museum, I strongly suggest you investigate in advance the ability to have a guide take you through the Museum.
Below are pictures of a few of the other exhibits to give you an idea of the size and diversity of what they have on display.
We got to the Nerua restaurant at 2 PM for our luncheon and were there over 3 hours. Here is a picture of the two of us standing in front of the kitchen when we arrived. Our group had a private dining room and our own menu, so I have no idea what the price is for lunch there. The picture shows our menu of the different dishes and wines that we enjoyed. As with our other meals, additional wine was available for the asking. We had three passed hors d’oeuvres to start with, which were all delicious, and a very nice Cava, Spain’s version of Champagne, from the Penedes with them. Then we sat down to 9 courses of plated dishes. We had the next three wines shown with the first 8 courses and the Dulce wine with the Butter Bun ice cream. Beth took pictures of every course, but I am only showing one of them here, the mackerel, as an example. All of them were not only delicious, but they were also plated like works of art. One of our friends we were seated with cannot have gluten and the staff had prepared for her alternatives for any dish that had gluten.
This was the second 1 Star restaurant we went to as part of the tour package. I wrote about the other one in the post for September 20. That first one was in a small country village and was a very small restaurant on the second floor over an inn and the 23 of us took over the entire restaurant for that luncheon. We had a wine tasting on the patio outside the restaurant where they guided us through the wines that would be served with the meal before we went in for lunch. Nerua was very different – a large restaurant in a major city and it was in the same building as the major attraction in that city, the Guggenheim. We had a private dining room but they had the rest of the restaurant open for those with reservations as the same time. So both restaurants were very different in size and atmosphere – country inn, big city premier restaurant. But each had plates where we gasped at the plating as they were presented and every dish at both restaurants was a delight.
After the long, wonderful lunch we took some additional pictures of the outside of the museum, this time in daylight and I have the topiary again to show the size and the colors in daylight. We then walked back across the street to our hotel. We did not need anything more to eat after that incredible meal, but we did go up to the rooftop for a glass of wine later that evening. They had a musician playing the accordion and it was great to sip the wine and look out over the Museum and the river.
We were in this hotel for three nights and it was the midpoint of our trip so we followed our plan and turned our laundry into the hotel since packing enough clothes for 18 days would have meant at least one more suitcase. As you can see in the picture. It was waiting for us in our room in a lovely basket. It was NOT inexpensive but well worth the cost and we really loved everything about this hotel.
If this is the first of my posts on the Spanish Wine Tasting that you are seeing, it is the 7th one in a series covering each day of the great wine tasting trip that we did. The first post is a summary of the entire trip and you can find that at https://billwinetravelfood.com/2022/10/10/two-week-spanish-wine-tasting-trip/ The posts for each day get into the details of the wines we tasted, the wineries we visited and what we learned there, the hotels we stayed at, the restaurants we ate at, and the historic, architecture, and geographic sites that we visited.
On Friday morning we left Leon and went to Cantabria and then on to Basque County, two of the 17 Autonomous Communities mentioned in the post for Sept 21. We would think of them as states or provinces but in Spain they are called Autonomous Communities. The map showing those Autonomous Communities is available for download below as it was in the post for the 21st. This map lists The Basque Country as Pais Vasco so I guess there are different names for it.
As a change of pace that morning instead of a winery we went to the Castanon Cidery where they make sparkling hard cider. After that we had a chance to walk through a lovely Cantabrian village, Santillana del Mar, and had lunch there on our own. We then were driven to the beautiful city of Bilbao where we stayed three nights in the exquisite Silken Gran Hotel Domaine right across the street from the Guggenheim Museum. I had a little bug that day and slept through most of the bus rides, missing what Beth said was beautiful scenery and I did not have much appetite.
The Castanon Cidery was a lot of fun. They took us through the cider making process and one of their big things is that cider, at least their cider, needs to have a very long pour so the bubbles release and you get the full effervescence. They started out showing us how to properly pour their cider from the bottle into a glass but because there was a real learning curve here, only water was used. Six of our group volunteered, including Beth and Howard, where they had to hold the bottle over their heads and pour it into glasses held waist high without spilling it. You can see Beth and one of the other women have the bottle in the right position, but not all of it is ending up in the glass. After taking us through the cider making process, they offered tastes directly from one of the very large stainless-steel tanks. I am a big fan of English Hard Cider and I found this cider very light and fruity, so I was not a big fan. You can see the person from the cidery filling a glass for Beth with the glass held knee high and about a 4-foot stream shooting out of the tank into the glass. He did spill a few drops. We ended up in a room with big wooden barrels where we could pour our own glasses, again with a long stream shooting out of the barrel. I claimed IR status for the day with my stomach bug, so I did not try it. Beth did and they had a cylinder there that you could hold your glass over that would catch most of the stream that missed your glass. This became very important for Beth when she could not get the knob on the barrel to close and stop the stream and she had to yell for help. While I was not impressed with their cider, they did make it a fun and educational experience to learn about what they are doing.
From the cidery we went to the village of Santillana del Mar. Antonio took us to the center of the village and gave us an introduction and suggested places we might want to see, and we had about 2 hours to explore the village and have some lunch. This is considered one of Spain’s prettiest villages and it is a Spanish National Landmark as it is one of the most perfectly preserved villages from the 15th – 17th centuries in Europe. Three of the many pictures we took of the town are here with their church below.
We found a small street café where we could have an American sized lunch instead of the main meal of the day. I had a craving for chicken soup to settle my unhappy stomach but expected I would have to find some alternative in this small café. But they had a large crock of delicious chicken soup that was perfect for me. Beth had a nice salad and a lovely omelet. Yes, I even drank water with my soup, not wine, to make my stomach feel better.
Here on the all is one of the signs pointing the way for pilgrims on the Camino Real. There is no one pathway to Santiago De Compostela. Pilgrims take hundreds of different routes through small towns like Santillana del Mar and/or down dirt roads past vineyards like the picture is the post for the prior day shows.
The bus then took us to the city of Bilbao in the Basque Country. We were staying in the Silken Gran Hotel Domaine which is a beautiful premium hotel and we were there for three nights. The hotel is right across the street from the Guggenheim Museum which we visited the next day.
After checking in and unpacking we walked around the museum at night and took some great pictures of it, a few of which are below. The huge topiary shown in full size and then close up is all live flowers. The giant spider outside the museum geta a lot of attention and is at it’s most threatening at night I think.
We then went to the lobby lounge of the hotel for dinner. I just had a salad and Beth had one of her favorites, a Club Sandwich. I was feeling up to having some wine by this time. We had a very big day scheduled the next say including a guided tour of the Guggenheim Museum and lunch at a Michelin One Star restaurant so I was hoping I would feel better by then.
When the bus stopped for us to visit the Casar du Burbia vineyard in Bierzo, we were a little surprised. We were on a small two lane road, that became a one lane road when our bus drove down it, and there were no winery buildings anywhere in sight. When we got off the bus we were led to the truck shown in the picture and told to climb up and hold onto the ropes. A couple of tour participants would have had great difficulty climbing up into the truck so there was a car following the truck that they could ride in. We then drove up into the hills on smaller and smaller roads until we stopped at a vineyard. Along the way we passed several hikers on their pilgrimage to Santiago de Compostela.
We climbed off the truck and went into the vineyard where our host talked about their different vineyards. The standard for most vineyards around the world is grape vines planted in a row with the branches of the vine trained along wires as shown in the big picture below. The Spaniards call this vineyard style Espaldera. Howard had told us that there are two other approaches to how a vineyard is planted in Spain and here we saw the second one, which was next to one using the wires that we were very familiar with. This style is called En Vaso and each vine is trimmed to stand on its own, like a rosebush, and this is shown in the picture on the right. Because wine making in Spain goes back many centuries, this was the approach that was originally used before wires were available and used to train the vines. Many of the vineyards that still use the En Vaso style, do so because it has been a long tradition at the vineyard. There is a third style called Pergola which is shown in the picture on the right. I will talk about why this style is used in the post for Sunday the 25th when we visited Bodega Katxina where I took the picture below the other two.
As I mentioned in an earlier post, one of the discussions that we had at most of the vineyards was what yield they want to harvest from their different vineyards. For many of the vineyards used to make their top wines, the vines were pruned to yield 12,000 liters/hectare, well below the maximum of 20,000 liters/hectare allowed by most of the D.O.s. For this first En Vaso vineyard that we visited they were very proud that they managed it to produce only 8,000 liters/hectare. The more the vines are pruned to produce fewer grapes, the more flavor each of those grapes will have and that generally means wines with more flavor. But if you compare the middle and upper pictures you will see that the Espaldera vines on the wires are able to be planted closer together while the En Vaso vines have to stand on their own and are therefore planted further apart. IMHO pruning each vine to produce fewer grapes yields move flavor in each grape but having fewer vines per hectare would not have as much impact. If the En Vaso vineyards were planted with he vines as close together as the ones are in the Espaldera vineyards, they would produce more than 8,000 liters/hectare. However, it was very apparent that this topic has high emotion associated with it and those that had En Vaso vineyards felt strongly they were producing very superior grapes. I therefore chose not to ask about the number of vines per hectare any place we visited that had En Vaso vineyards.
We tasted the Godella and the Mencia grapes from a number of vines and then got back in the truck which took us back to the bus and that drove us to the Burbia winery. It was about 11 AM when we got there and they first took us through the winery which was in production and showed us how they punched down their red wines by hand to keep the skins in contact with the juice to pull all the flavors out. We laughed at seeing the John Deere tractors but they were the standard at every vineyard where we saw their tractors. Our hots had set out a lovely long table in the shade with a wonderful spread of charcuterie, bread, and cheeses as shown in the picture. We know that we were going a restaurant specializing in great steaks for lunch in a couple of hours, but the spread was so good we ate too much along with the delicious wines we tasted.
The first two wines that they took us through were Godella. Their standard 2020 Godella has a retail price in the US of $15 and we loved it. They also do an oaked 2019 Godella that has Barrica on the label. It has a retail price of $22. Some of the people really preferred that wine but I liked the unoaked better and have purchased some for my cellar. We were then introduced to their wines made from the red Mencia grape and Beth and I quickly fell in love with it. Mencia is to Tempranillo, the red wine Spain is famous for, as Cab Franc is to Cabernet Sauvignon, softer and rounder with less tannin but great flavor. Their basic Mancia has a retail price of $15 with cherry, blueberry, and floral aromas with polished tannins and long bright mineral finish. I apologize that I did not capture a picture of that bottle. Then we had the 2019 Hombros Mencia which has a retail price of $20. This was aged longer than the introductory Mencia and is very worth that price but unfortunately seems to be harder to find in the US than their other wines. We finished up with the 2016 Tebiada Mencia which has a retail price of $25. It had several years of aging and was juicy with a medium long finish. The dry, medium body had black cherry, violet, blackberry, blueberry, plum, oak and granite flavors and aromas. It was my favorite wine of the day. The pictures of these four wines may help you find them. I highly recommend all of them.
This was just a wonderful tasting.
They poured us all a nice taste and talked about each of the wines. In addition to the taste that they poured, they left bottles of it on the table if we wanted more. We were sitting outside with great weather and that delicious food. The charcuterie plate had Iberico ham or course but also beef and tuna cured int he same way as the ham.
We then took a short bus ride to the town of Ponferrada and had lunch at the Venecia Restaurant which was included in our tour price. Their specialty is steaks from all over the world and we had a lovely grass-fed steak from Argentina with fries as shown in the picture. Spanish food is delicious but having a change of pace to a premium steak and fries was very enjoyable. Lunch was accompanied with another Mencia wine which is shown in the picture. It was a 2021 so no aging but very nice with the steak. I do not know if this wine is available in the US. Lunch started about 3 PM which is typical in Spain.
We then had an hour bus ride back to the Conde del Luna in Leon and were able to visit the Cathedral there which has an astounding display of stained glass from the 13th century. I forced my self to only include one picture of the stained glass which gives just a hint of the why this is considered one of the most exquisite Cathedrals in Spain.
Based on all of the food we enjoyed at the winery and then our delicious steak lunch, we did not feel the need for any dinner that evening.
Beth and I got married Memorial Day weekend of 1971, a week after she graduated from Georgetown. I was halfway through my MBA up in New York at Columbia. Beth was an Ensign in the Navy Nurse Corps and our sole breadwinner. She had the 7 AM to 3 PM shift on Thanksgiving in 1971 so she suggested that we either get take out or go to a restaurant for our first Thanksgiving dinner together. I responded that we should have a home cooked turkey dinner for our first Thanksgiving together. Beth’s response was she was not going to work a full day and come home and start to cook a turkey at 4 PM. I agreed and suggested that she come home and eat a turkey at 4 PM. If she bought a turkey, I’d cook it.
You can download the recipe I am using now, after 51 years of roasting over 70 turkeys or read the blog and decide if you want the recipe and I have the download links again at the end of this blog. The other recipe is for Cranberry Chutney and that is discussed below
Our bible for the kitchen was The Joy of Cooking and Irma had her typical very comprehensive recipe for roasting a turkey for me to follow. When Beth arrived home from work there was a gorgeous golden brown roasted turkey sitting on the table ready to be carved and it was moist and delicious. Beth informed me that she would never roast a turkey and this Thanksgiving will be 52 years where her record remains intact. Our phone in 1971 hung on the wall in the kitchen and did not have any camera capability so we do not have a picture of that first turkey.
My roasting the Thanksgiving turkey has become a family tradition and each of my three children was my Sous Chef for a couple of years to learn my recipe and approach. Since she was 18 months old, my oldest granddaughter, Reese Davis, has been my Sous Chef and and this picture is Reese at 18 months old in 2007 helping to make the stuffing. She also tasted it frequently for quality control. Last year, when she was 15, she took on the lead role and I was her Sous Chef. This year Ray Davis, her youngest brother, age 8, has asked to join the team and learn how to roast a turkey. He really likes cooking at their house and I think he will quickly be a very productive member of the team. “I” and “we” are used somewhat interchangeably in these notes with we representing the team of Reese and I with assistance in some places from Beth.
Over the last 52 years I have continued to use the overall approach from the Joy of Cooking recipe but I have added tweaks and incorporated some lessons learned over those years. This post is to share that accumulated experience with you. There are many approaches to cooking a turkey including deep frying, smoking, wet or dry brining, and spatchcocking. All of them can produce the entrée for a great Thanksgiving dinner. This post will talk about one way of oven roasting a turkey with stuffing/dressing and making the accompanying gravy. My role on Thanksgiving is roasting the turkey and after Beth left the Navy I have left the gravy, side dishes, and desserts to the rest of the family. Each of those topics could be an even longer post, but you will not see a post on that from me. I am however including Beth’s Cranberry Chutney which is very closely related to turkey, and I will also offer some wine suggestions for Thanksgiving dinner.
I use the term stuffing for the seasoned breadcrumb mixture that bakes inside the turkey. Dressing is that same mixture cooked outside of the bird in a baking dish. Our family really loves stuffing/dressing so I do both. That way we have more than will fit inside the bird. Occasional blind tests have shown that no one can consistently tell which bowl is stuffing and which one is dressing but that is our tradition and I continue it. In the interest of typing less I will just say stuffing below but that covers both stuffing and dressing unless one is specifically addressed.
In this post I will talk about the topics below. At the end of the post you will be able to download the recipe if you want to give this approach a try and also the recipe for the Cranberry Chutney.
Overall Approach
Utensils
Thanksgiving Dinner Process
Wine aAccompaniment
Overall Approach to Roasting Turkey
There are three themes that drive my approach to roasting the turkey for Thanksgiving.
The first is that your meal planning should be for at least 5 meals, not just the big Thanksgiving dinner. In addition to the family Thanksgiving Dinner you should be planning an encore full dinner with the leftovers two or three days after Thanksgiving, perhaps for a smaller group, or supplying leftovers for grown children to take to their own home to have their encore turkey dinner. At least one lunch of hot turkey sandwiches should also be planned. The fourth meal recognizes that the stuffing and cranberry are gone by now and is targeting the tiny scraps of turkey meat that are on the cutting board every time you carve some of the turkey. Turkey tacos, or nachos, is a complete break from the other turkey meals and if you save those scraps instead of tolling them out, the meal component is free! The fifth meal is taking the turkey carcass once all the meat is off if it and using it to make a rich stock for turkey soup using the last pieces of turkey meat.
Planning five meals up front lets you purchase the right size bird and gets you the best return on what you pay for that bird. The last two meals are virtually free, and really delicious.
The second theme is related to the first one and it is to get the maximum utility out of every component that you use in making your turkey dinner. When I talk about the prep process below, or Mis en Place, we are going to use onions three different ways and use every part of the onion, including the skin. The same is true for celery where we are using the leaves at the top of the stalk and the white end at the bottom of the stalk that we always throw out. Carrots are used two ways. By knowing how I plan to use each of those ingredients, I can use fewer of them.
The third theme is that the toughest part of cooking a turkey is to have all of it fully cooked and none of it overcooked and dried out. All the poultry that I have cooked as whole birds Duck, Goose, Turkey, or Chicken – present the same challenge. When they sit on a rack in the oven with the breast side up, the breast gets much more heat and cooks faster than the dark meat that the bird is resting on. By the time the thigh meat is fully cooked, at an internal temperature of 165-170°, the breast meat is often overcooked. When the bird has been bred to have huge amounts of breast meat, like a turkey or supermarket chicken, that adds to the difficulty of having all the meat done at the same time.
I do three things to address that issue. How I do all three are discussed under the Thanksgiving Dinner Process below and are easier when using the tools that I discuss under Utensils.
For the first 30 minutes of cooking I have the bird upside down. The legs and thigh are on the top and the breast meat is underneath. That gives the dark meat a head start in the cooking process so it will finish at close to the same time as the breast meat. It does mean that I need to take a very hot roasting pan out of the oven and take a heavy bird that is also very hot by this point and pick it up and flip it over so the breast meat is on top and put it back in the pan. This is not easy. With the right tools that I talk about below and the right approach I have done it about 70 times without dropping the bird on the floor or burning myself. Yes, I also roast turkey sometimes other than at Thanksgiving.
For the first 50-60 minutes I have the oven at 450° and then I turn it down to either 350° or 325°, depending on the size of the bird. Which temperature to use is shown in the recipe that you can download at the end of this post. Starting at the higher temp gets the carcass of the bird hot so the meat closest to the bone starts to cook and the lower temperature for final cooking lets all of the meat get fully cooked.
At 20 minutes after the bird has been rotated to breast side up, I cover the breast of the bird with cheesecloth soaked in unsalted butter or olive oil. The cheesecloth insulates the breast meat so it cooks slower and keeps it from being overcooked by the time the thigh meat is up to 165°. For a long time I basted the cheesecloth covered turkey frequently but I have recently become convinced by a number of postings by chefs I respect that basting does very little to enhance the flavor or add to the moistness because the juices roll off the skin of the bird and have little impact on the meat underneath. But opening the oven door frequently to baste the bird lets a lot of heat escape and lengthens the cooking time which can cause the bird to be overcooked. My bird never came out overcooked but I have stopped basting the turkey.
Useful Utensils
It is very hard to make very good food if you have are working with poor utensils. Beth and I have made the investment to have good quality tools for a home chef. First and foremost, for all cooking, and very much for the Thanksgiving turkey, good quality knives with a sharp edge are mandatory. Over the years Beth and I have found knives from different manufacturers where we liked the weight and balance, the overall feel of the knife, and they have been good tools for years. The knives we have bought most recently are from MadeIn and we really like the quality and price of those knives. I plan to do a blog post on kitchen knives when I finish the posts for our Spanish Winetasting Trip. I use a Make Sharp MK.2 electric knife sharpener to keep a good edge on about a dozen kitchen knives that we use regularly and I can have a very good edge on all of them in about 15 minutes. The first time I used the Make Sharp it was more like 45 minutes but once the knives have gone through several times at the 20° setting, the edge is restored very quickly.
Good pots and pans are also very important, and I have done a couple of blog posts on cast iron and carbon steel fry pans. Our stock pot is the 5 quart Chantal stainless steel pan in the picture. It has nice weight and lets me start with about 4 quarts of water along with all the ingredients and, at the end, reduce that down to about 2 quarts of rich stock. We can also put this pan in the oven which we do when we make the turkey stock. I also use one of the ceramic baking dishes that I also use for lasagna for the dressing. I also use a basic sheet pan in part of the turkey prep.
In addition to these good standard kitchen tools, I have accumulated a set of other tools that really help me with the roast turkey. I use all of them for other recipes as well, but I would not want to do my turkey recipe without these tools that make the job much easier.
Roasting Pan – When I first started roasting the turkey we had a large roasting pan that I used. As our family grew and the size of the bird did as well, we had to get a bigger roasting pan. When the disposable aluminum pans became widely available, I tried them and was an immediate convert. There was no impact on how the bird cooked and cleanup became a much easier and faster job. I now use the one in the picture with the handles and supporting frame. That makes it easier to do the rotation of the bird to breast side up after 30 minutes. For one year we had a very large family group with requests for leftovers that they could take home so we got a very big bird. I used two aluminum pans nestled inside each other to handle that weight but the single pan in the picture with the supporting aluminum frame easily handles an 18 lb. bird .
Roasting Rack – The roasting rack in the picture is used for any of the large birds that I cook, and I have also used it for some large beef roasts. I can turn it upside down and put it on my Kamado grill with slabs of pork ribs in each slot so I can cook about 3x what I could cook if I just lay them down on the grill. I take the roasting pan and this rack out on the deck and liberally spray them with Pam cooking spray. Doing it on the deck does not get the spray over other things in the kitchen. The rack is easy to clean without food caked to it.
Poultry forks – The real key to me rotating the partially cooked bird is these poultry forks. With someone holding the roasting pan and the rack. I can slide one fork in each end of the bird, lift it our of the pan, and rotate it 180 degrees to get the breast side up. Before I got these forks, I was using combinations or tongs and carving forks and the difficult process of rotating the bird earned the nickname “flipping the bird”. Now it is pretty simple, but part of that is having done it multiple times. I find the forks very good for getting any large bird out of a roasting pan and for some large pieces of hot meat like pork shoulder or brisket to get them off the grill to wrap in foil or butcher’s paper. I strongly encourage you to have good quality poultry forks as a kitchen tool. This is an Amazon link to ones for $19 that are very highly rated – https://www.amazon.com/KAYCROWN-Stainless-Lifters-Poultry-Carving/dp/B07B1Z7X9N/ref=sr_1_7?crid=3B63VQDCNYYXW&keywords=poultry+forks&qid=1668354806&sprefix=poultry+forks%2Caps%2C82&sr=8-7
Cheesecloth – Covering the bird with cheesecloth that has been soaked in butter was the reason a total rookie like me hit a home run with my first turkey back in 1971. We have a family member with a dairy allergy so this year I am replacing all the ways in which butter is used in the attached recipe with olive oil. I made that comment several times in the recipe and I hope it is clear that you can make that substitution if needed. TV chef Michael Symon also likes using cheesecloth on his turkey but he soaks it in some different things, bourbon being one of them, and uses it a little differently than I do. I encourage you to check his cookbooks and streaming cooking shows about turkey for some other interesting things that you can do when you cover your roasting turkey with cheesecloth.
Very large bowl for stuffing – Two bags of Pepperidge Farm Stuffing along with the other ingredients takes up a lot of space. You want to move all those ingredients around to evenly mix them. I use this very large plastic tub for that I also put ice in this large tub to keep several bottles of white wine chilled for parties.
Fat separator cup – Liquid fat is lighter than water so it floats to the top. If you are cooking a day ahead, you can put a bowl of stock or pan juices in the refrigerator overnight and the next day the fat will have congealed on the top and is easy to remove. You can even use some kinds of fat like duck fat in other recipes. But when you don’t have the time to let a dish cool and the fat congeal, which is almost always the case when using pan drippings for gravy, then it can be much more difficult to remove the fat. Beth found this fat separator cup years ago and we love it. We pour the liquid into the cup and let it sit for a couple of minutes. The fat will rise to the top. But when I pour the liquid out of this cup, the liquid comes from the bottom, not the top, because the spout opening is at the very bottom of the cup so I can pour out all the juices until just the fat is left. This is a very handy tool. This is an Amazon link to a highly rated 4 cup fat separator for $17 – https://www.amazon.com/OXO-Good-Grips-Cup-Separator/dp/B07V1ZSYVF/ref=sr_1_6?crid=40NUZAT104ZC&keywords=fat+separator&qid=1668355180&sprefix=fat+seper%2Caps%2C102&sr=8-6
Below are 12 steps in my process where I talk about what I do, why I do it, and some lessons learned.
Creating a Timeline for the turkey – The first thing that Reese and I do when she comes over on the Wednesday before Thanksgiving is to create a timeline of everything we need to do and when that needs to happen. The picture shows a sample of that timeline where at the bottom of the page we put the time when Beth wants everyone to sit down at the table. We then put half hour increments up the page for the things that must happen on Thursday and above that half hour increments for what we need to do Wednesday evening (or afternoon if we want). One of the key things this timeline does is identify when key resources like the oven and different burners on the range are being used. Our three children are now married and in their own homes, two of them with children. They now bring the side dishes and dessert each year and they can add any kitchen resources that they need to the timeline so everyone has what they need. One of the key things is knowing what time any oven needs to be preheated so it is at the right temperature when needed. How much time is needed on Thursday to make the stuffing, stuff the bird, sew it up, and cover it with butter or olive oil is a driving factor. Once that process is finished the bird should go right into the oven. It should not sit on the counter for more than 30 minutes after it has been stuffed. If we finish the stuffing process very early, the bird will be out of the oven, rested and ready for carving well before Beth wanted everyone to sit down and the side dishes may not be ready yet. Even worse, if that process takes longer, the bird will not be ready at the scheduled start time. When the turkey goes in the oven, Reese and I quickly review the timeline to see if we need to make any adjustments for next year in that process so we have history to help us budget that time correctly. Some of the things that should be in your timeline include:
Take two sticks of butter out of the refrigerator to soften if you are not using olive oil. It is very important that one half of one stick be very soft to butter the bird before it goes into the oven.
Start assembling the stuffing 2 hours before the turkey should go into the oven.
Preheat the oven to 450⁰ at least 45 minutes before the bird should go into the oven.
Butter the bird 10 minutes before it goes into the oven back side up.
Flip the bird to breast side up 30-40 minutes after the bird goes in based on the size of the bird. Turn the heat down to the final cooking temperature 20 minutes after you have flipped the bird.
Right after you set the oven for the final cooking temperature, cover the turkey with the cheesecloth soaked in butter or olive oil
Halfway through the cooking time, turn the pan 180⁰ in the oven so that if there are hot spots in the oven, they hit different parts of the bird.
30 minutes before the end of the scheduled cook time carefully remove the cheesecloth and baste one time.
If you are making dressing, use the bulb baster to add a full bulb of pan drippings to the pan, cover it with foil, and put in the oven. Let cook for 45 minutes and then remove and put the dressing into a bowl to bring to the table.
Move the bird from the roasting pan to the carving board when you take it out of the oven so the gravy can be made while the bird rests. Let the bird rest for 30 minutes before carving. Clip the stiches and remove the stuffing from both sides and add to a bowl. Then carve the bird when the resting period is over.
Defrosting the turkey – The biggest cause of Thanksgiving disasters has been not properly or fully defrosting frozen turkeys. Unless and until the bird is fully defrosted it cannot go into the oven to start being cooked and that has caused many families to get on the phone and try to find a restaurant reservation on very short notice. Improperly thawing the bird has been the biggest contributor to people getting sick after eating it. Fortunately, we have had neither disaster. The people at Butterball, one of the largest turkey providers, have a very easy and foolproof way of properly defrosting your frozen turkey – Thaw Thursday. The Thursday before Thanksgiving take your bird out of the freezer and put it in your refrigerator. Put Thaw Thursday on your calendar. It will be on November 17, when I first publish this post on my blog in 2022. If the turkey is fully defrosted in a few days, it is fine to stay refrigerated the remaining days until Thanksgiving. If you follow my process you will take it out of the wrapper six days after Thaw Thursday, the day before Thanksgiving, to get the ingredients needed to make the stock and that will be a clear proof that the bird is fully defrosted. After you get what you need for the stock on Wednesday, wrap the bird in plastic wrap and put it back in the refrigerator as soon as you have the stock ingredients to keep it refrigerated until you want to start the roasting process the next day, Thanksgiving. Just feeling the outside of the bird through the plastic and seeing that it does not feel frozen does not tell you if the bird is fully defrosted. Your turkey has likely been hard frozen for some time and the last thing to defrost will be the carcass of the turkey. Thaw Thursday will give the bird time to fully defrost. The bird does NOT need to come to room temperature. It should go into the oven cold.
If you forgot to do Thaw Thursday and your bird is not fully defrosted the folks at Butterball suggest that you submerge it in a large pot of cold water, not hot, for 30 minutes per pound and that will defrost it. If you have an 18 lb. bird and discover it is fully frozen at 10:00 AM on Thanksgiving Day, that would mean that you could not put the bird into the oven to start cooking until 7:00 PM so dinner would be VERY late. But making the stock on Wednesday will let you know if you need to cold water defrost process in plenty of time to still have dinner at a reasonable time on Thanksgiving.
If you have questions about roasting your turkey or need help with a problem, I will be keeping an eye on my blog up until lunch time on Wednesday, the day before Thanksgiving. At that time I move into Sous Chef mode with Reese and Ray and will not be paying much attention to the blog. But Butterball has an 800 number staffed with very qualified people available 24 x 7 to help you – 1-800-BUTTERBALL.
Handling raw turkey – wash your hands EVERY time you finish a step in the prep cycle where you touch the bird. Take the bird out of the wrapper in the sink so any juices go right down the drain. Remove the neck and bag of internal organs and reserve for the stock pot. The neck may still have ice crystals even if the bird itself is fully defrosted. RTake the bird out of the wrapper in the sink so any juices go right down the drain. You should NOT rinse any poultry products before cooking. That process splatters raw juices all over and can create a serious risk of infection. The poultry will be cooked to a temperature well above what is necessary to kill all bacteria so rinsing it first does no good and can spread salmonella instead of preventing it. This has been well documented by respected chefs on a number of cooking shows.
Mis en Place – a French term for getting all the prep work done on time, in an organized manner so you have everything you need when you need it for your cooking. Really a good idea. We do our Mis en Place on Wednesday afternoon, or sometimes after dinner on Wednesday. We need all the ingredients prepped for the stock pot, the stuffing/dressing, and the roasting pan. Two of those ingredients are used in all three – onion and celery – so we start with them and then do the carrots which are used in the stock pot and the roasting pan but not in the stuffing. The last thing we do is take the turkey out of the package to get the things we need for the stock pot. The above picture shows the bags for stuffing and roasting pan about to go in the refrigerator overnight.
Onions – We need finely chopped onions for the stuffing/dressing and we need big chunks of onion for the roasting pan. Any part of the onion not used for either of those can go in the stock pot and that includes the skin and outer layers of the onion. They can add color and a lot of flavors to the stock, and it is strained at the end so none of those things are eaten, they just add their flavor to the stock. We prep 2 bags of stuffing, so we use three large (very) yellow onions. If you use Vidalia or sweet onions you well be less likely to be crying from all of the chopped onions 😊. We cut off the head and the tail or each onion and put that on a sheet pan to go into the stock pot. We peel the onion including the two outer layers under the skin and add that to the sheet pan for the stock. We then quarter two of the onions and put them through the food processor 2 or 3 pieces at a time to finely chop them using the primary metal blade. Pulse the food processor to get the pieces finally chopped. Put them into a measuring cup to check the amount. 1 cup of large chunks will not make 1 cup of finally chopped vegetables since the large chunks have lots of empty space between them. If you do not have a food processor you will need to do this by hand, and it should be a fine chop. I plan to do a blog post with a video on chopping an onion but that will likely not happen until early in 2023. You will need 1 cup of finely chopped onion for each 16 oz bag of stuffing you are using. If you take a 2-cup measure and add the chopped onion to that cup you can stop when you have the amount of onion that you need, one cup or two. Put the chopped onion in a plastic bag marked Stuffing. We then cut the third onion into eight wedges and take out the innermost small layers and add them to the sheet pan for the stock. We put the eight large segments in a plastic bag marked Roasting Pan. Those two bags should go in a larger plastic bag to control the onion smell and then into the refrigerator. Any quarter pieces of the first two onions that were not needed to be chopped to get the amount you need you put on the sheet pan for the stock pot. If two onions don’t give you the number of cups of finely chopped onion you need, use a 4th onion with the skins and head and tail added to the stock pot pile on the sheet pan.
Celery – After rinsing off the celery we cut off the white section at the bottom where it was linked to the base and any celery flowers at the top for each stalk that will be used. Those go on the sheet pan for the stock pot. For each bag of stuffing we are using we cut three stalks of celery in half lengthwise and then each strip into 2” pieces. We put about 6 pieces at a time in the food processor to be finely chopped and again put the chopped pieces into a 2-cup measure until we have the number of cups needed for the stuffing. Finely chop by hand if you don’t have a food processor. Use enough stalks until you have the number of cups that you need based on the number of bags of stuffing you are making. We then take one more stalk and cut that in 3” long pieces and add those to the bag marked Roasting Pan. If we don’t have at least a cup of celery pieces for the stock pot, I cut up one more stalk in 2” pieces and add that to the sheet pan.
Carrots – Don’t peel the carrots. Cut off the top and bottom of two large carrots and add to the sheet pan for the stock pot. Cut both carrots into pieces 2” long. Add the pieces for one of the carrots to the bag for Roasting Pan and close that bag up. All the bags can now go into the refrigerator. Add the pieces from the other carrot to the sheet pan for the stock pot.
Turkey – Put the neck on a cutting board and with a cleaver cut it into sections 1 – 1 ½” long. Cut the heart into two pieces and the other organs into large pieces as needed. If there are any large clumps of fat around either opening that you can remove easily with a paring knife and not cut the skin, add that fat to the stock pot. Cut off the flat end piece of each wing and add that to the sheet pan. These pieces will add the turkey flavor to the stock. If your turkey did not come with the neck and gizzards and/or you have people who really like to eat that flat end of the wing, even thought is has almost no meat, you will need to purchase some turkey parts for the stock pot. You can ask the people at the meat counter of your supermarket if they have any turkey necks you can purchase. If not purchase a Drumstick, uncooked, and cut the meat off it in large pieces and put the bone with the chunks of meat into the stock pot.
Making Turkey Stock – I make about two quarts of rich turkey stock each time. The attached recipe that you can download at the end of this post has the ingredients and the recipe for making the stock. Most of the stock goes into the gravy with the pan drippings to make a plentiful amount of delicious gravy so there is gravy for leftovers and hot turkey sandwiches. Any stock not used for the gravy is added to the stock made with the turkey carcass for turkey soup. We make the stock on Wednesday and leave it in the electric oven at 225° overnight and then have it back simmering on the stove top Thanksgiving morning. That long cooking at low heat with the pot covered gets all the flavors our of the ingredients and is the basis for a rich stock. As the recipe indicates, the stock is reduced while the turkey is cooking to about 2 quarts of liquid which makes it a rich stock and then strained so it is just a clear liquid. Making stock is easy and it adds great flavor to many dishes. Most of the ingredients in the stock pot are things that you have thrown away in the past. Why not use them to make your gravy really good and have some delicious turkey soup you can freeze and enjoy on some cold winter days? Below are pictures of making the bouquet garni of hers wrapped in cheesecloth that goes into the stock pot.
Stuffing/Dressing – There are lots of opinions about stuffing vs dressing. We have put both in bowls and done a blind taste test several times and the results showed that people could not reliably taste the difference. Because I have made stuffing for 51 years, it is part of our tradition, and we still make it each year. There is sufficient demand that we also make a large pan of dressing. If I had a time machine and could back to 1971 with my lessons learned, I would start the tradition with dressing instead if stuffing as that is a much simpler process. As the recipe indicates, we use a bulb baster to spread some of the turkey stock over the dressing before putting it in the oven to add turkey flavor and possibly also one bulb of pan juices for some additional turkey flavor. We also sauté the onions and celery before putting them in the stuffing mixture. If you are only doing stuffing inside the bird, you don’t need to do that but if you are doing some or all dressing cooked in a pan, those ingredients will often only partially cook when you put the pan in the oven so precooking them for 10-15 minutes is a good idea. If you are doing stuffing, you will need to sew closed the front and back openings where you put the stuffing. The recipe suggests using cooking twine to do that and the Useful Utensils section above has a link to get that cooking twine in time to have it when you are stuffing your bird. If you are doing dressing you want it to have at least 45 minutes to cook in the oven.
Roasting pan – As discussed above, for years now I have used a disposable aluminum roasting pan for my turkeys. It reduces the clean up effort significantly. I prefer the ones that have the aluminum frame and handles. I spray the pan with cooking spray, I use Pam, so less of the pan juices stick to the bottom and I use the large rack mentioned above. I distribute the bag of large chunks of onion, celery, and carrots that was done in Mis en Place in the bottom of the roasting pan as shown in the picture. Those vegetables cook down and add flavor to the pan juices. When the turkey is removed to the carving board to rest I pour the pan juices into the fat separator cup and use some white wine to deglaze the pan and add that to the fat separator cup. At that point the pan can be put aside to cool and then thrown out.
Buttering the bird – just before the bird goes in the oven we cover it with either butter or olive oil. We use olive oil because we have some family members with dietary restrictions for dairy products, but either one is fine. The picture shows Reese seven years ago buttering the turkey after she has sutured both cavities holding stuffing closed. If using butter, it needs to have softened so it spreads easily over the bird so taking a stick of butter out of the refrigerator several hours ahead of cooking will let that happen. Cut that sick in half and use half to butter the turkey and melt half in a small fry pan and soak the cheesecloth in that after you have used it to clean your hands. If using olive oil, about 4 oz each for the bird and for the cheesecloth is good. Butter or oil the bird breast side up in the sheet pan first. Then, with your hands covered with either butter or olive oil, pick up the bird and put it on the rack in the roasting pan breast side down. Breast side down means the wings are on top as shown in the picture. We cook the bird for 30 minutes breast side down to get the dark meat fully cooked at the same time the breast meat is fully cooked. You can then butter or oil the back side being sure you get whichever one you are using all over the bird. Your hands will be covered with residue. Have your sous chef, or a family member standing by with the cheesecloth so you can wipe all of that residue off and then fold up the cheesecloth and put it in the pan to fully absorb the butter or oil in that pan. Again, we are wasting nothing.
Flipping the bird – As mentioned above under Overall Approach, after cooking the bird back side, or wings side, up for 30 minutes (up to 40 minutes for a bird over 20 lbs.), we take it out of the oven and flip it to breast side up. This is not easy and you need to be careful of a hot pan, a hot bird, and very hot pan juices that can spill or splatter. If you have one person holding the pan and rack and good poultry forks, that greatly simplifies this process. Beth and I nicknamed it flipping the bird in the early years when we were figuring out how to do it but with the right tools and having done it a few times, now it no big deal. It does have a very material impact on getting the bird uniformly cooked so all parts a moist and juicy so the learning effort is worthwhile. The first picture shows the bird wings side up out of the oven before being flipped. The second picture shows the bird back in the oven breast side up. You can see in that picture that the skin on the breast side is white while the lower skim you can see through the rack has started to brown. Having the bird back side up at 450° for 30 minutes gets the dark meat cooking and then flipping the bird lets the white meat eventually catch up so both are done at the same time. I keep the oven at 450° for 20 minutes after flipping the bird and then turn it down to the final cooking temperature and put on the cheesecloth as described below.
Cheesecloth – If you go on the Internet and search on Covering Turkey with Cheesecloth you will get a lot of hits with people who love it and are using it in different ways. I cut the cheesecloth large enough so I can unfold it and refold it so that is at least three layers deep and can fully cover the breast side of the bird, including the legs. I use tongs to tuck it inside the wings. Much of the butter or olive oil in the cheese cloth will become part of the pan drippings and add flavor. The cheesecloth provides some insulation from the direct heat of the oven so the breast meat cooks slower, giving the dark meat more time to cook. We remove the cheesecloth 30 minutes before the oven is scheduled to come out of the oven to let the skin on the breast get nice and crispy. Sometimes the cheesecloth will stick to the skin in some spots and start to tear it as you take it off. I use tongs and work from each corner gently pulling up the cheesecloth. If I hit a spot where it is sticking, I go to one of the other corners and work from there. When I have as much loose as possible I go back with a sharp paring knife and scrape along the cheesecloth down to where the sticking point is to free it up. Some people like to wrap the turkey in foil to get that insulation effect. Doing that can cause the turkey to steam in its own juices which is not good in my opinion, and the skin does not get crisp. For those people who like the turkey they get wrapping it in foil, you do you and enjoy your meal. I prefer the above approach, but it is certainly not the only way to make a delicious roast turkey.
Use a thermometer – Any recipe that gives you a cooking time based on the weight of the bird should be viewed only as guideline on when the bird might be properly cooked. You need to cook the turkey to an internal temperature of 165-170° and make sure both the breast meat and the thigh meat are at that temperature. Most often the thigh is the last to get to the needed temperature. If your turkey came with a pop-up thermometer, that is a pretty good indication of when the breast is done but using an instant read digital thermometer to check both the breast and thigh temperatures is highly recommended, especially the thigh temperature. I start checking that when I remove the cheesecloth and do not take the bird out of the oven until the thigh is at that temperature. Any lower temperature than that carries a risk of infection. If I get both breast and thigh at 170° and the little probe in the bird has not popped, I still take it out to rest. Butterball says not using a thermometer is the second biggest cause of problems they get calls on, after not fully defrosting the bird.
Rest the bird before carving – As with any roast, your turkey needs to rest before you carve it. 30 minutes is good to let the juices retreat into the meat instead of pooling on your carving board. You can remove the stuffing from inside the bird during that resting time.
Set aside a small bowl for scraps that come off in the carving process. They are very good for turkey soup or for turkey tacos at a later date.
Roll the bird onto one side and cut down between the thigh and the body and push the leg away from the body so you can sever the leg from the body at the joint to remove the drumstick and thigh. Cut off the drumstick at the second joint and put on the serving platter. Slice off the dark meat from the thigh and add to the serving platter and cut as many slices of dark meat as you can from that side of the back of the turkey and add them to the platter. Roll the bird back upright and remove the wing by pressing the wing tip down and cutting the wing off from the body. The picture is a page from The Art of Carving, a very good book published by House and Garden that now sadly appears to be out of print. It shows you how to carve the breast effectively. The last picture about carving down at an angle is key to carve across the grain so the slices stay together. As you get the wide part of the breast, carve alternately from the back of the breast and the front of the breast, still at an angle to have medium size slices. When you have gotten as much meat as you can from that first side, determine If that gives you sufficient meat for the Thanksgiving meal. If so, you can stop there and take the other meat off the carcass after dinner or the next day. If you think you need more meat for the Thanksgiving meal, repeat the process for either the breast or the dark meat, or both. Slicing the 2nd breast later will keep it moister and take-home packages can be in larger pieces of breast that can be sliced the next day. Pieces of crispy skin that come off during the carving can go on one end of the serving platter.
Gravy
Gravy is a very important part of a great Thanksgiving meal. It needs to have color and good turkey flavor. The recipe you can download uses a combination of the pan juices and the stock you made to do that. You should have enough stock to make enough gravy for the encore meal and for the hot turkey sandwiches so consider that when you determine how much stock to add to the gravy pot. Beth has been the gravy master for the 51 years and the recipe there is from her. It is more of a process than a recipe, taking incremental steps to get the right amount of gravy and the thickness your family likes. Our family prefers gravy that is pretty thin and easily pours instead of needing to be spooned out, but you can add more roux to get whatever thickness you want. If you want to chop the giblets and add them to the gravy, you should remove them when you strain the stock. They are fully cooked and can be chopped and then added to the gravy when you have the quantity and thickness that you want. Not everyone likes chunks of giblets in their gravy so you may want to survey the people you are feeding to get their preference before you make the gravy.
Cranberry Chutney
Cranberry is the other traditional accompaniment to turkey. Beth’s mother had a recipe for a cranberry chutney that was a very delicious alternative to the cans of cranberry from the store. That very simple recipe can be downloaded here, and it can be made several days ahead to reduce the amount of work that needs to be done on Thanksgiving. We also have cans of cranberry jelly for the grandkids who are not ready to try the cranberry chutney yet.
Since this blog is about wine as well as food, I will make some wine suggestions here. We are not addressing the Travel aspect of the blog in this post. We normally think of white wine with poultry and that is good, but there are also alternatives that match well with turkey.
Before getting into recommendations, I will share three lessons we learned in our recent three week wine tasting trip to Spain.
We drink our white wines WAY too cold. Most refrigerators chill wines to around 45° and that shuts down much of the flavor of the wine. People who think white wine just tastes bland are generally surprised when they drink white wines that are about 60°. I strongly encourage you to take the white wine out of the refrigerator 30-45 minutes before you plan to serve it, open it, and let it sit on the counter. You will be very pleasantly surprised at the flavors you did not know were there.
We drink our red wines too warm. Red wines are crafted with the intent that they will be drunk at 65-68°. When they are warmer than that, they lose some of their lovely flavors. I now put my reds in the refrigerator 30-45 minutes before serving. At 68° they have just a little chill to the taste but they are not cold. I am finding even simple inexpensive red table wines have more flavor when I drink them at 68°.
At one of the first vineyards that we visited and were tasting wine at 3 PM, I asked them when did they open the wines? I was very surprised when the response was ”When we got here this morning”. I asked the same question at several other vineyards and the answer was always around 8:00 to 9:00 AM. So much for letting wines breathe for an hour! I have done this at home now and a $15 wine that I opened at 8:30 AM, put into chill at 5:30 PM, and started drinking at 6:00 was a huge hit.
If your family is open to trying a white wine that is not your standard house white, there are some good alternatives to consider:
Pinot Gris – there is an earlier post on this blog on Pinot Gris so I will quickly summarize this grape and encourage you to check out that post for more information. Pinot Gris is the French name for the grape that is called Pinot Grigio in Italy. The Italians use it for simple, inexpensive table wine. The French showed that it can make a dry, delicious, full bodied white wine that pairs very well with food. A number of other countries have followed the French approach and are making very good Pinot Gris. I am a big fan of Pinot Gris from the Willamette Valley in Oregon and more on that below.
Chenin Blanc – South African Chenin Blanc can be very good with turkey.
Godello – If you want to try a white wine just getting some traction in the US, this wine from Spain, pronounced Go DAY ho, is a very good food wine and would pair very well with turkey. Most sell for around $15 a bottle in retail stores. Casar De Burbia is one I would recommend.
My family has some very strong red wine lovers. I think Pinot Noir with its medium body pairs very well with any poultry, and turkey in particular. We will be enjoying the Willamette Valley Vineyards (WVV) Whole Cluster Pinot Noir at this year’s Thanksgiving dinner. It is highly rated by Robert Parker and only $26 from the vineyard website, https://www.wvv.com, if you don’t find it in a local store. Order right away and you can have it for this year’s dinner.
A dry Rose is also a very good wine with turkey. We are big fans of the Rose from Provence, but we recently tried the Whole Cluster Pinot Noir Rose from Willamette Valley Vineyards and really loved it. At the first taste the Pinot Noir flavor came through giving it some very good character but much lighter than the red Pinot Noir mentioned above. During the unique Whole Cluster fermentation process they use, they take some of the juices off early and use them for this Rose and it is delicious and only $25.
Just to make things easy on you, WVV also makes a great Pinot Gris for $18. Consider having three very good wines from the same vineyard for your family and guests to enjoy with their Thanksgiving dinner.
Turkey Soup
There are many very good turkey soup recipes out there, so I am not going to offer one. But when you finish taking all the meat off the turkey bones you have two things sitting on the counter that in past years you probably put in the trash – the turkey carcass and lots of small scraps of meat that were left after carving the roast. If you take that carcass and use the stock pot recipe that is part of the Roast Turkey recipe you can download below, that carcass takes the place of the turkey pieces you used on Wednesday to make the stock for your gravy and will give you several quarts of delicious stock as the base for your soup. Any stock that you did not put in the gravy can also be added for more soup. When you add the onion, celery, and carrots to the stock pot, check the recipe you want to use for your soup and there is a good chance that most if not all three of those ingredients will be used in the soup. You can follow the same process to take the skins, ends, and other pieces that you don’t want in your soup and put them in the stock pot and bag the rest for when you are making the soup, probably the next day. All of those scraps of turkey can go into a bowl or bag and be added to the soup. You have most of what you need for some great soup sitting on the counter, why throw it in the trash?
Beth makes the soup and she bags portions sized for the two of us and freezes them so we can have some nice soup on cold winter days. Some, or all, of the stock can also be frozen to use in future recipes and it will add more flavor then the cans or boxes of chicken stock you buy in the stores and it has no chemical ingredients to give it long shelf life in the supermarket.
I hope these thoughts on roasting a turkey for Thanksgiving, and the recipes that you can download, will help put a meal on the table that your family will want repeated every year. That is what we have enjoyed for many years.
We left the beautiful Parador in Baiona Wednesday morning and had our first visit to a vineyard on our way to Leon, where we stayed the next two nights. That vineyard was Bodegas Do Campo which is in the Ribiero DO. I will cover what DO means and the organizational levels for Spanish wine at the end of this post. Do Campo is a fairly small winery that has been run by the same family for four generations. They own 6 hectares of vineyards and buy grapes from suppliers they have know for years who have an additional 12 hectares. They use the Mencia grape for their red wine and Treixadura, Godello, Torrontes, and Palomino for their white wines. They make more white wine than red wine and we tasted four of their white wines at a luncheon we had with them after the vineyard visit. Unfortunately their wine was not able to attract a following in the US with so many other Spanish vineyards offering very good wine from the same grapes so, to the best of my knowledge, none of their wines are currently available in the US.
This visit to the vineyard was our introduction to Howard having us get much more involved and participating in in the wine making process. We walked through the Treixadura vineyard right outside the winery where the grapes were fully ripe and being harvested. As you can see in the picture above, many of the grapes had gotten to an amber color by that time. While we sampled some of the grapes off the vine, the owner of Do Campo talked about the different vineyards they owned and the ones they bought grapes from. Most of us were not familiar with this grape and we were all commenting on how sweet the grapes were. The owner explained to us that the Treixadura wine is a dry white wine and we would see that over lunch. During fermentation the yeast eats the sugar and produces carbon dioxide, which is vented off into the air, and alcohol so the end product is a nice dry white wine.
He then took us in where the grapes were being pressed and gave us glasses of the “flower”, the freshly pressed grape juice, which was delightfully sweet with natural sugars, not at all like artificially sweetened drinks. Several people wished they could have a glass with breakfast. We were standing next to the machine in the picture with a giant cylinder turning and some residue coming from it into the bin below. He explained this was filtering off anything left in the juice after pressing and held a glass of the juice up next to a small window of the fluid coming from the press into this filtering system. You can see it was dark gold going in with the sediment that was suspended in the juice and light clear yellow after the filtration process.
The juice went from there into big stainless steel tanks for fermenting. He went to one of the tanks that had been filled three days ago and was just beginning to become wine and poured out a pitcher from that tank for us. We could then compare the freshly pressed juice just going in to be fermented with the taste after it had started the fermentation process. This picture shows that pitcher and with two glasses and some grapes. The larger Do Campo glass has the “wine” and the smaller glass to the right has the “flower”. Picture artistically composed by Beth. There is very little difference in appearance between the two glasses, but the “wine” was a little less sweet and starting to have a little more taste after just three days of fermentation. The big tanks have ribbons around them that are used to cool the tanks during the 14 days of the fermentation process. If the wine is going to be blended with other grapes such as Torrontes, that happens at this stage and the final wine is then bottled. They do barrel age one of their white wines, but we did not taste that one. All the ones we tasted were just done in stainless tanks.
Beth and I have been on many vineyard tours in the US and all the major wine producing countries in Europe. Several times we were there when the grapes were ripe and ready for harvest and had a chance to taste the grapes off the vines and then taste wines made from those same vines in earlier years. We found that tasting first the grapes and then the wine really helped us understand what the winemaker’s goal was with those grapes. A few times our guide helped us find very old vines and very young vines and taste the difference in grapes from the old vines. We had a chance to do all of that here but we have never had the chance to be in the middle of the wine production process and able to see, smell, and taste the voyage of the grape from the vine to the bottle. At seven of the other wineries that we visited we were given similar opportunities to get hands on during their production process and see some of the things that their winemaker did to put his stamp on the wine. Everyone had some unique elements.
We have never learned so much about wine in any of the other wine trips we have taken. If you really enjoy wine, I recommend that you seriously consider taking this trip. Howard is planning on doing the trip again in 2023 but is not sure how many years after that he will do it. At our age we all reach the point where we recognize it is time to hang up our spikes and leave the game to younger participants. He is semi-retired from his import business so the opportunity for this unique exposure to great Spanish wine and the wine making process likely has a limited remaining life. I encourage you to each out to Howard at hfriedo@verizon.net and start a dialogue on joining one of his trips while he is still doing them.
We had a short walk downhill from the vineyard to a small inn where we had a private 2-hour luncheon hosted by Bodegas Do Campo. We started with a nice charcuterie board of ham, salami, and cheese with some great bread. We then had Eye Round of Beef with French Fries and finished with three delicious deserts. Four of their white wines accompanied the luncheon and if a bottle was emptied another immediately took its place. The white wines had good body and depth so they were fine with the roast beef.
My favorite was their 2021 Vino do Campo Godello, which won some awards last year. This was Beth and my first exposure to that white grape. We really loved this dry wine with nice body and a little minerality in the flavor. While I can’t get the Do Campo in the US, I have found several other Godellos that are available in the States and are in the $12-20 price range in the store. I am giving each one a try so I can pick the one or two that will be standards in our cellar. This grape was another challenge in Spanish pronunciation. The double l is silent, so it pronounced Go DAY ho. Our favorite Spanish white wine is from the Rueda DO and is made from the Verdejo grape, which is pronounced Ver DAY ho. When said with a correct Spanish accent, and often at a rapid pace, the two sound very similar and I was not always sure which grape a speaker was talking about 😊.
We also had three Treixadura wines that were very good and that was the grape we had followed through the production process. They were the Pazo Carballo (I believe their best white wine), the Vino Do Campo Cosecho, and the Vino do Campo Ribeiro, their vineyard of the field or the wine people would make in the cellar from the vines in their backyard.
We then had a 3-hour drive to the city of Leon. In Leon we stayed at the Conde Luna hotel which is a 5-minute walk to the lovely Cathedral located in the heart of downtown. Beth and I and one of the friends we made on this trip walked up to the Church of San Isidero where they have some lovely mosaics and beautiful illustrated books. The three of us enjoyed a light dinner at a café in the square outside this church.
Lesson #2 – The Organizational Hierarchy of Spanish Wine
If you really know the vineyards of Spain or are looking for a specific wine from a recommended vineyard, then the information on the label is probably not very important to you. If you are like me and learning about Spanish wines, then there is one rule that can really help you improve the chance that a wine you select off the shelf or from a restaurant wine list will be one that you will enjoy. That rule is to buy a wine that has a DO on the label. This “Denominación de Origen” (designation of origin) lets you know that the wine you are considering met a set of standards defined by the leading vineyards in a specific geographic area and therefore is likely of good quality. It may not be to your taste, and any bottle can have a bad cork or have been exposed to too high or too low temperatures in transit into this country – so there are no guarantees. But wines that do not have a DO have not committed to those standards of quality and therefore are a much higher risk.
Spain is divided into 17 Autonomous Communities (AC), which are wine making regions, and they are shown in the map below, which can also be downloaded. In each of those AC’s, wine makers in some of the smaller geographic have banded together and defined a set of standards that a wine must meet in order to put DO on the label, e.g., DO Rias Baixas in the Galicia AC. Each DO has a group of members that monitors compliance with those rules and determines who can put that designation on their label. There are approximately 70 DO’s in Spain. Below are the six AC’s we visited and within them the nine DO’s where we tasted wines. All of the vineyards that we visited were members of the DO for their area.
Madrid – did not visit any vineyards in the Madrid DO
Having a DO defining a fairly small geography lets the standards be set for their terroir. Every DO that we were exposed to has a standard for the yield that can be produced, most commonly 20,000 liters of wine for each hectare of vines. That standard requires that vines be pruned to limit the volume of grapes that they produce.
The taste of the grape is primarily dependent on what nutrients and related trace elements that their root system delivers to the grapes. The root system matures and delivers more elements to the grapes as the vine ages. The root system of each vine delivers X volume of different elements to the grapes on that vine. That is divided up by the number of grapes on that vine. The more grapes, the lower percentage of X that they get and the less flavor the wines made from those grapes will have. If the vines are pruned to produce fewer grapes, they will have a higher percentage of X and bring more flavor to the wine. 20,000 liters per hectare was frequently referenced as the highest yield allowed by the DO covering the winery we were visiting. But every one of those wineries we visited was committed to a much more aggressive pruning for most if not all of their wines to ensure the taste quality they wanted to deliver. 12,000 liters was common and for some wines it was down as low as 8,000 liters.
Asking a winemaker in any country about his yields is a very good way to start a good discussion with them and understand where they are trying to position their wines in the quality/price continuum. It also shows that you can have an intelligent conversation with them about their wine and sometimes that will positively impact the quality and quantity of wines that you get to taste.
Within the Galicia AO the Rias Baixas DO is right on the coast of the Atlantic region while the Riberio DO is more inland, so they have entirely different soil, rainfall, and other conditions. Each DO has standards defined by the growers in that specific geography so they fit the terroir of that area and the grape varietals that are being grown there. I will only buy Spanish Albariño that has DO Rias Baixas on the label.
In short, look for a DO on any bottle of Spanish wine that you are not totally familiar with.
We had a very full day on Tuesday: a boat trip to see the extensive shellfish farming in the Galician estuaries, a wine tasting followed by lunch at a Michelin 1 Star restaurant, a wine tasting back at the hotel that Howard had arranged, and a welcome dinner hosted by Howard.
We took at short ride from our hotel to the town of O Grove where we had a chartered boat for just our group. They took us out into the Ria de Arousa where there are over 2,200 of barges or “Bateas” where they raise enormous amounts of shellfish. I was listening to the captain explain the process and taking pictures of one of the crew on one of the bateas, so I did not take notes so this summary is from memory and I hope reasonably close to correct. Each of the bateas has 420 ropes hanging down into the water 5-10 meters in the water. Each rope can be used to raise mussels, scallops, or oysters. The picture shows one of the crew members on the bateas with a rope for each kind of shellfish. Each is seeded with tiny baby shells and put down in the Ria which is very rich is the ocean plant life that the shellfish thrive on. The rope with the mussels can grow about 20 kilos of mussels on each meter of rope in two years and there are about 300 mussels in the picture below. The scallop and oyster ropes each grow a few dozen full sized shellfish in 3 years. Because of the 2-3 year time required, thousands of bateas are needed so a significant crop can be harvested each year.
We were sitting in groups of six on the top deck of the boat and were then served a platter of very large and very fresh mussels along with a nice bottle of Albariño for each group as shown in the picture. Not surprisingly, the bottle of wine for our group must have had a leak because it was empty very quickly, but a new full bottle rapidly took its place.
With that very nice start to our day the bus then took us to the town of Cambados where Yayo Daporta, a Michelin 1 Star restaurant is located. This is a tiny family run restaurant on the second floor of a building. We started out on the patio where they did a wine tasting for us of the five white wines shown in the picture and then took us inside where we had a delicious meal with these wines accompanying them.
I very much liked the three different Albariños and am researching if any of them are available in the States. The third and fifth bottles in the picture were two other local wines that were also very enjoyable.
The Menu is shown here along with pictures of the first and sixth course they served. As a tasting menu the portions were thankfully small but beautifully presented and delicious. Other than the small sign saying this is a Michelin 1 Star restaurant, you would not be likely to walk into this small restaurant. But it was one of the very best meals we had on this trip and that is a very high bar to clear.
Howard had also arranged a wine tasting for us when we got back to the hotel where we had three very nice Albariños from Quinta de Couselo in the Rias Baixas DO and the Finca Viñoa from the Riberio DO which is 90% from the Treixadura grape with some Albariño, Godella, and Loureiro grapes.
Note: Spanish pronunciations – God has given me many gifts, but languages is not one of them. I believe I am fluent in about 0.8 languages. I apologize for any major errors in this set of blogs on anything related to the Spanish language. In this note I will try to address two pronunciations, one simple, the other a little more difficult. The ñ character adds a “y” sound the word so Albariño is pronounced Al bar EEN yo. The letter “x” is pronounced “sh”. Rias Baixas is pronounced Ree as BY shes and the Treixadura grape is pronounced Tresh a DURA. That is a lot easier than trying to figure out how to ask for that wine if we had to use the American pronunciation of all the letters.
There are five Spanish wines that Beth and I were familiar with and really liked before taking this trip.
Cava – the sparkling wine from the Penedes region outside of Barcelona that is a very strong competitor to French champagne in under $50 price range.
Rioja – the most famous Spanish red wine and we learned we should say La Rioja
Ribero del Duero – my favorite Spanish red wine region
Rueda – IMHO the best white wine from Spain, made from the Verdejo grape
Albariño – one of my two favorite seafood wines, along with Sancerre from France. We got hooked on Albariño about 3 years ago from a special sale that Calvert Woodley, one of the two best wine stores in DC, did on Martin Codax. It was a delicious dry white wine for about $15 and I could almost smell the salt air from the vineyards right on the Atlantic coast just north of Portugal. Martin Codax is a Co-Op that buys the Albariño grapes from many small farmers and makes a very nice wine from the mix of grapes from many small vineyards in the Rias Baixas DO. I will talk more about DO’s in an upcoming post but I strongly recommend only getting Albariños that show on the label that they are from the Rias Baixas DO. A small step up is La Caña which is owned and operated by Jorge Ordoñez. It consistently gets 90-92 points from the reviewers and is about $18 and is now our house Albariño. Several of the Albariños that we had were is another step up in quality and I am looking at which ones are available in the States.
In Spain a glass of house Albariño is about 2-3€ and generally comes with a complementary bowl of potato ships or nuts. In a Tapas restaurant a bottle of Albariño is generally in the 8-12€ range, more in the high-end restaurants.
The three wines from Quinta de Couselo and the Finca Viña were very good and all are available in the US.
The Barbuntin is a lighter wine made from younger vines, generally less than 30 years old. It sells in the $12-15 range. I like the richer Albariños and would take either the Martin Codax or the La Caña over this one.
Quinta de Couselo Rosal is in the $20 price range, and I found it delightful
Quinta de Couselo Turonia is the best of the Couselo Albariños and fully worth the $24 price that on line retailers in the US have it for.
Finca Viñoa is carried by both Calvert Woodley and Macarthur and has made me a fan of the Treixadura grape and I now have some in my cellar. It is very dry with stone fruit flavors with some minerality that gives it some nice depth and structure. One other white and one new red were the other discovers that we really enjoyed and are working to get them in our cellar and I will cover both in upcoming posts.
After the wine tasting Howard had a welcome dinner for us in the hotel with some lovely scallops and a delicious dessert. We certainly did not need any more food or wine, but that did not stop us.
This was a remarkable day as shown below in a summary.
12 different wines tasted, all much more than a taste with two very knowledgeable people leading each of the two guided tastings, one with five wines and one with four wines. Seven of the 12 wines were different Albariños, giving us a great indication how good this wine is.
A lovely breakfast at the hotel including a sparkling wine for Mimosas
A tasing lunch at a Michelin 1 star restaurant
A very nice welcome dinner hosted by Howard
A second night at a beautiful and very comfortable Parador
This turned out to be good basic training for what Howard had in store for us as the trip progressed.
Monday Sept 19 was our first full day as part of Howard’s group of 21 people plus Antonio our guide, Ramon our driver, and Howard. We stayed in the NH Collection Santiago de Compostela Hotel only one night, the only part of Howard’s trip where we were not in a hotel at least two nights and two times for three nights which significantly reduced the unpacking and packing. Antonio’s routine at the end of each day was the same, with some changes to the specific times based on our schedule. Only one morning was fairly early, the most common was “Wake Up call at 8:00, Breakfast is served starting at 7:00, Bags outside your room at 8:45, be in the Bus at 9:30.” We did not have to get our bags down to the bus any time and when we arrived at each hotel our bags were brought to our room. All the gratuities for that were included in the package price that we had paid Howard.
We spent Monday morning in Santiago getting a guided tour through the Cathedral with a local guide. Antonio had head sets for each of us linked to the guide’s set so only we could hear what she said and we could be a ways away from the group to take a picture and still hear her. This picture is our group with her outside the Cathedral. Having explored it on our own the prior afternoon, with some information Beth had pulled from some guide books, we had a good foundation and enjoyed the guide drilling down to the next level and talking about the town around the Cathedral. Being able to ask her questions made it much more enjoyable than the self-guided audio tours that are becoming increasingly popular. We enjoyed a glass of wine with Howard after that tour and then boarded our bus for our first group luncheon.
Our group tour of the Cathedral
The afternoon of that first day was supposed to be our first vineyard tour at Pazo de Villarei in Rias Baixas, a producer of great Albariño. A week before the trip started Howard got a call from the vineyard that they had experienced a severe drought and had a very early limited harvest and could not accommodate our group this year. Howard was able to quickly arrange a wonderful luncheon for us in the town of Vigo which sits on a bay just off the ocean, at the Calle de las Ostras restaurant. We started with a freshly shucked oyster for each of us that was briny and delicious. Then the platter of food shown in the picture showed up and there was one of these platter for every two people! It included: Strong Crab, 2 blue crabs like we get in the Chesapeake, scallops, langoustine, at least a dozen shrimp, mussels, razon clams, a fish filet (sorry, I forget what fish it was), and a bowl with long thin black shells. Those were barnacles where you broke open the shell and sucked out the strip of barnacle. I tried one and can check off barnacle as tried it and don’t need to do it again. Beth declined to try one. There was a very nice bottle of white wine on each table of 6 people and when it got low, another one appeared. Our table enjoyed three bottles of the Beiramino from Ribeiro which is made from two grapes we were not familiar with. Palomino and Treixadura. It was a lovely crip white wine but I do not believe it is exported to the US. The price for this meal, wine, tax and tip included, was only €30! I think it would 3X that to get anything close to the quantity and quality of very fresh seafood that we had. I would not expect that the big platter of food for two people is on their standard menu if you walk into the restaurant. I believe it is something that Howard put together with the restaurant owner as a package deal. One of the people on our trip could not eat gluten and I was impressed by every restaurant we went to, and all the vineyards that had food for us while we tasted, being very solicitous in making accommodations for her.
This was our introduction to having our full meal of the day starting sometime between 2:00 and 3:00 each day and running for at least an hour. As noted in the prior post. After a lunch like this you did not even think about food until 8:00 at the earliest and just something light with some wine was plenty.
Gate into the Parador
After that wonderful luncheon we were driven to the lovely old Parador Baiona which is situated on its own peninsula just outside of town. We really loved this hotel and the vistas from the grounds were fantastic as you can see in the picture. Because this Parador was originally a medieval fortress, it is surrounded by walls and this picture is the gate that the bus has to go through to get into and out of the hotel. The first time Howard brought a group to this hotel the bus could not get through this gate and everyone had to walk up the long driveway to the hotel and a cart took multiple trips to get all the bags up to the hotel. The Parador excavated the ground to lower the roadway so busses can now get through and up to the hotel. But we learned just how great a driver Ramon is when we left the next morning and watched all the back and forth turns he had to make to align the bus to get out of that gate.
This part of the post has been edited to move some things that were part of our activity the next day and were included by mistake. My apology for that mistake.
Dinner was on our own that evening but after that lunch, we decided to skip dinner and sit out on the patio of the hotel and enjoyed a little more wine while we got to know a couple of people on the trip.
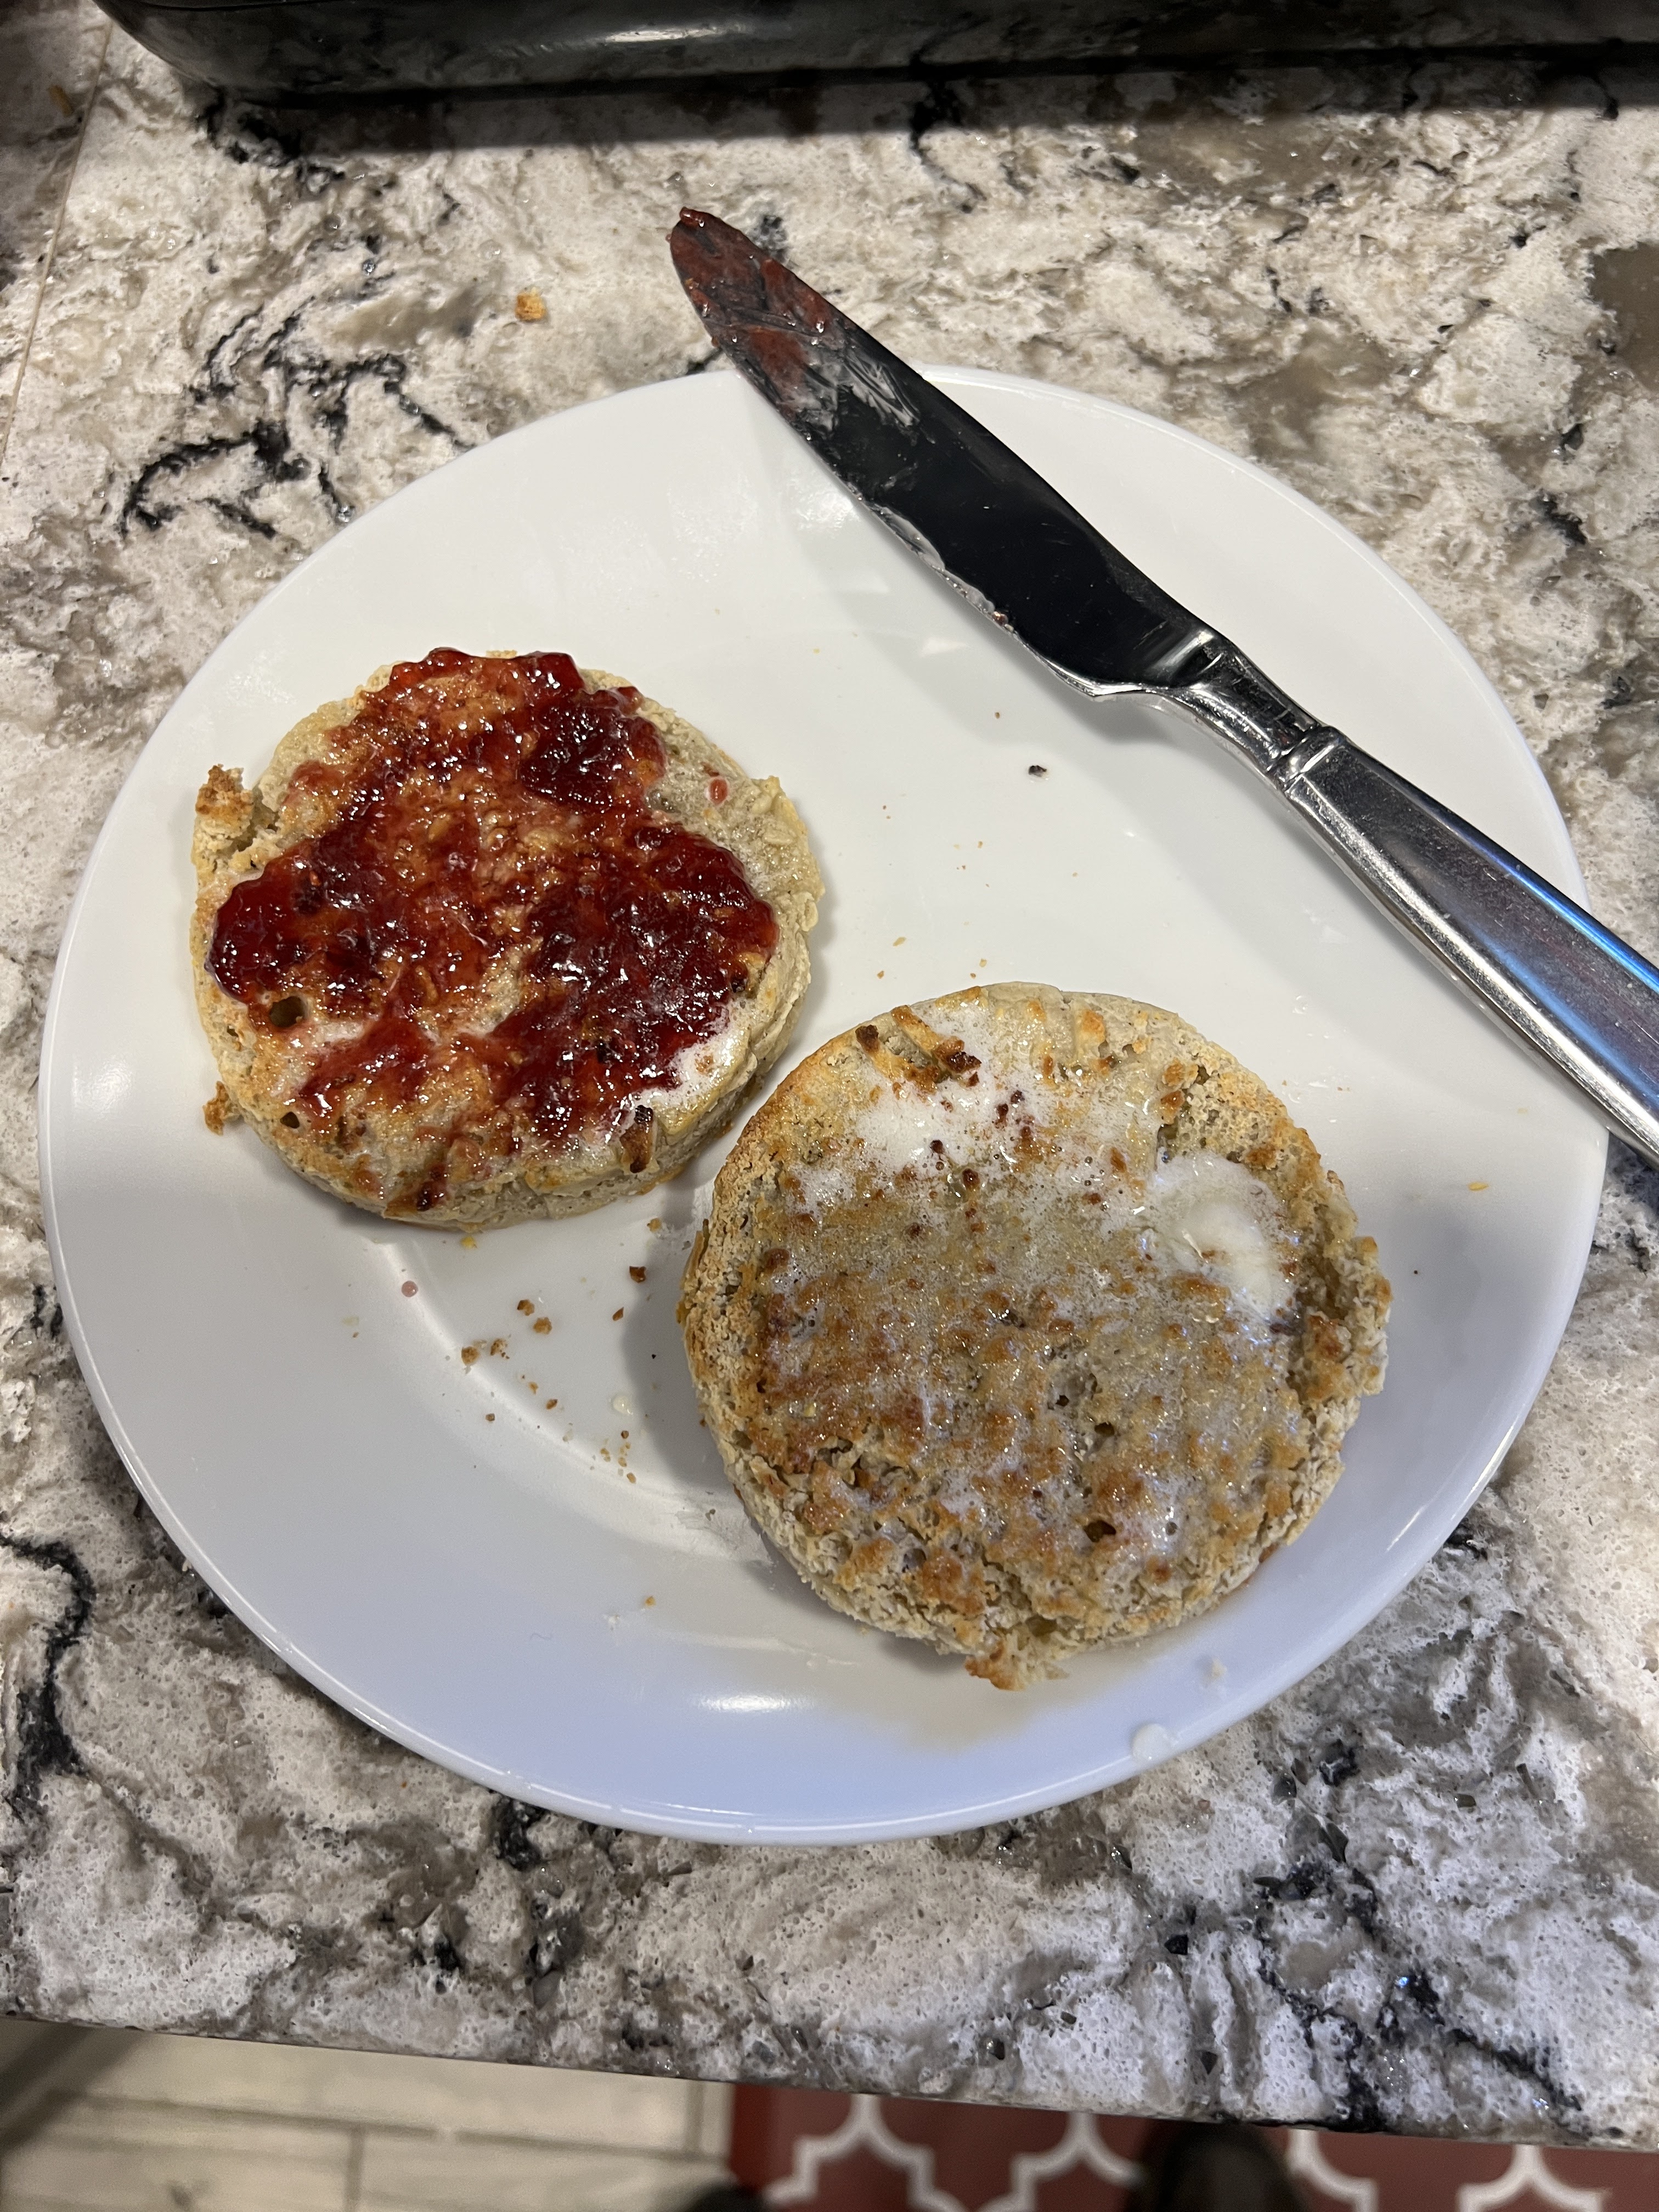
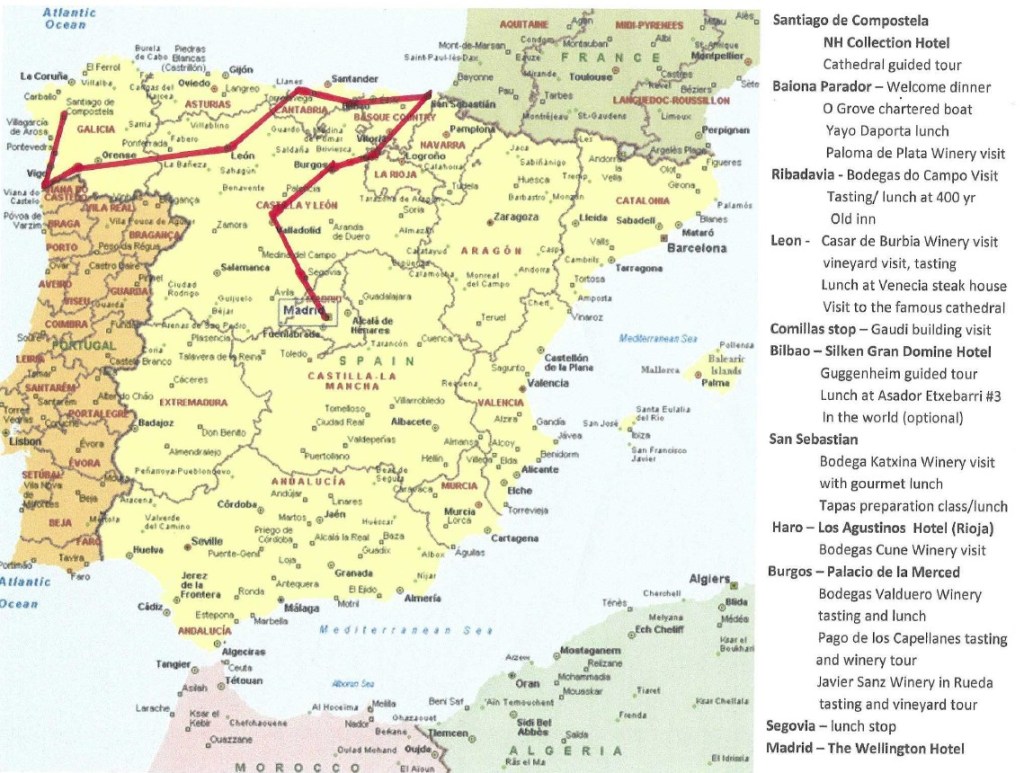


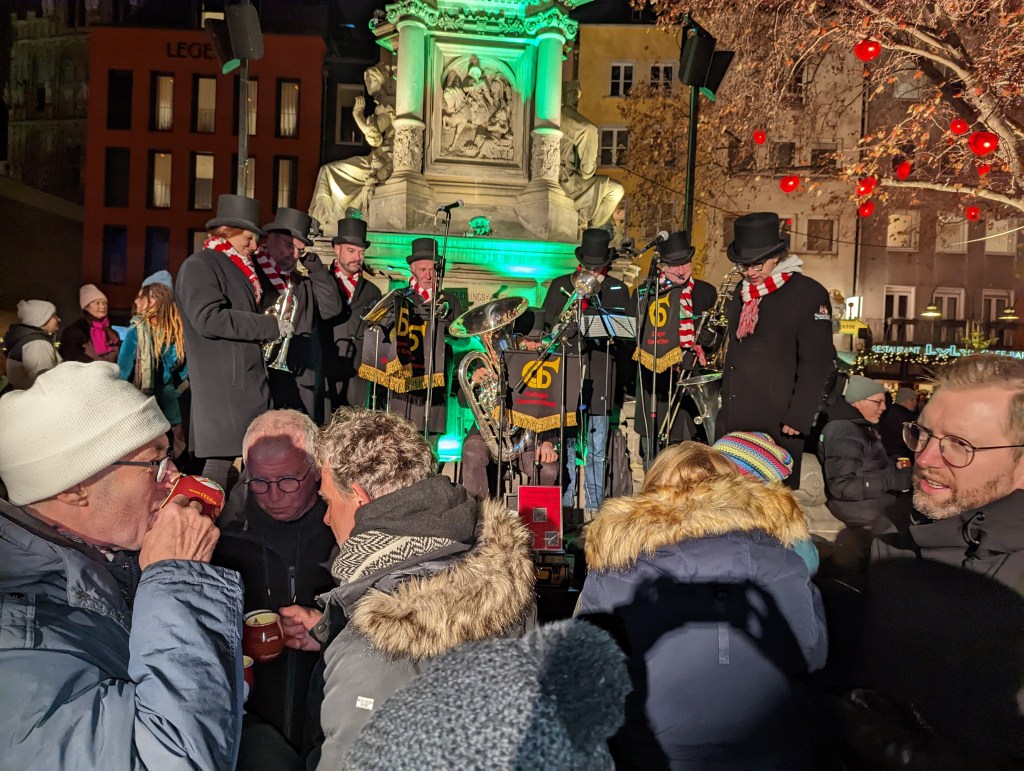

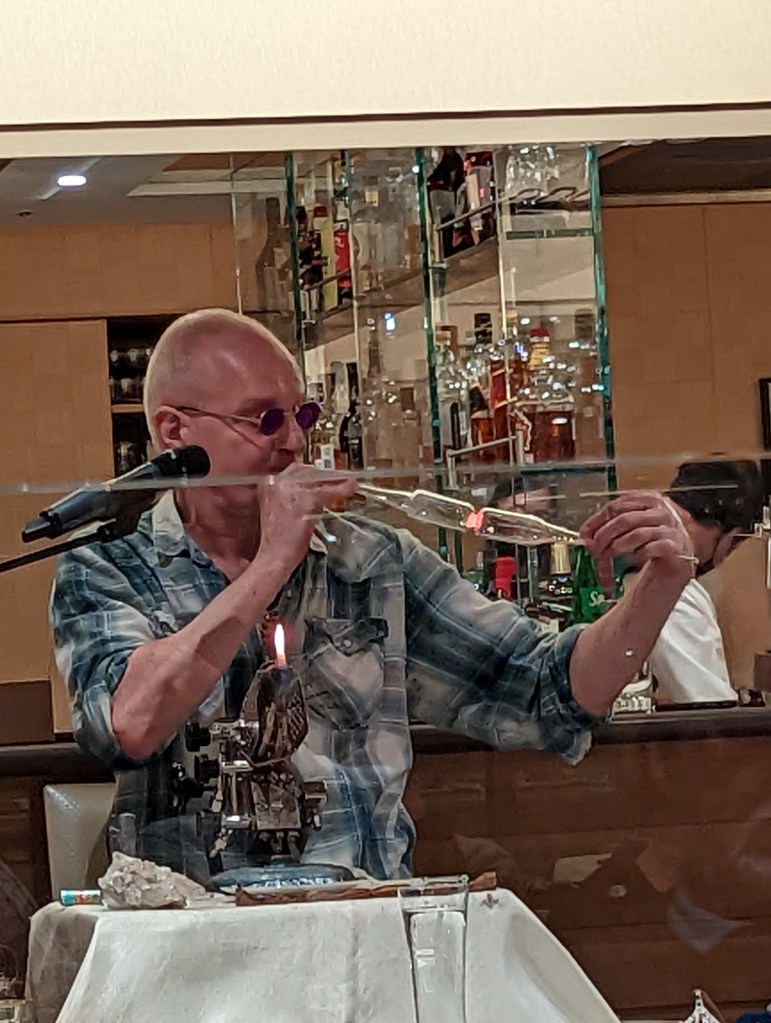
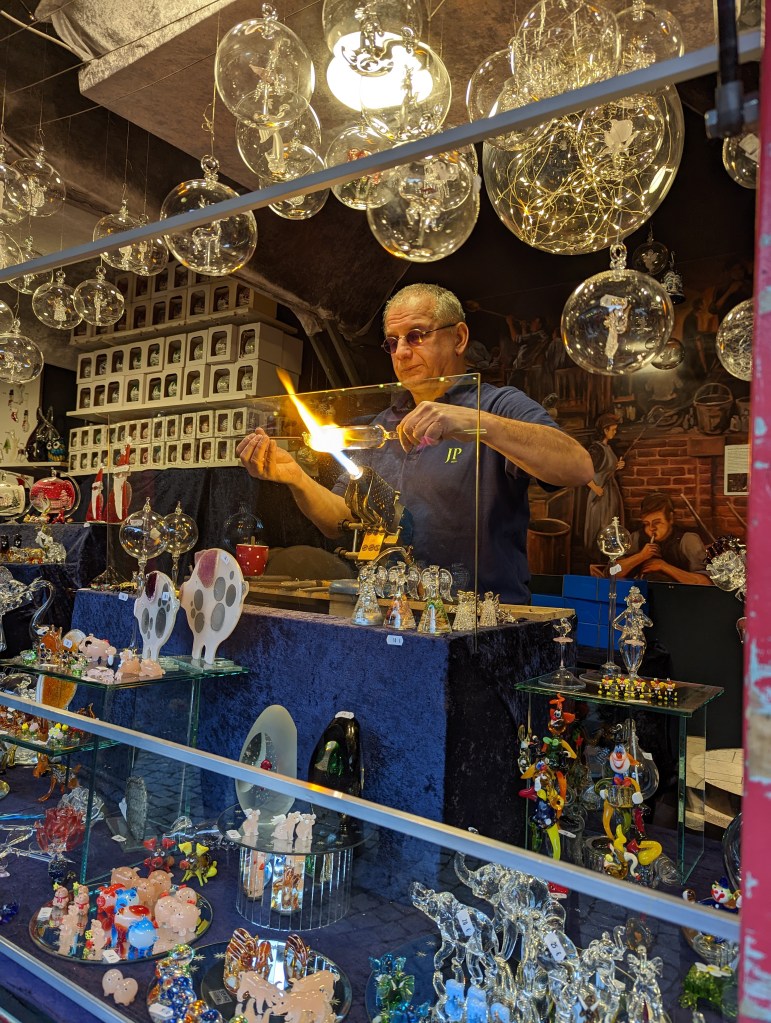
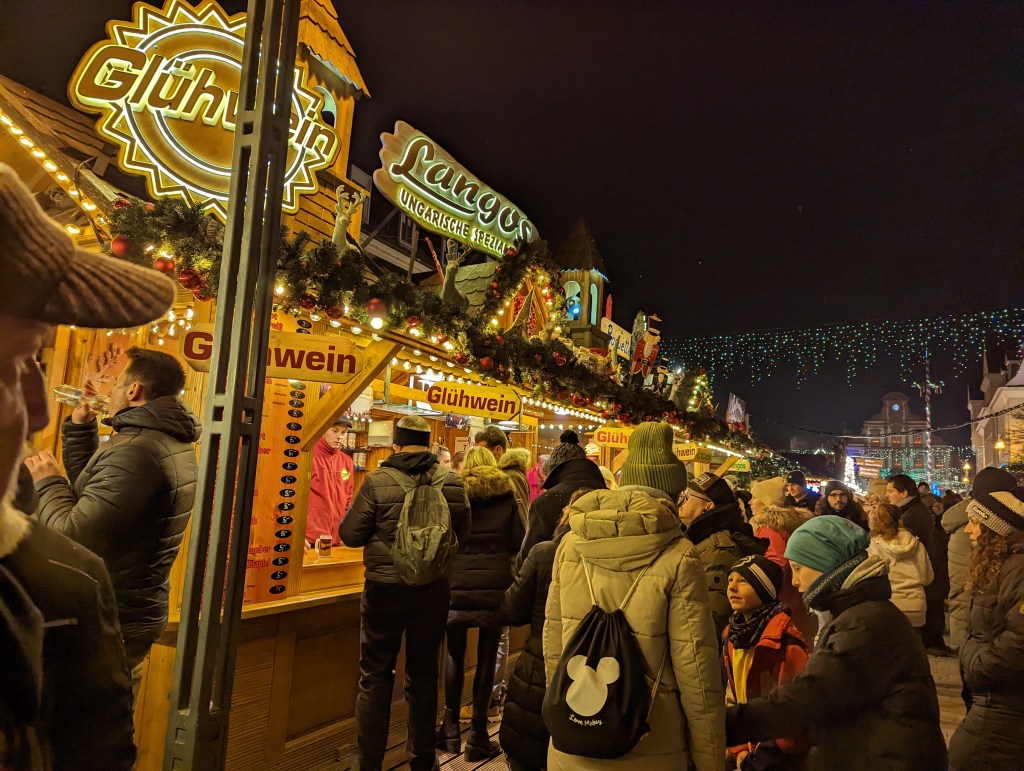
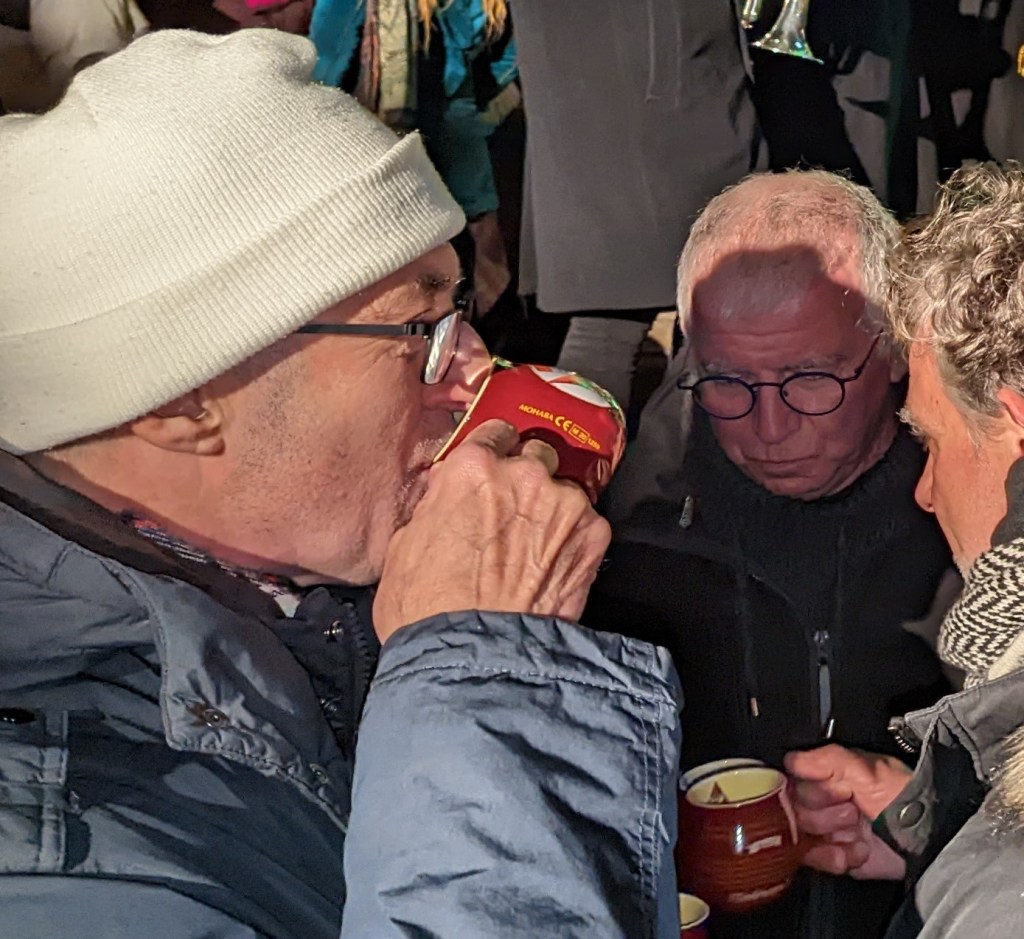
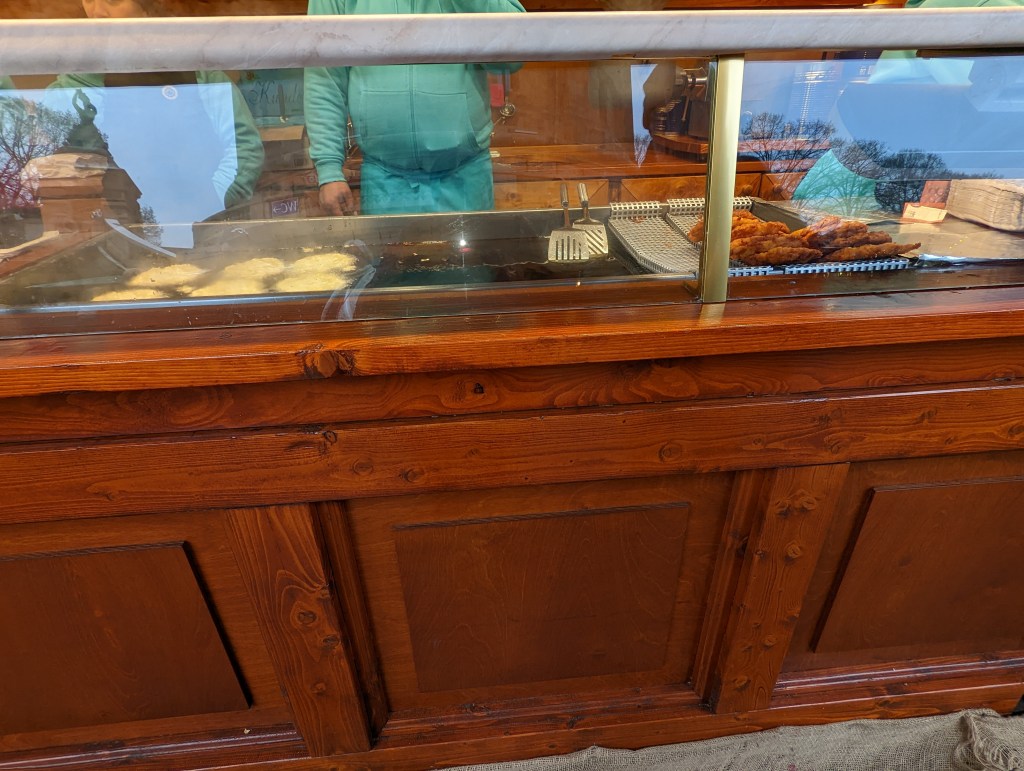


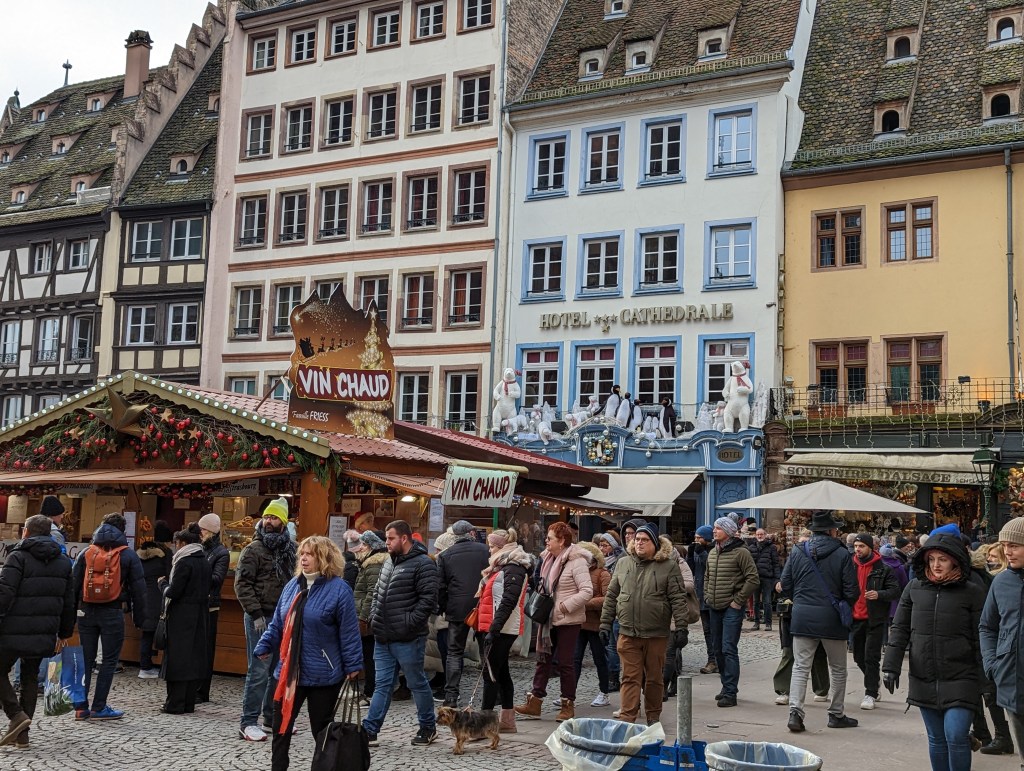


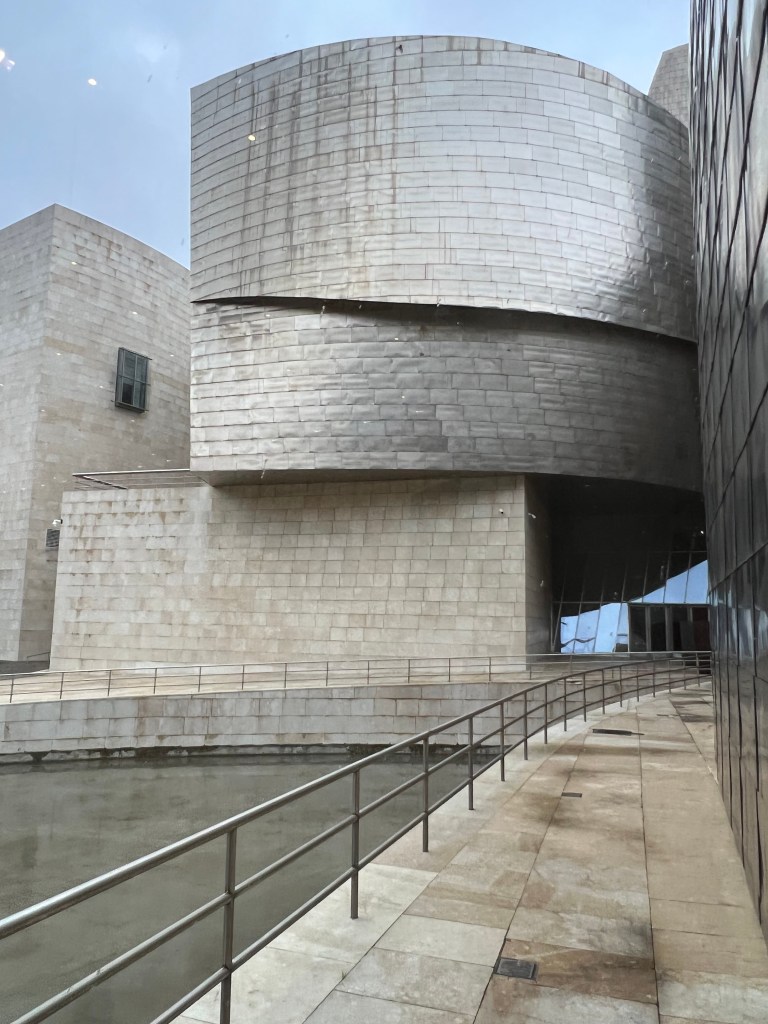
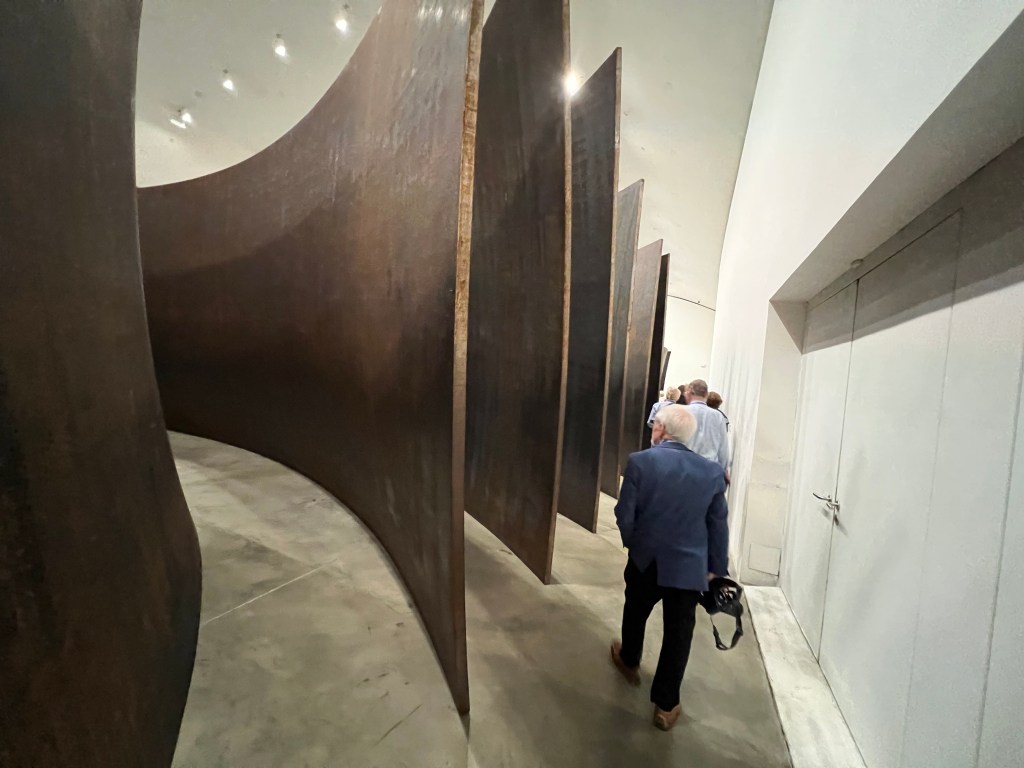
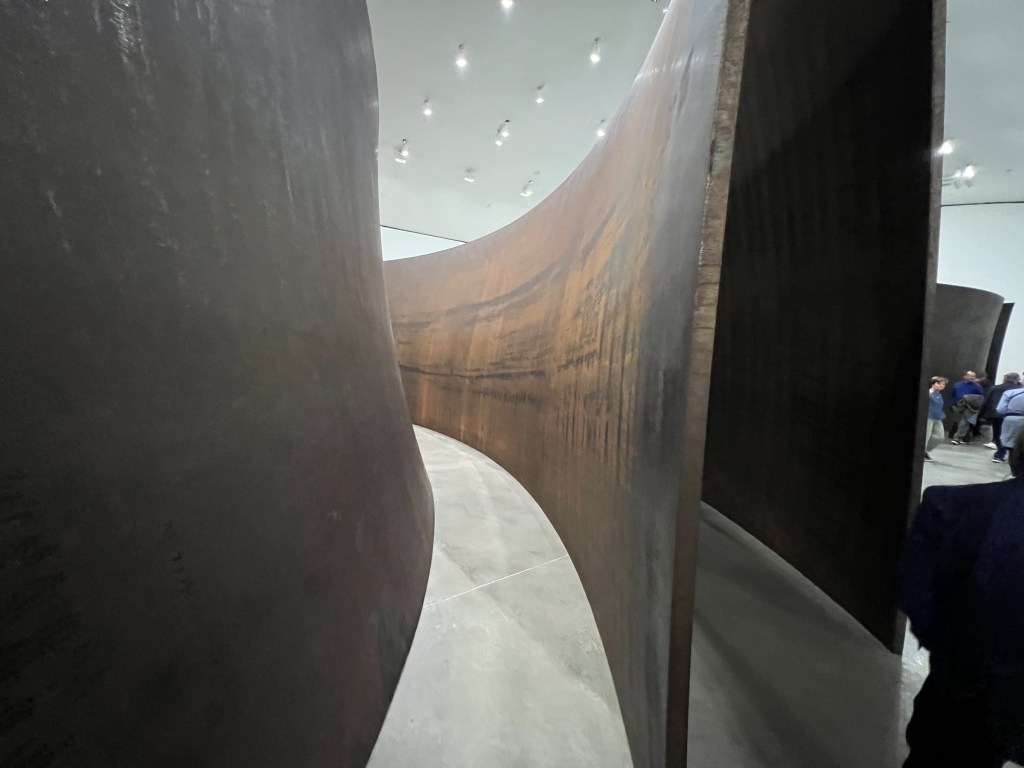
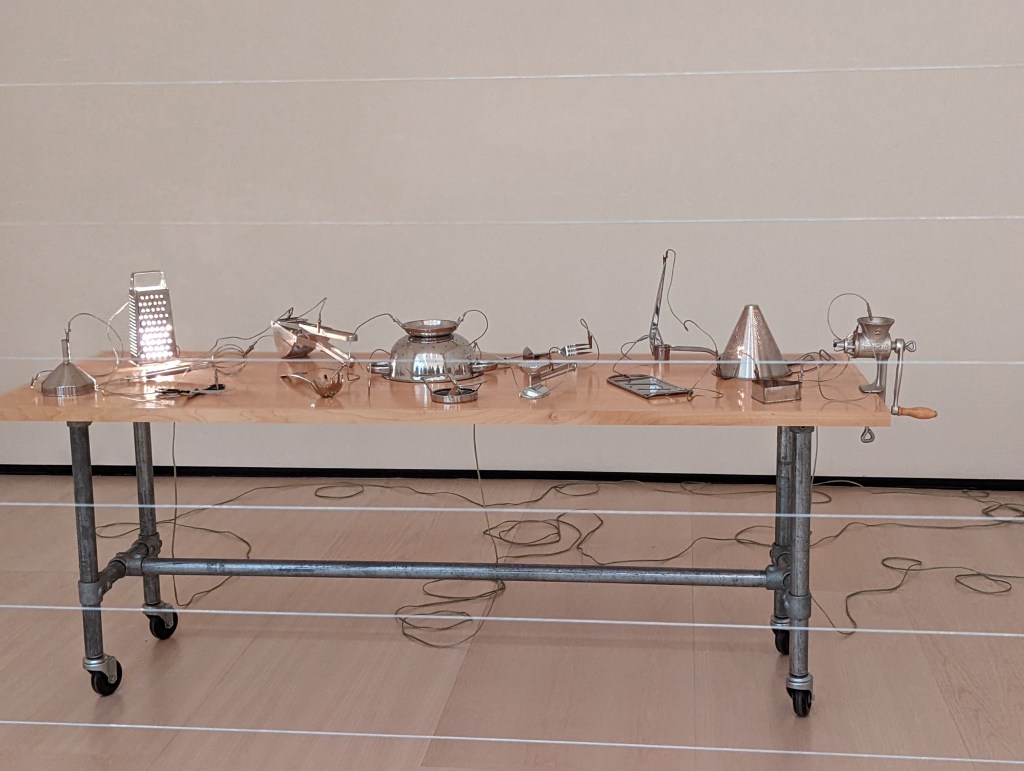
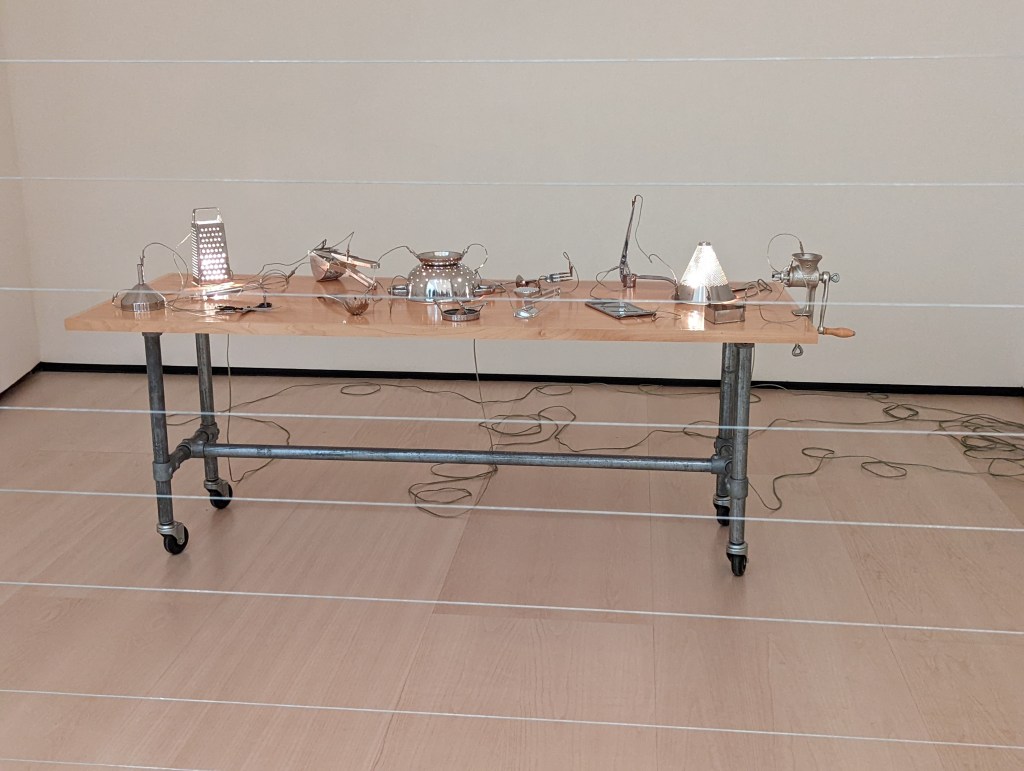

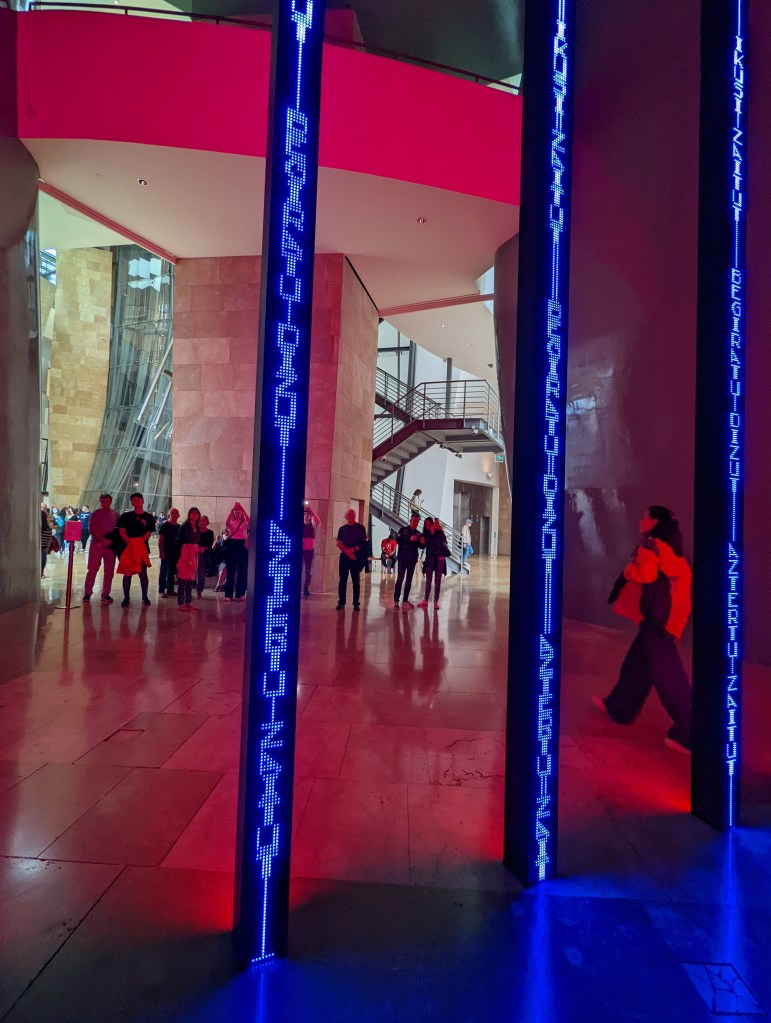
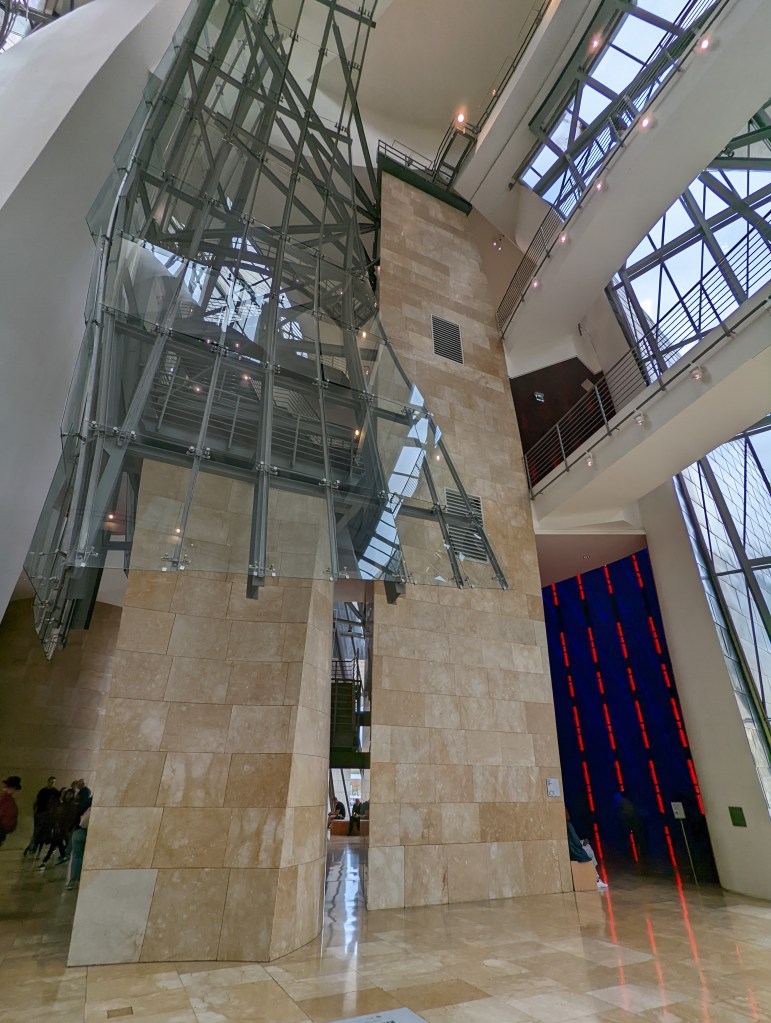
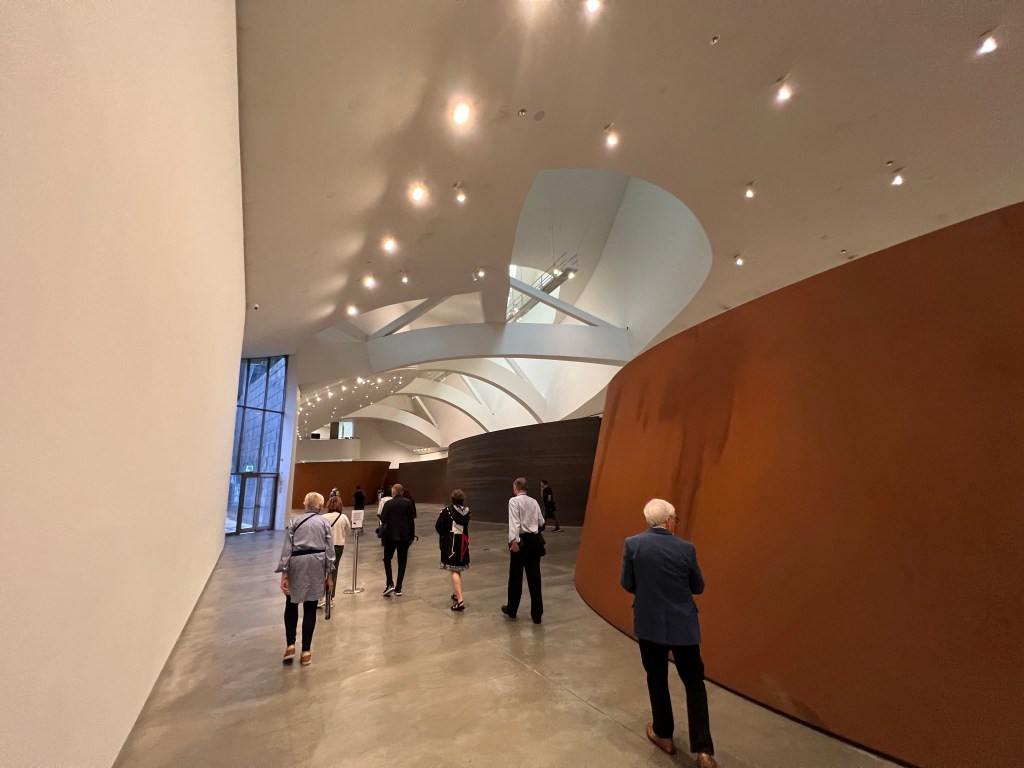
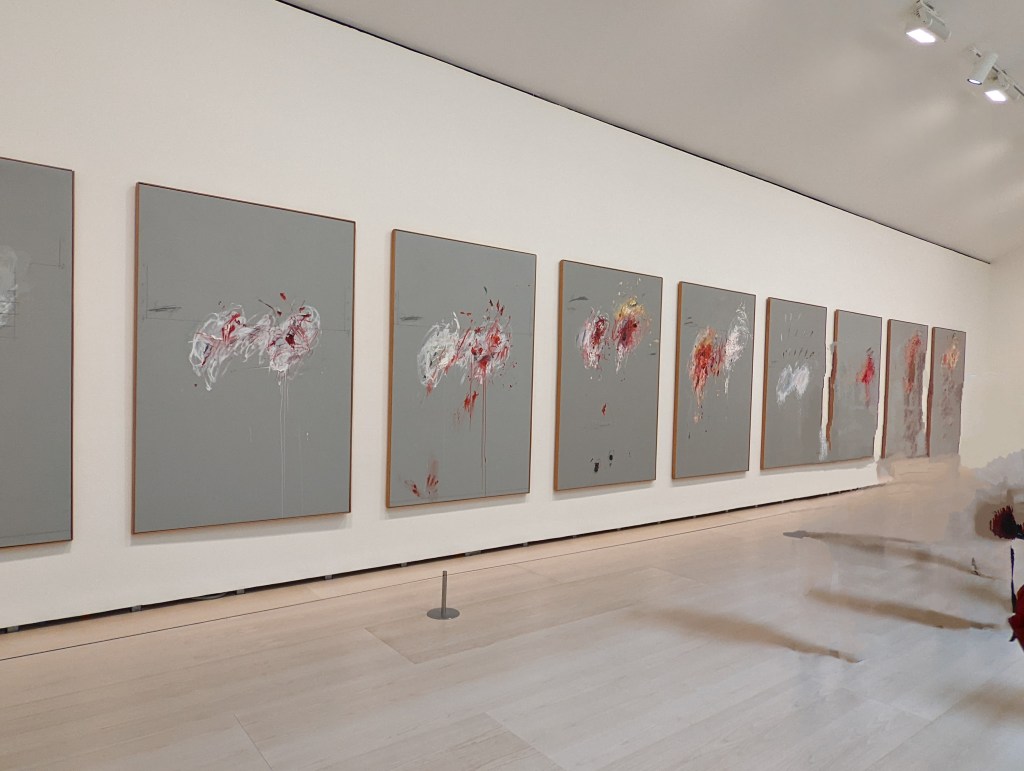
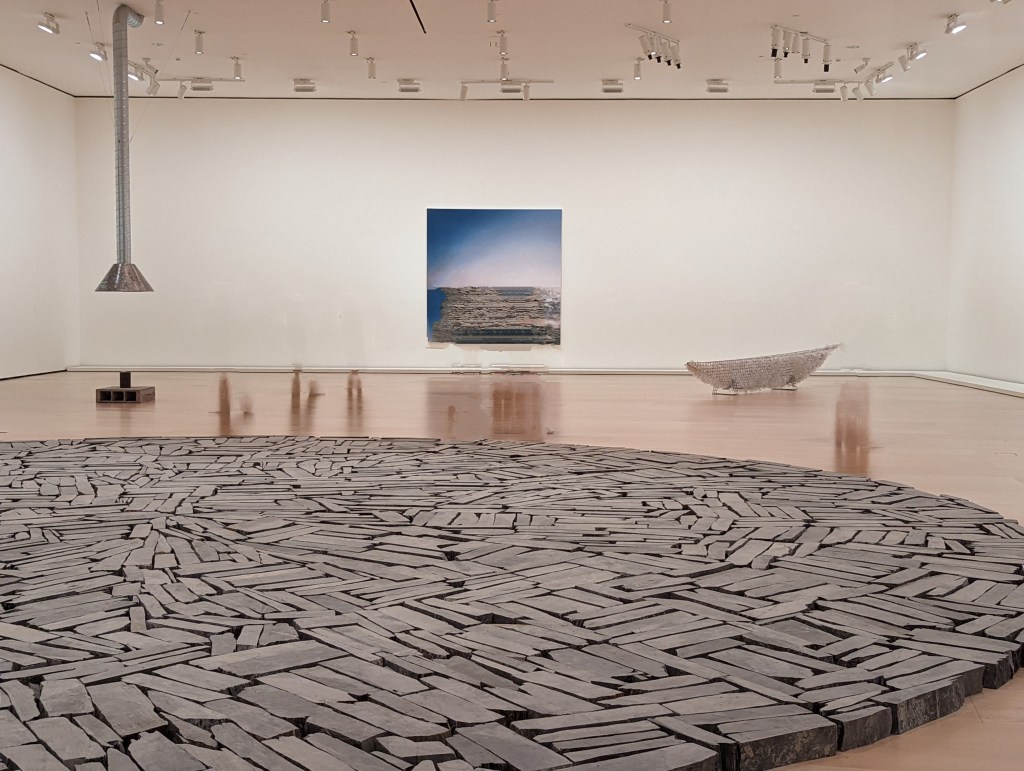
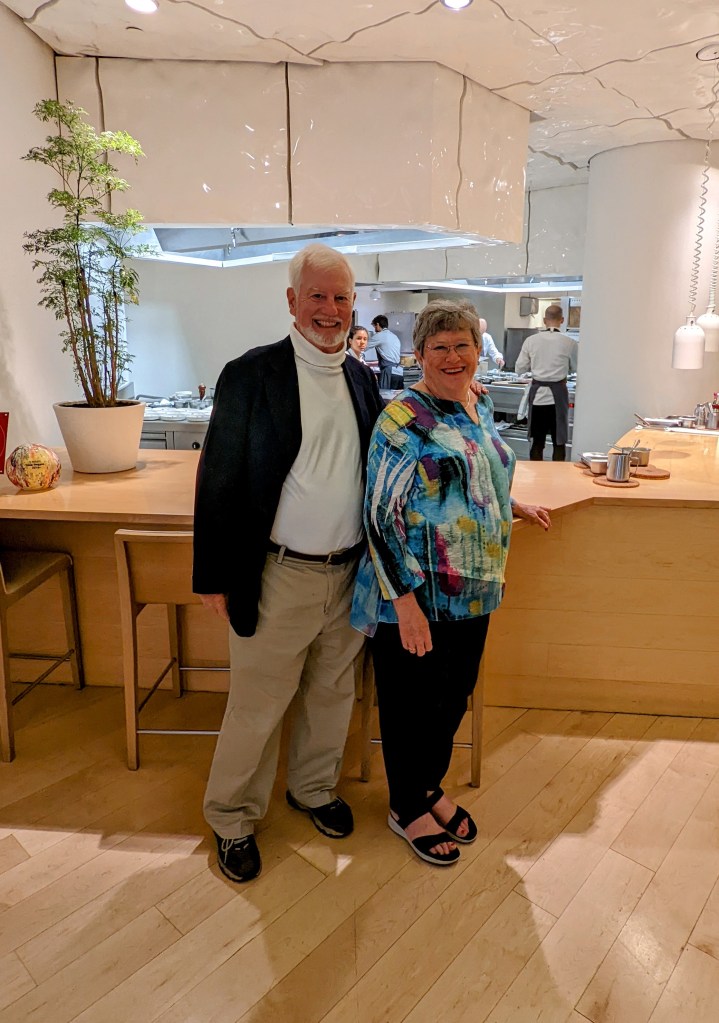

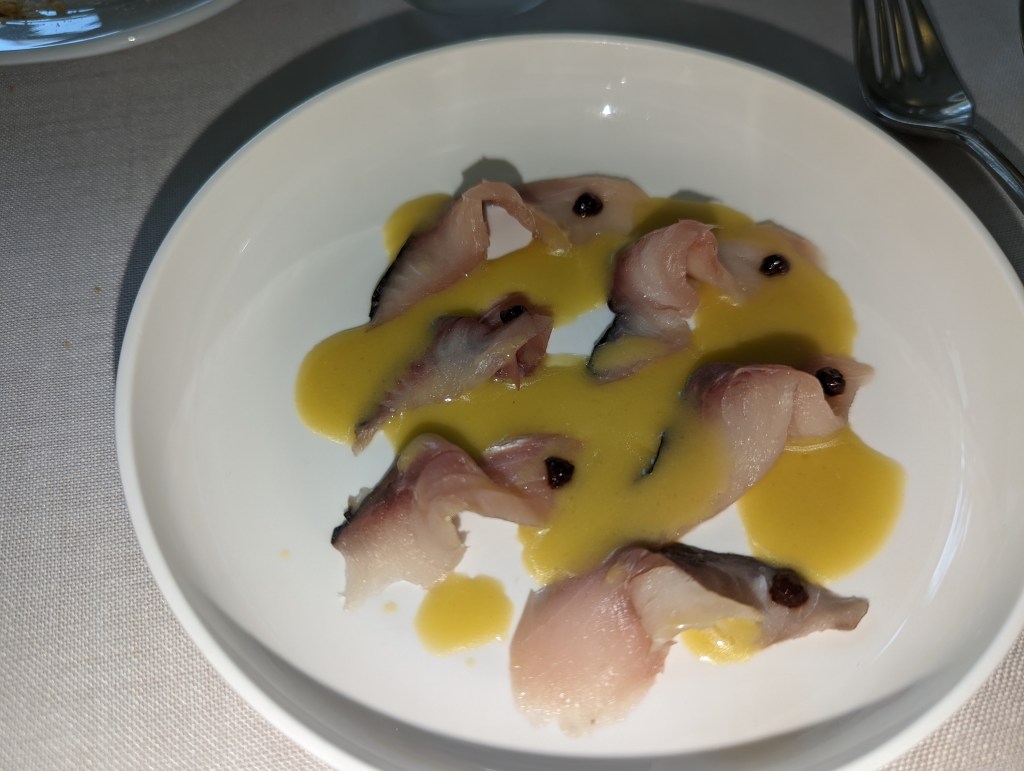
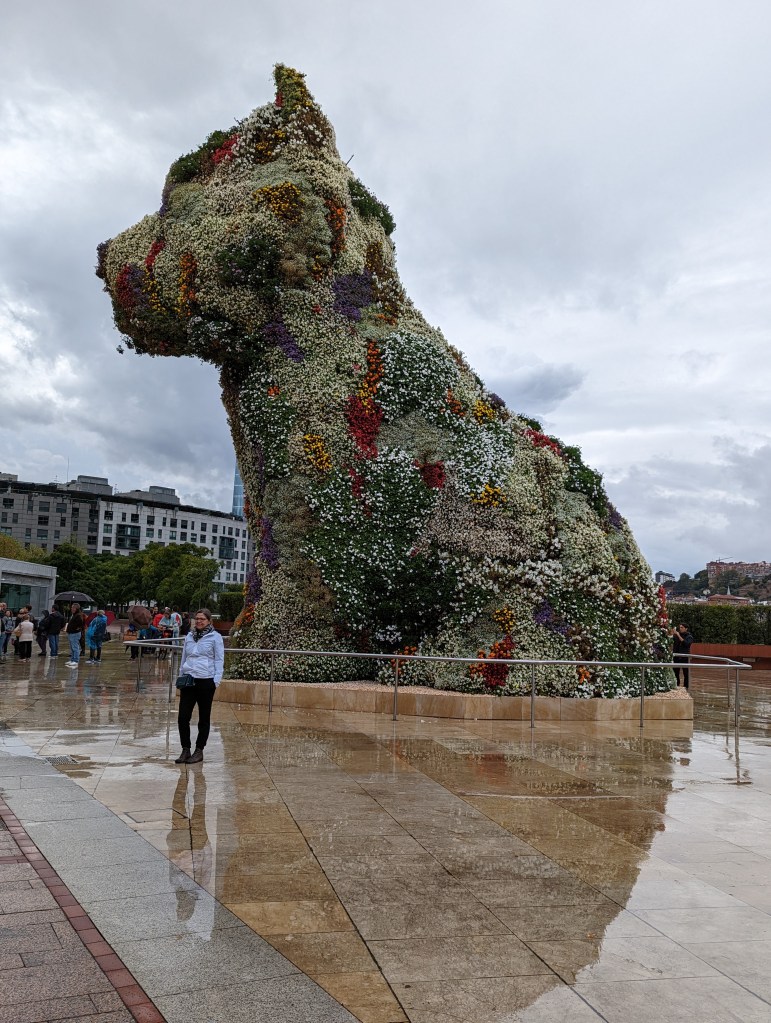
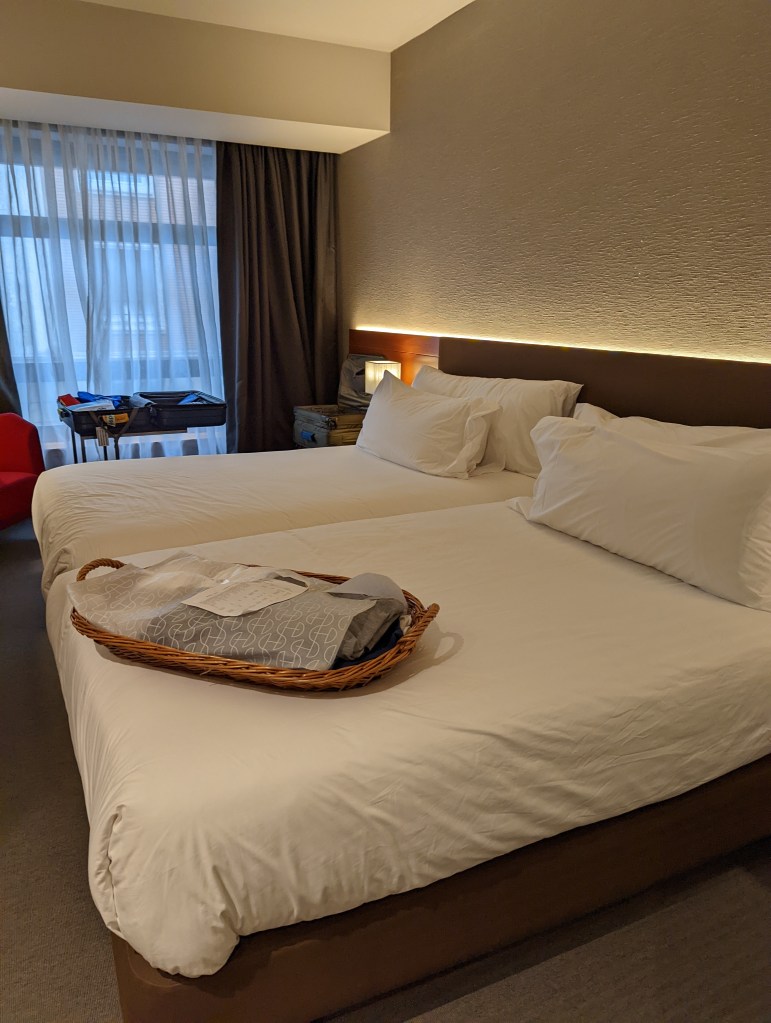
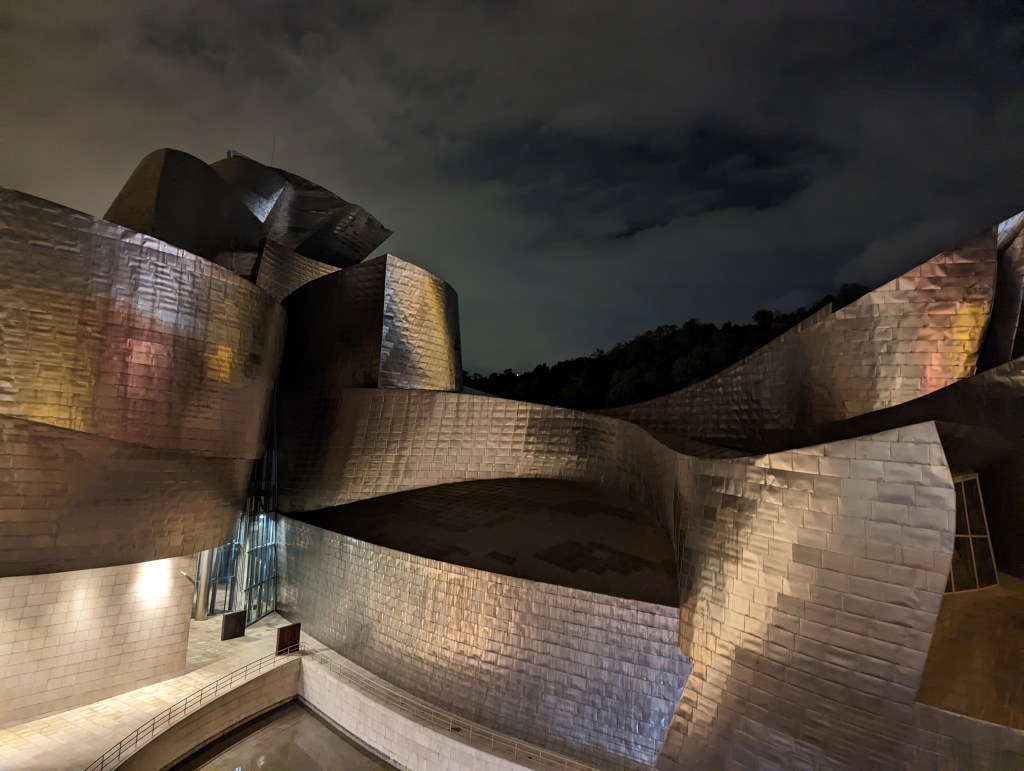

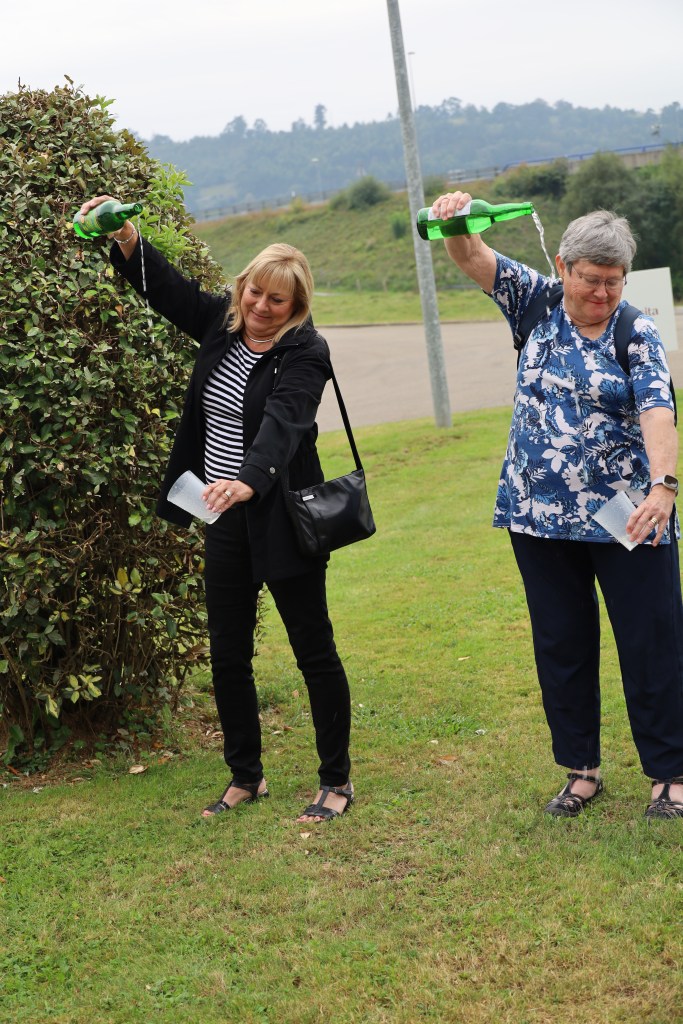

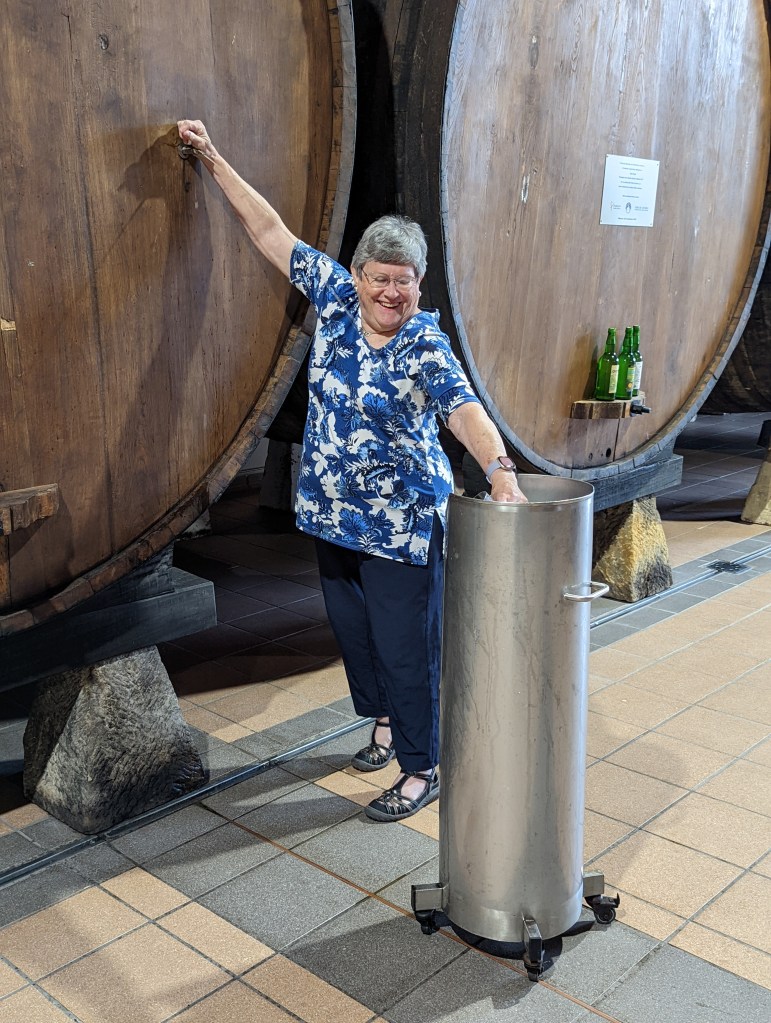
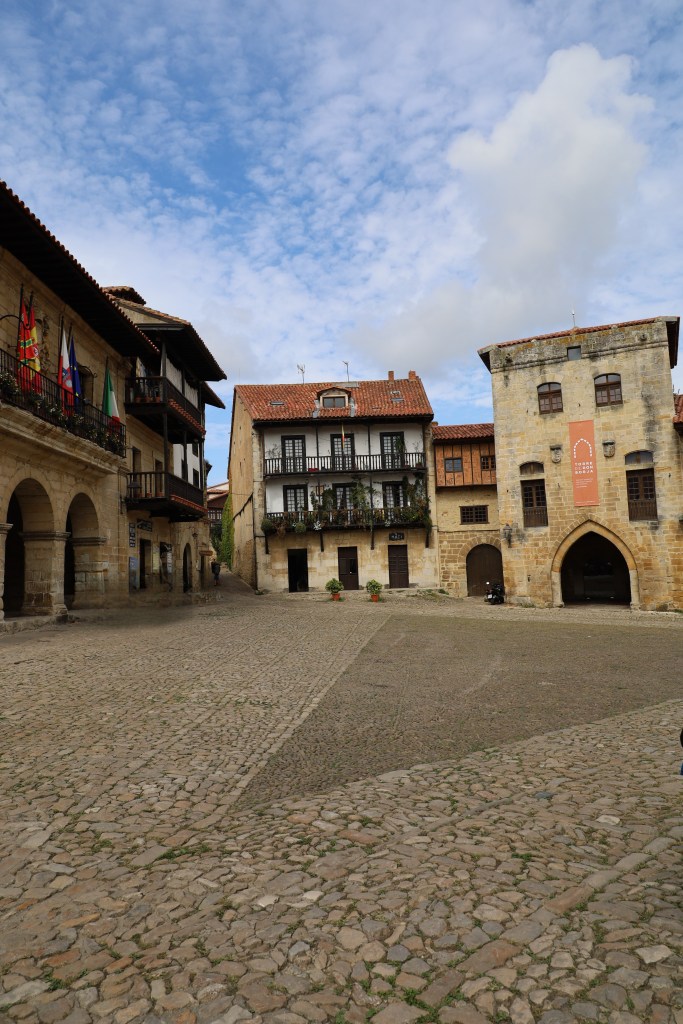
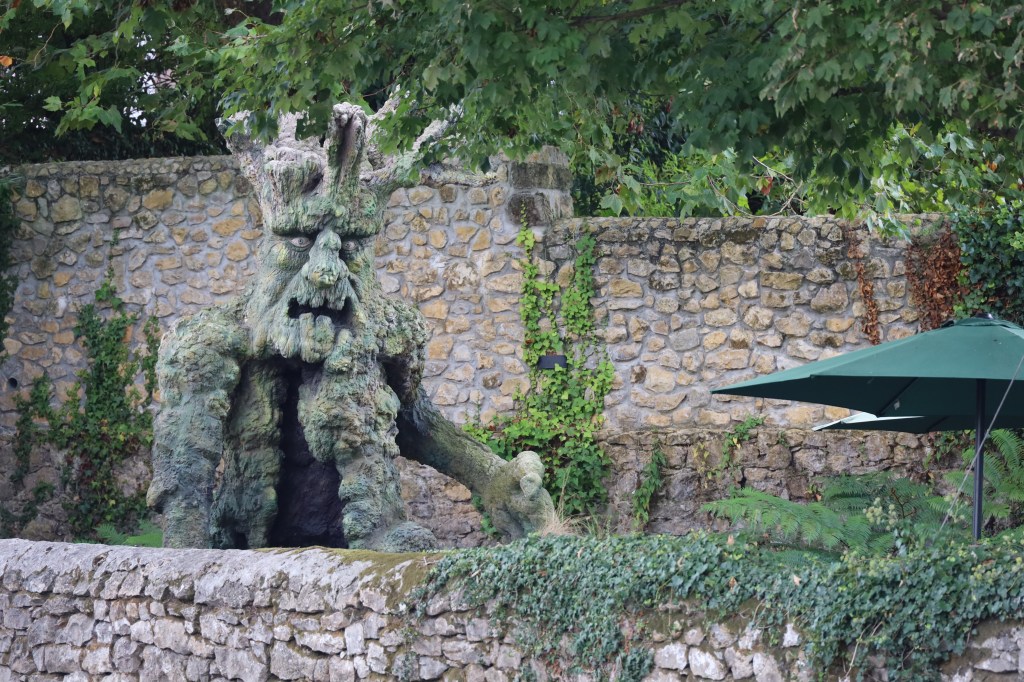
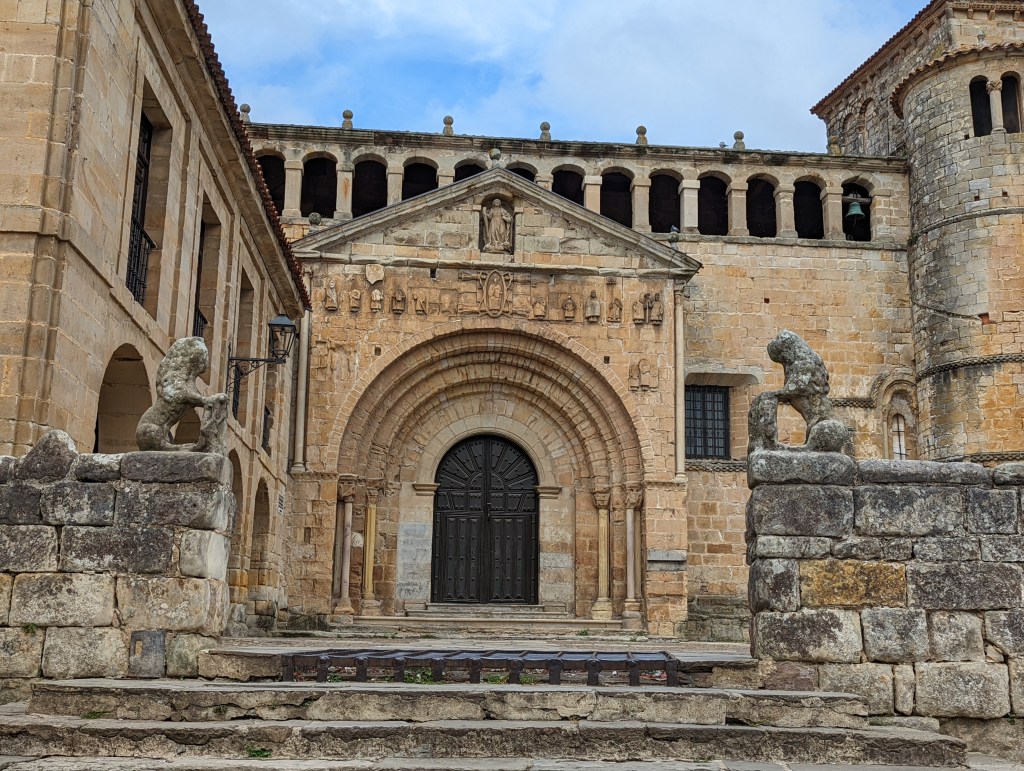
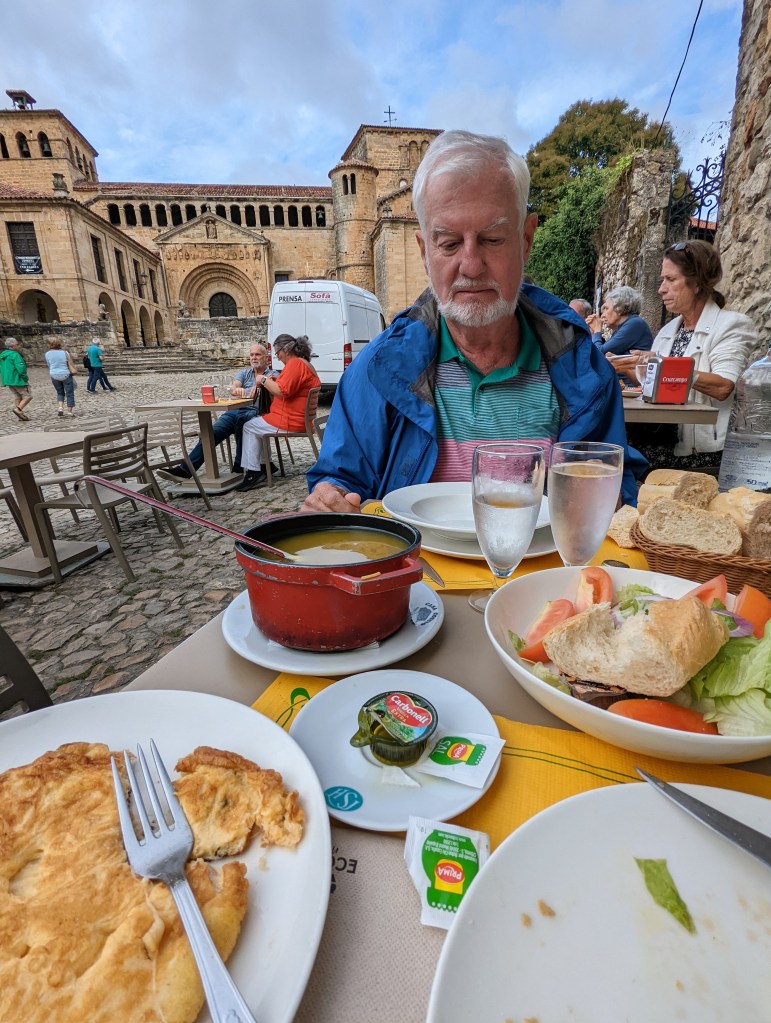
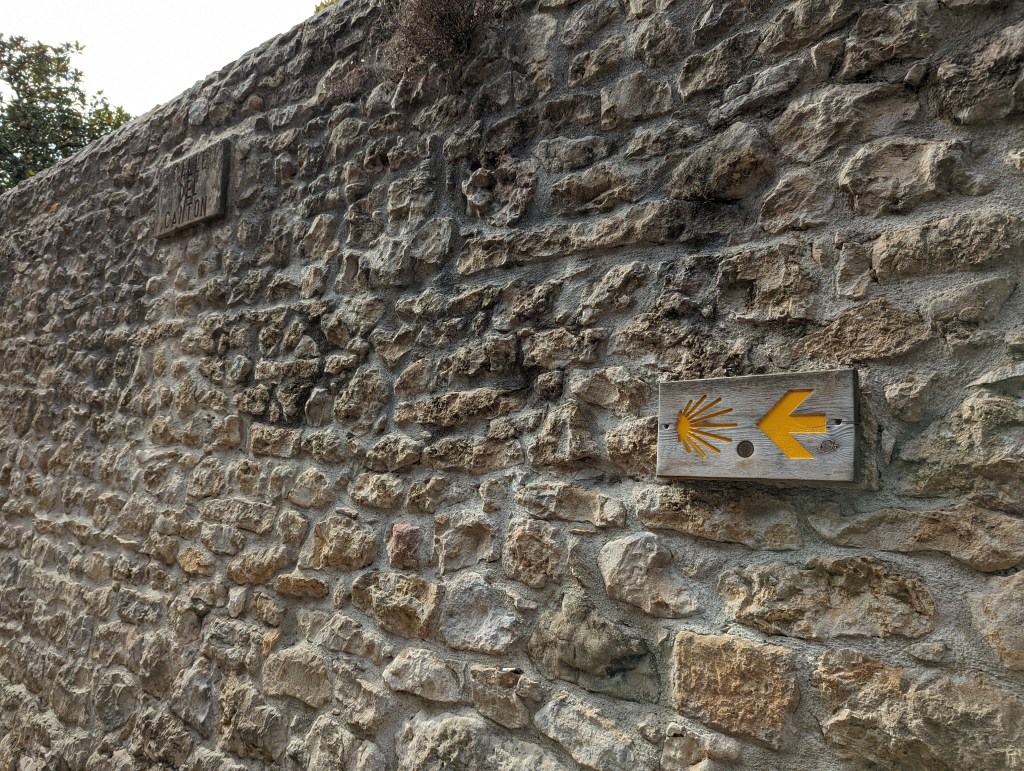
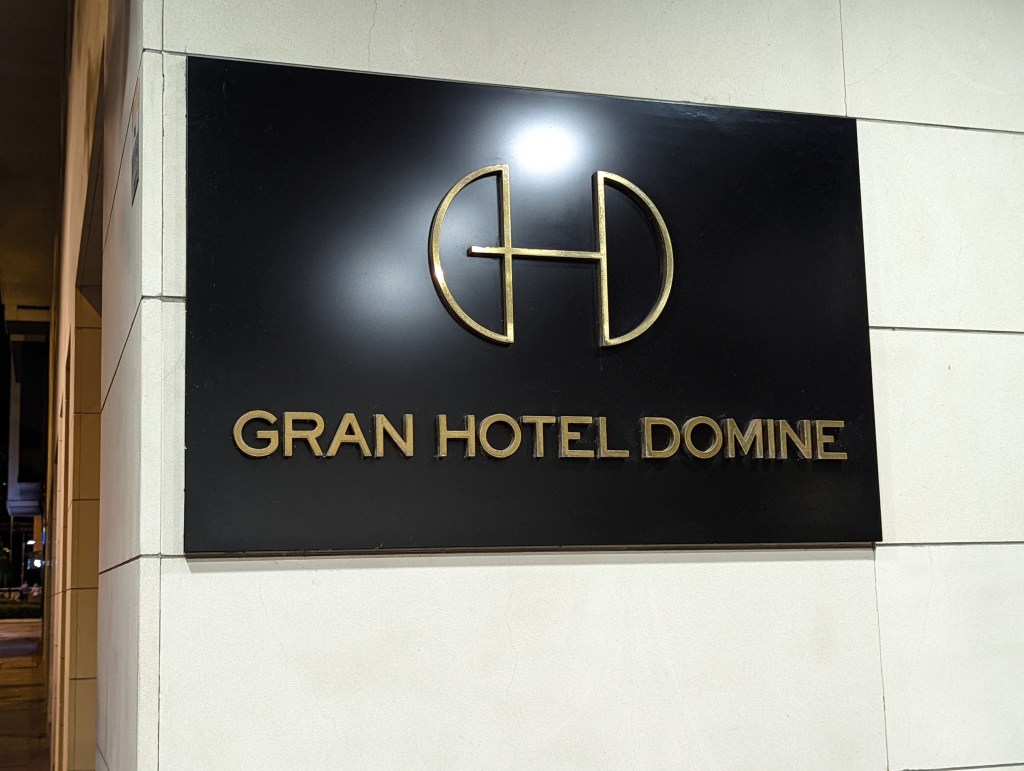
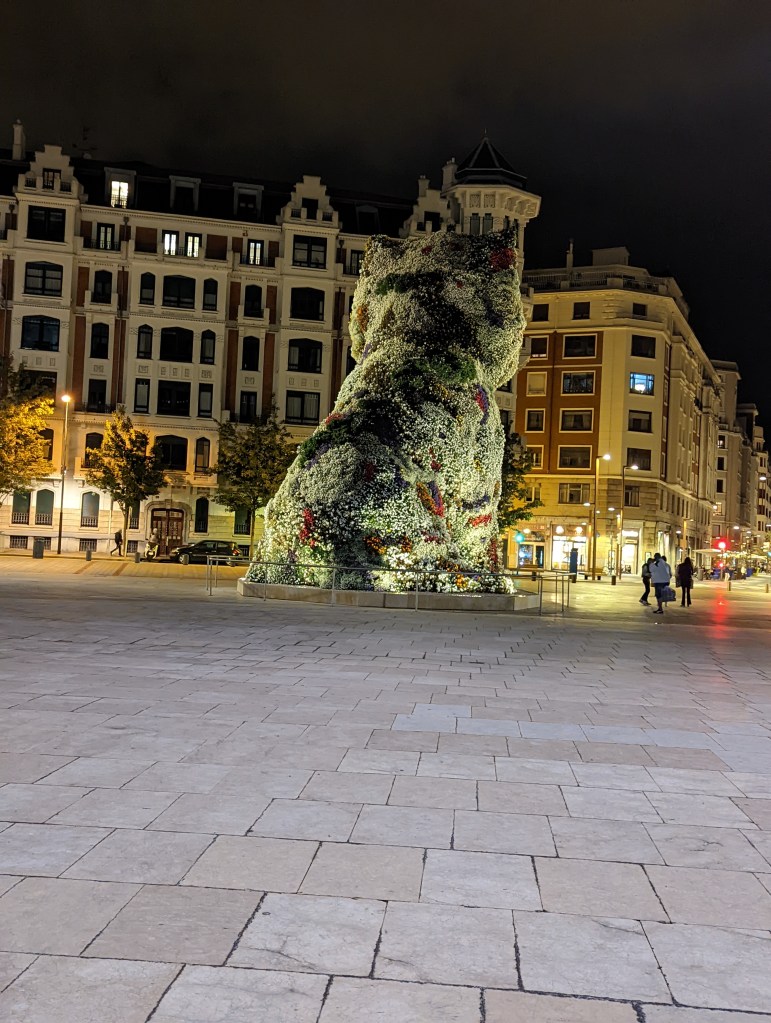

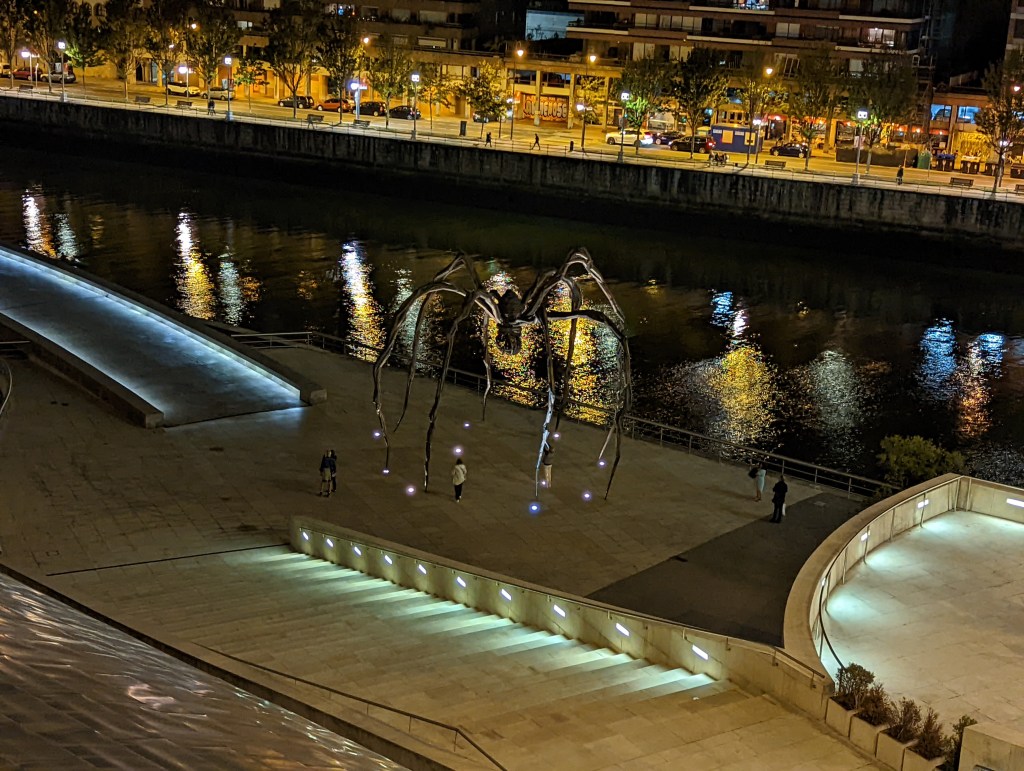
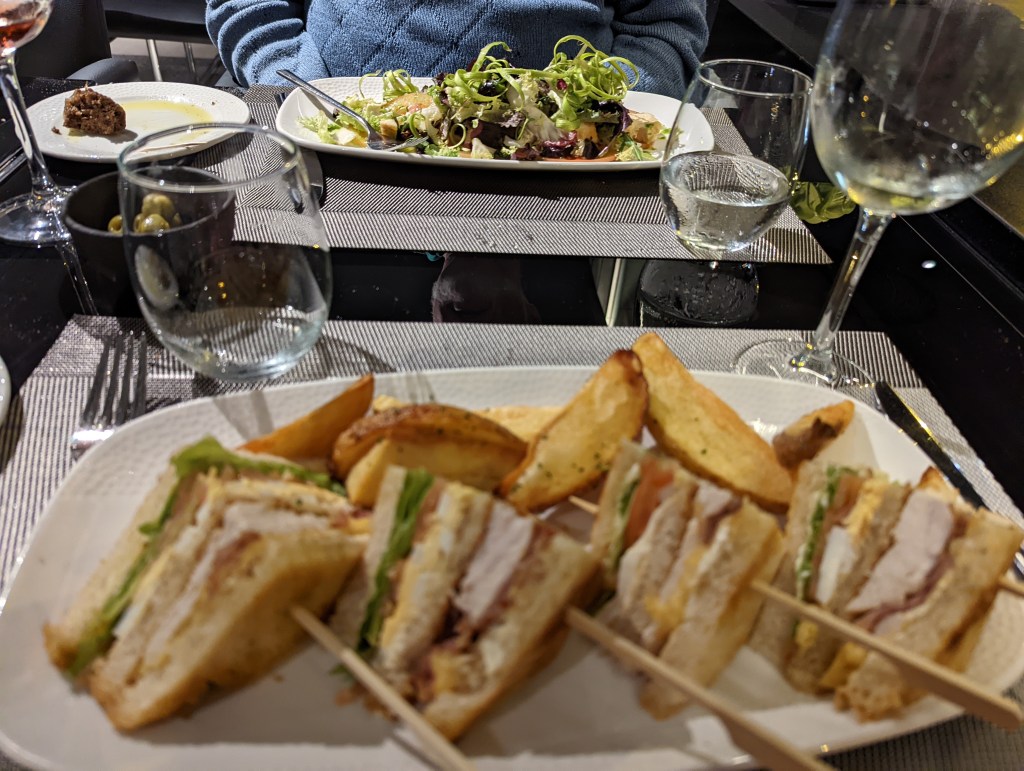
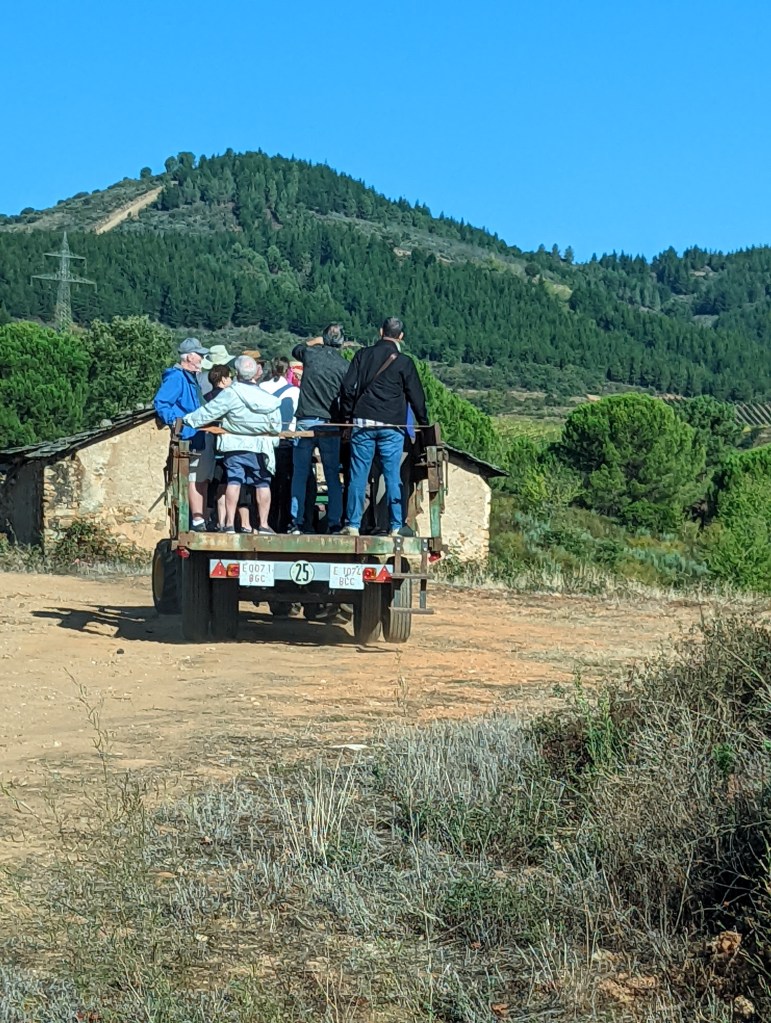
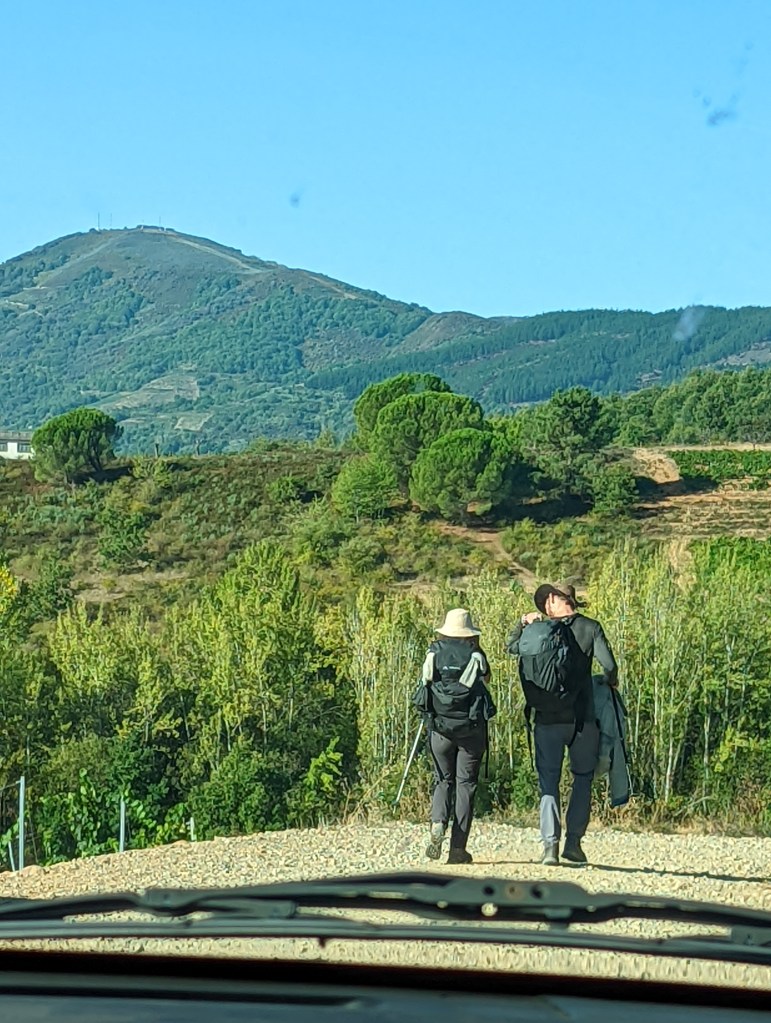
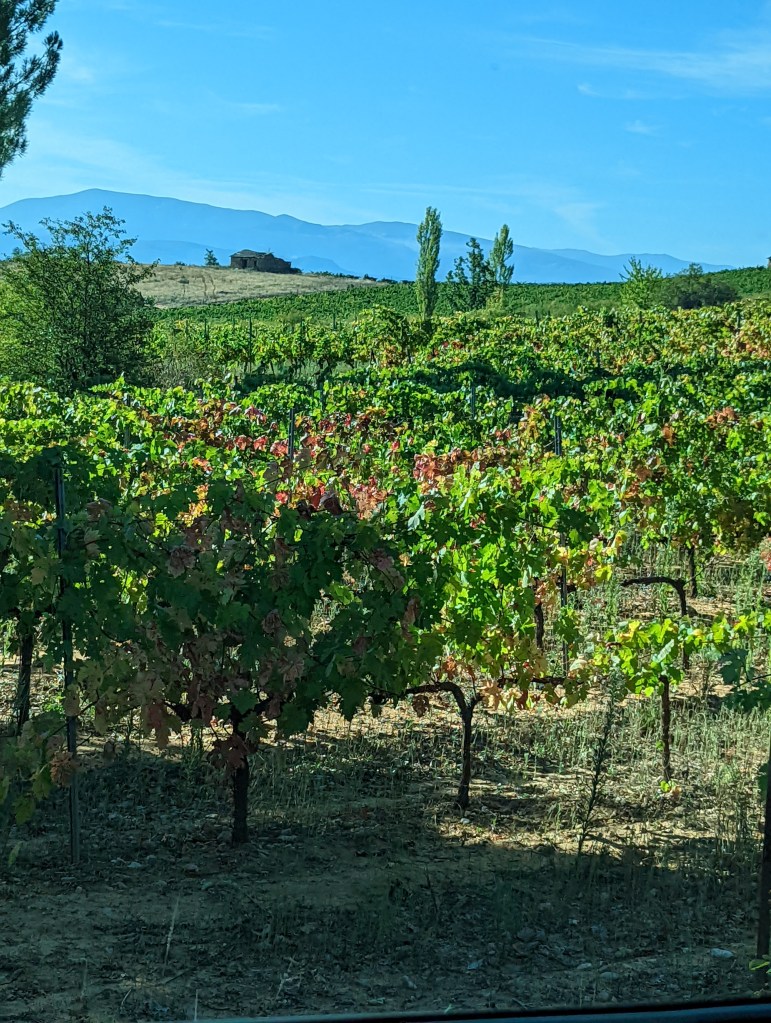
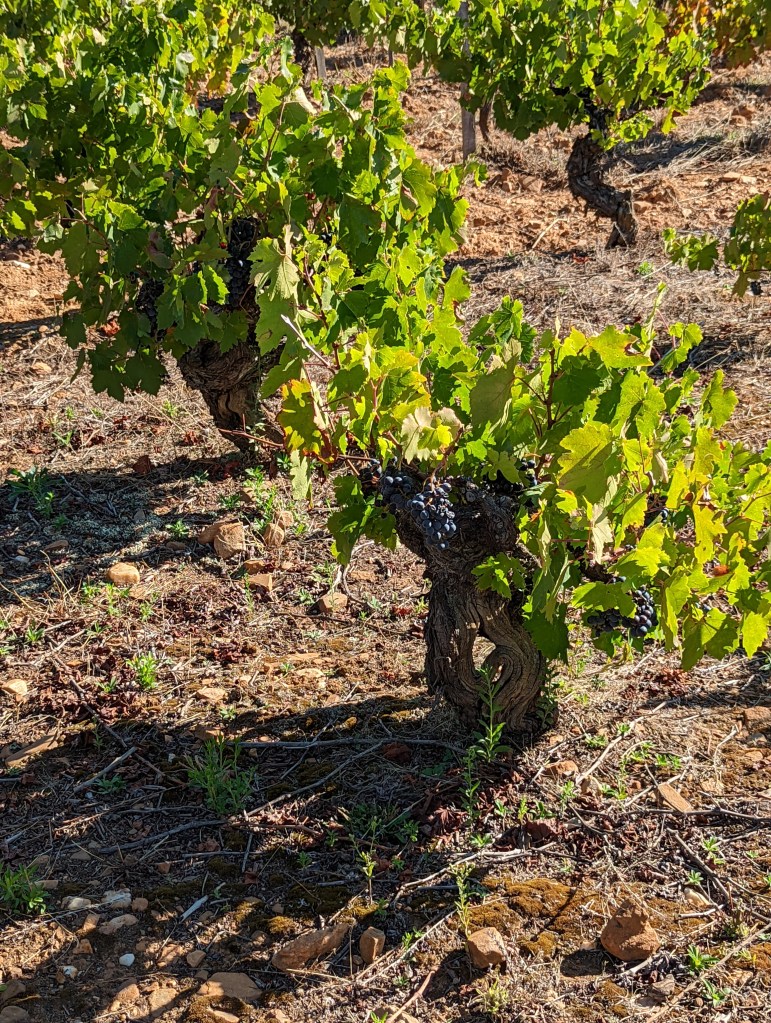
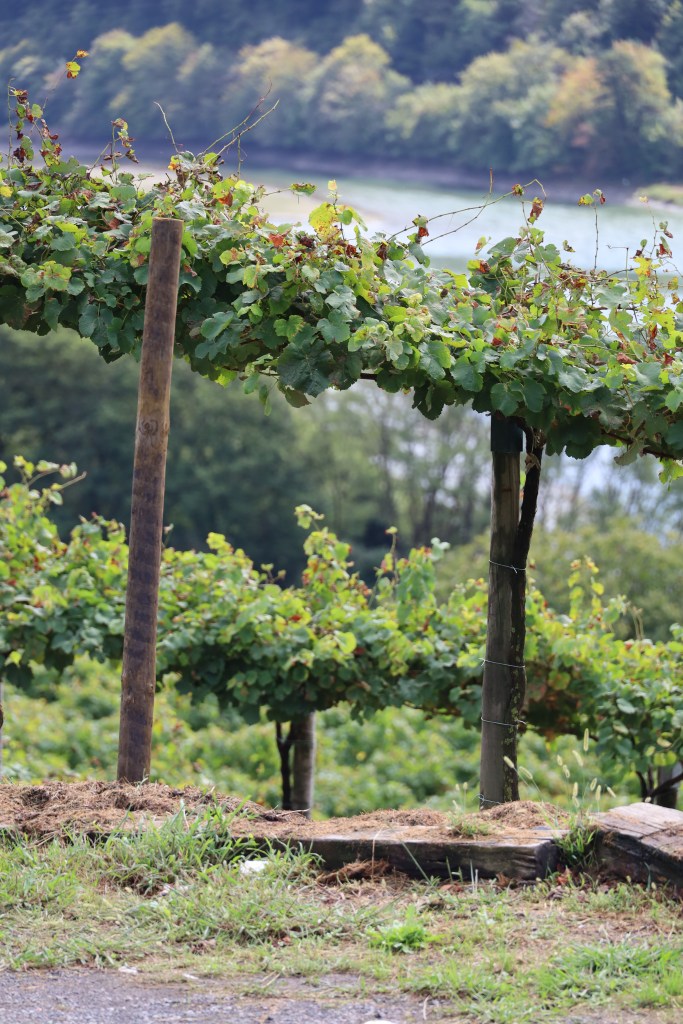
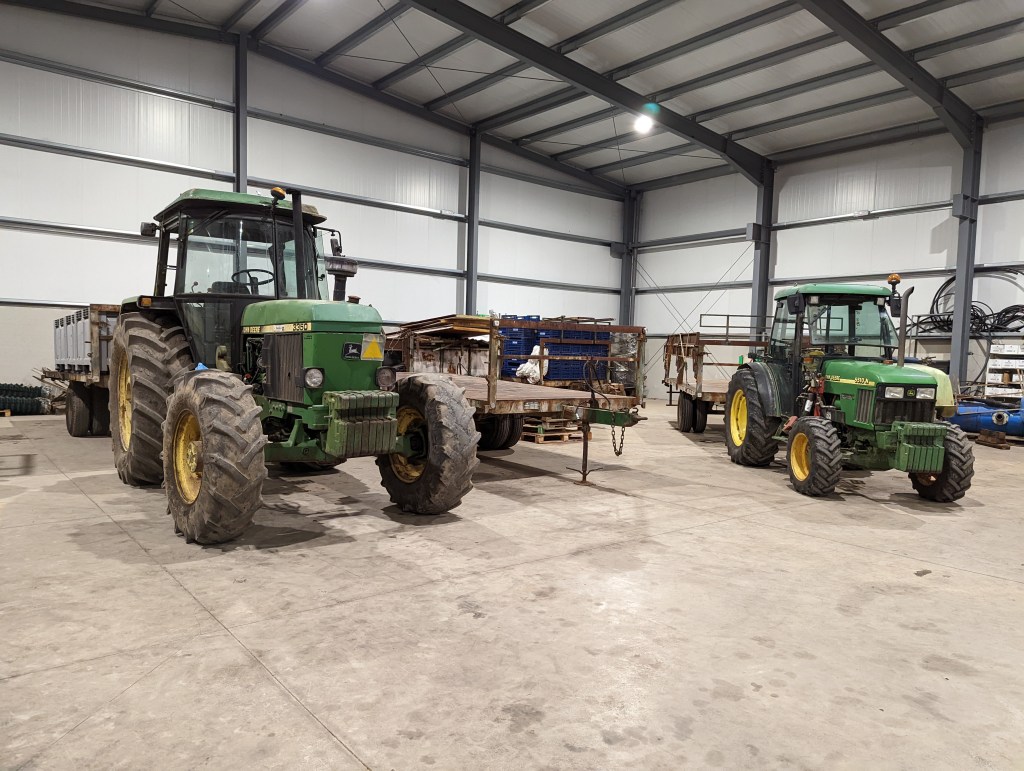
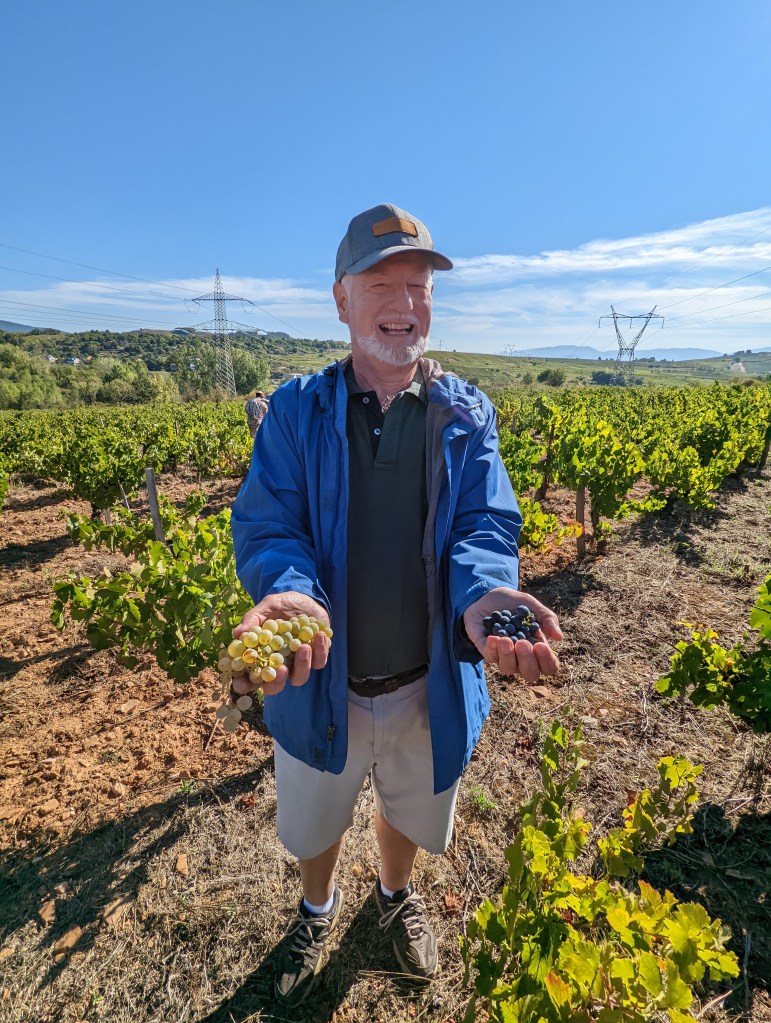
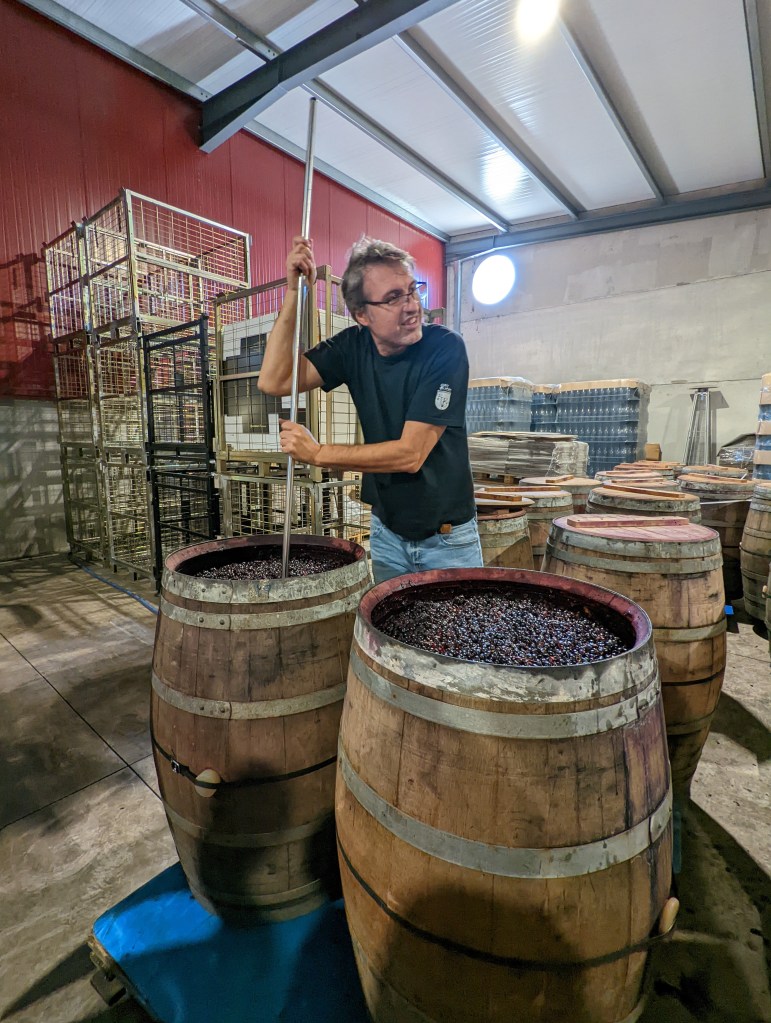
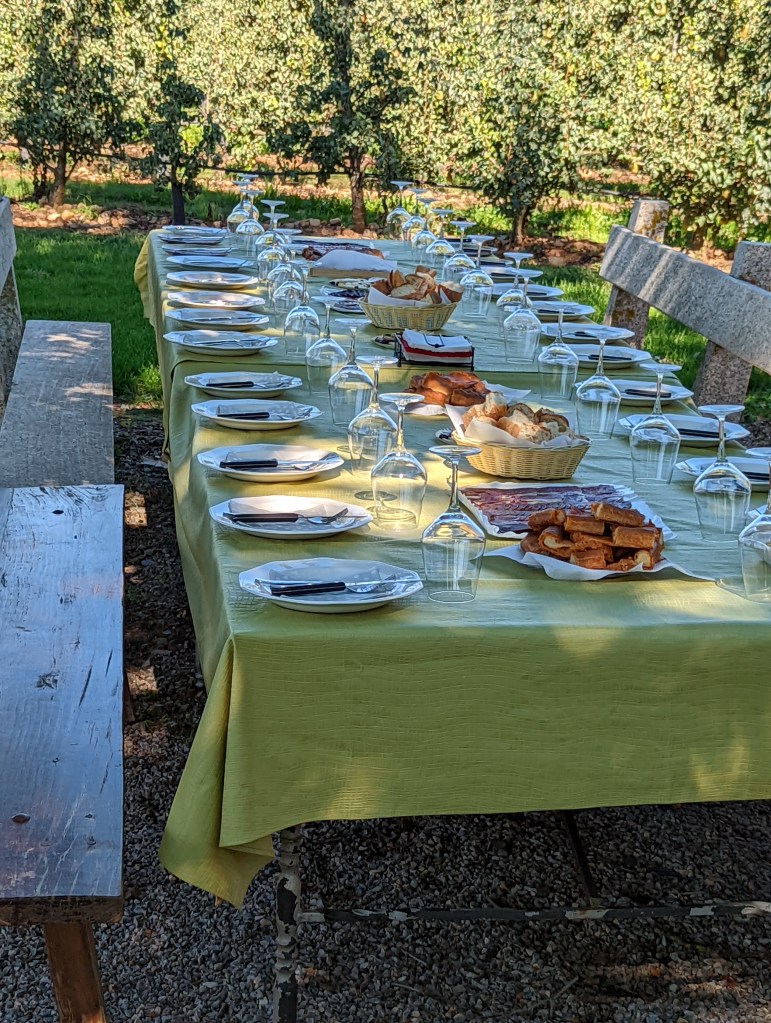
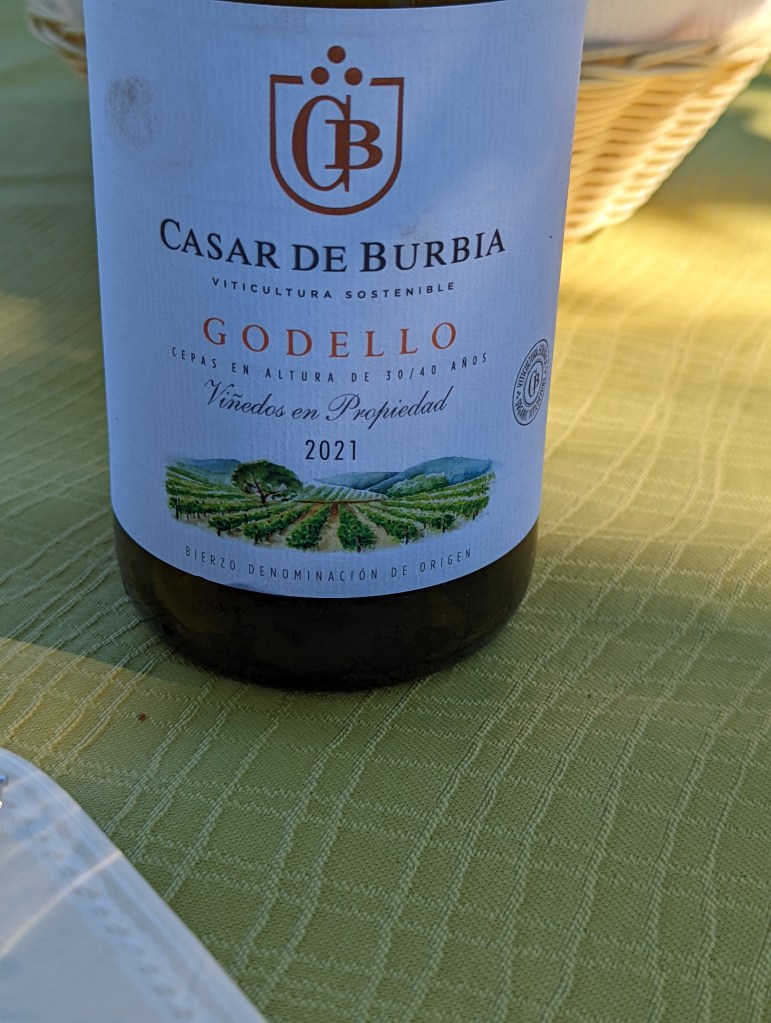
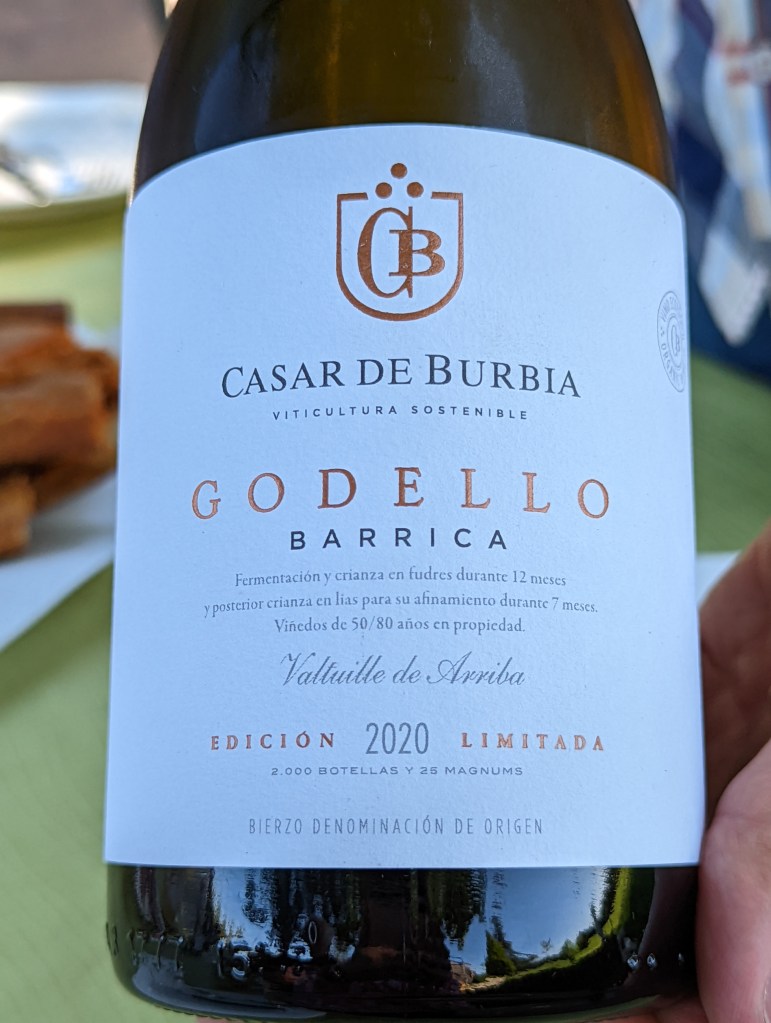
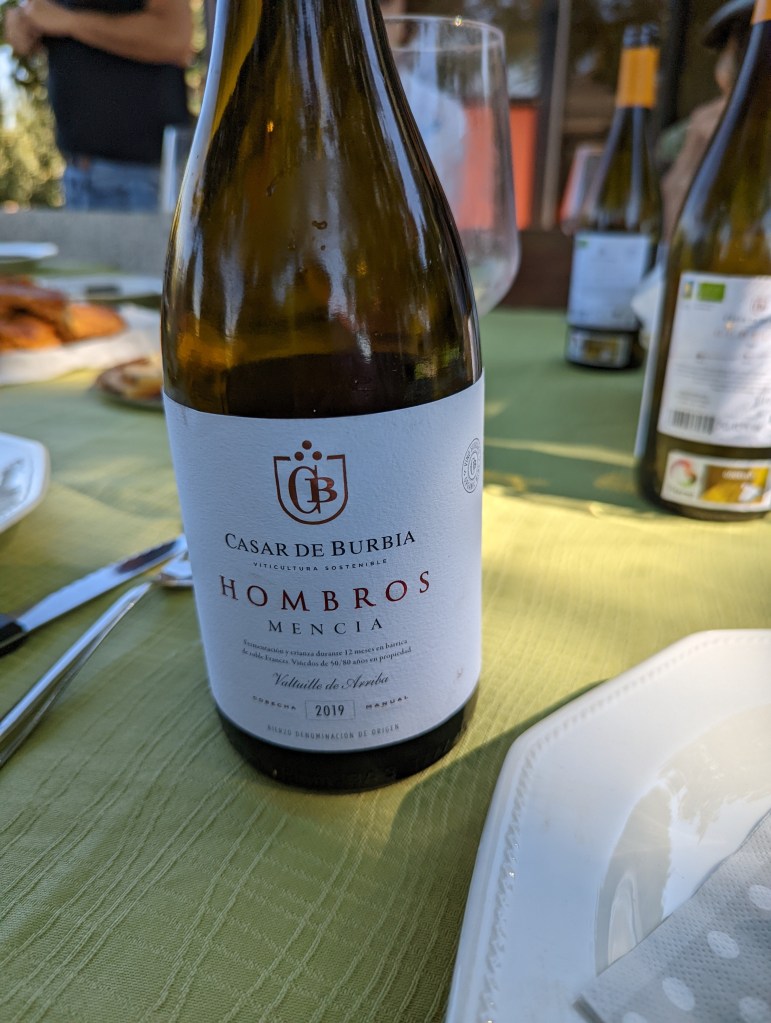
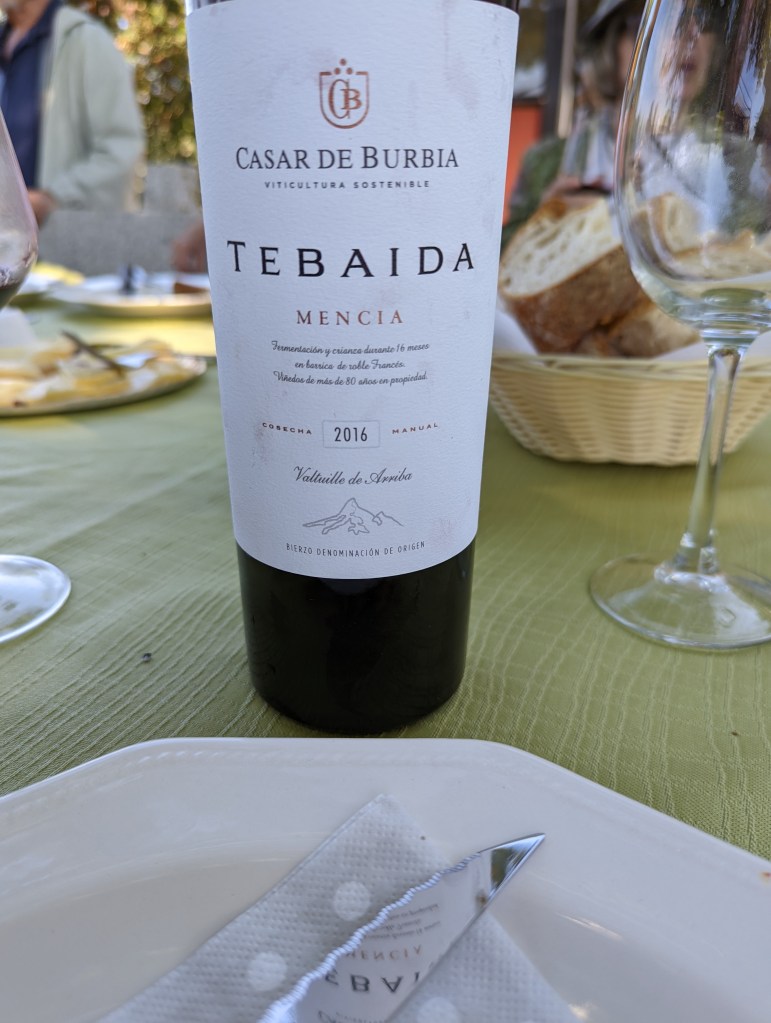
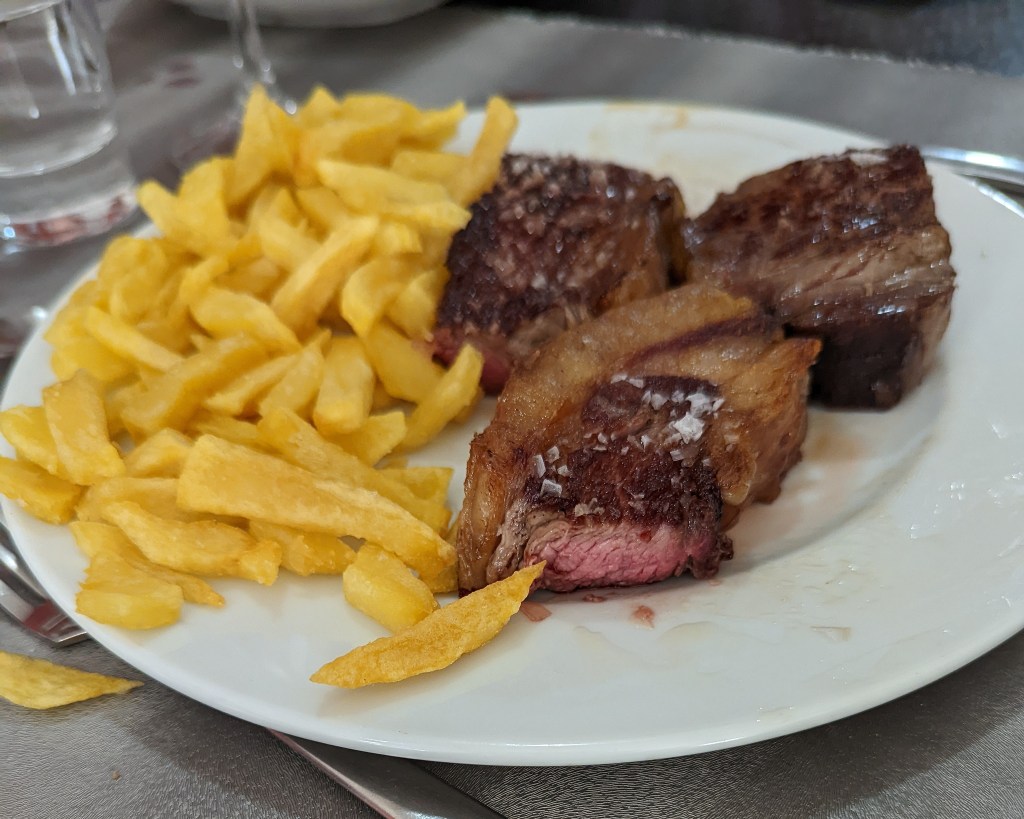
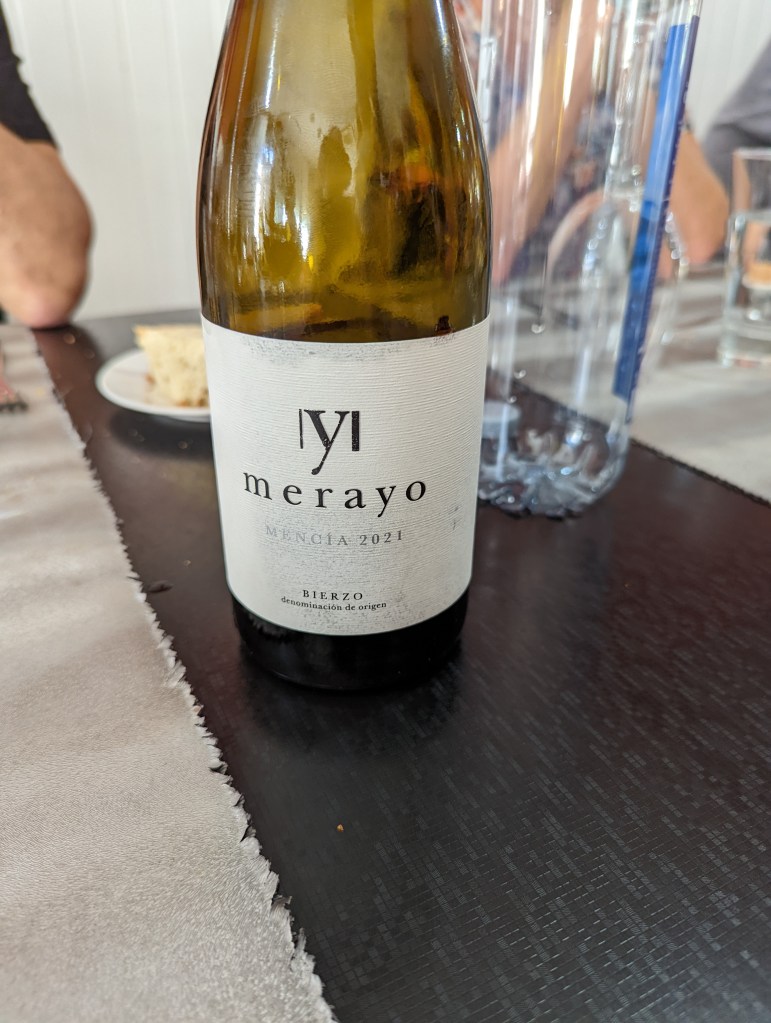
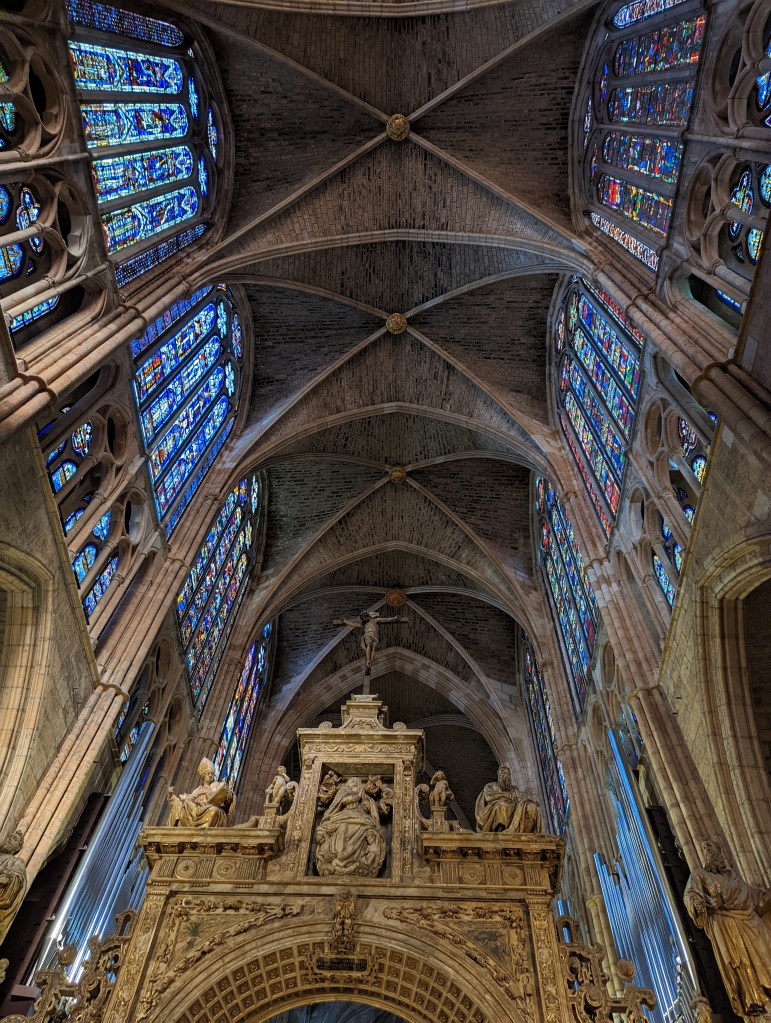
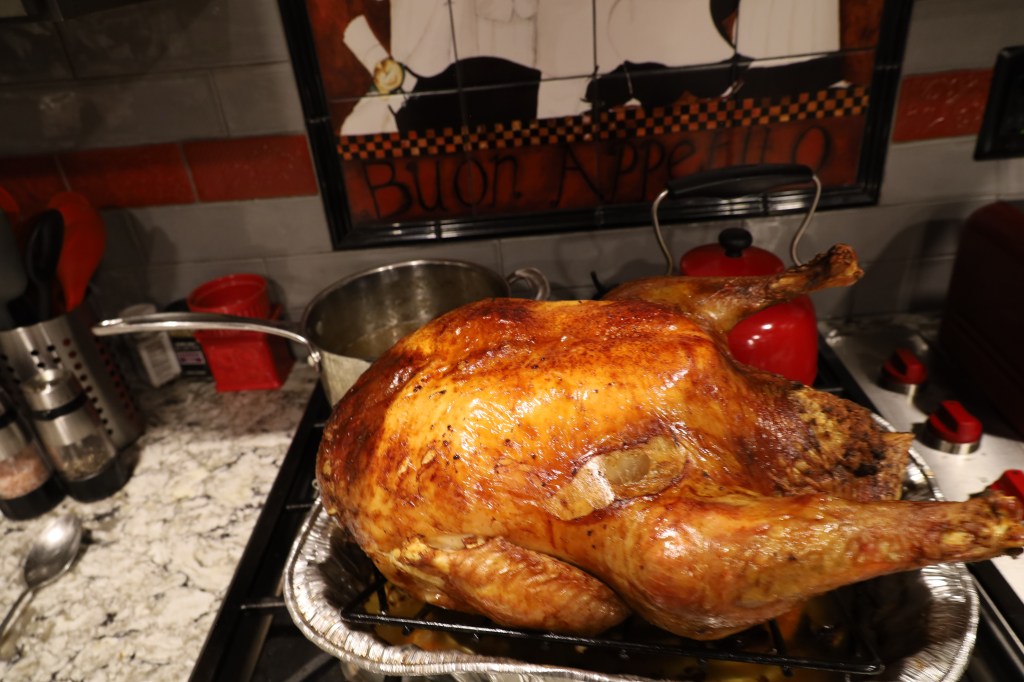
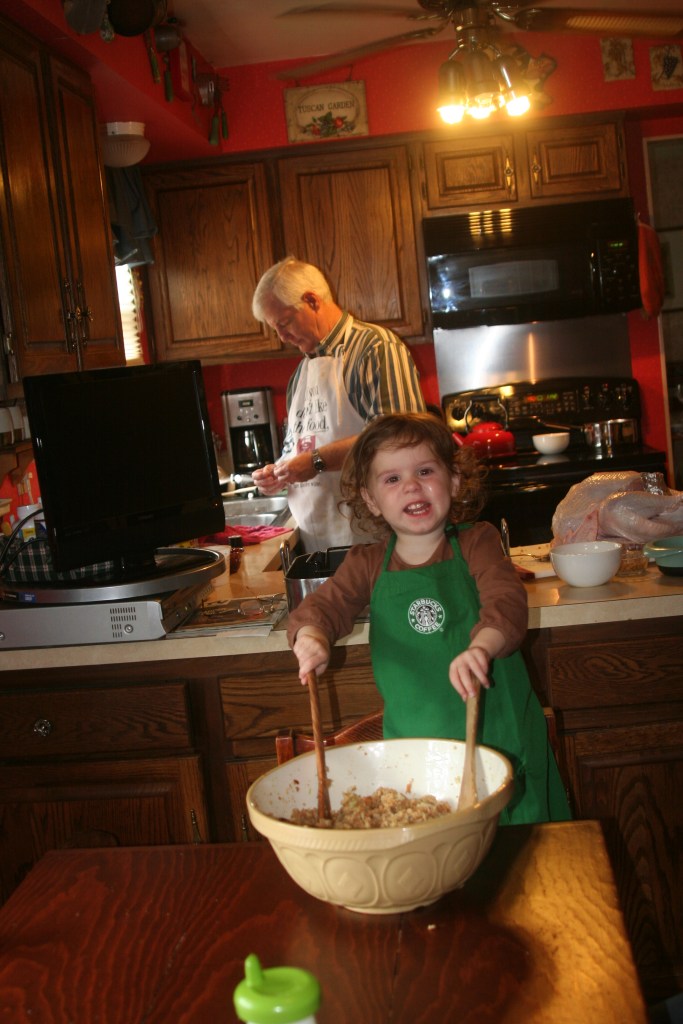
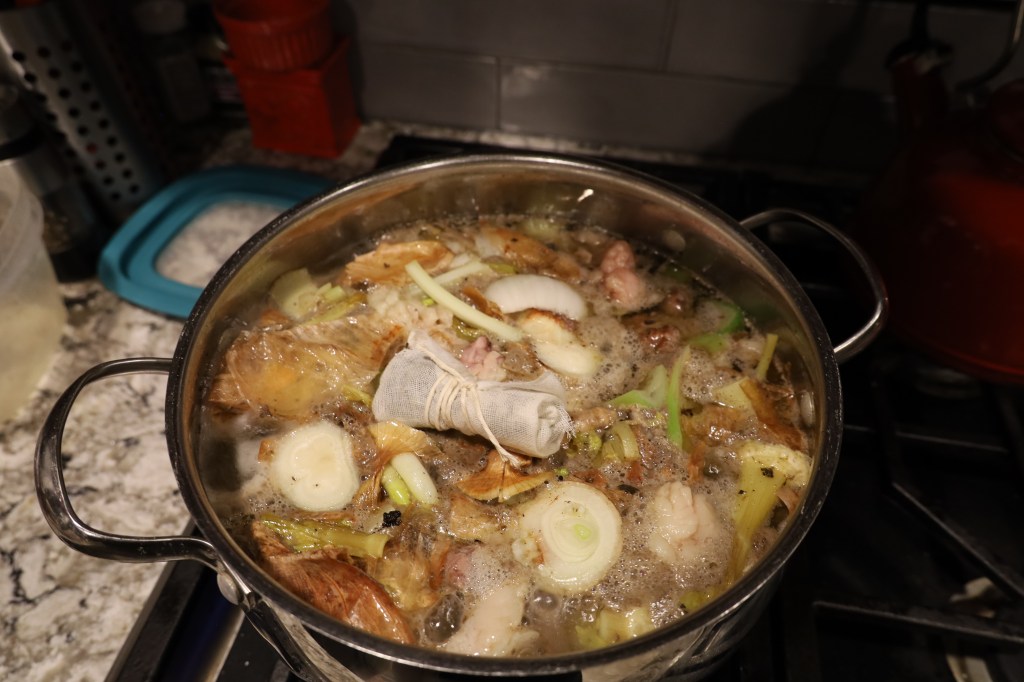

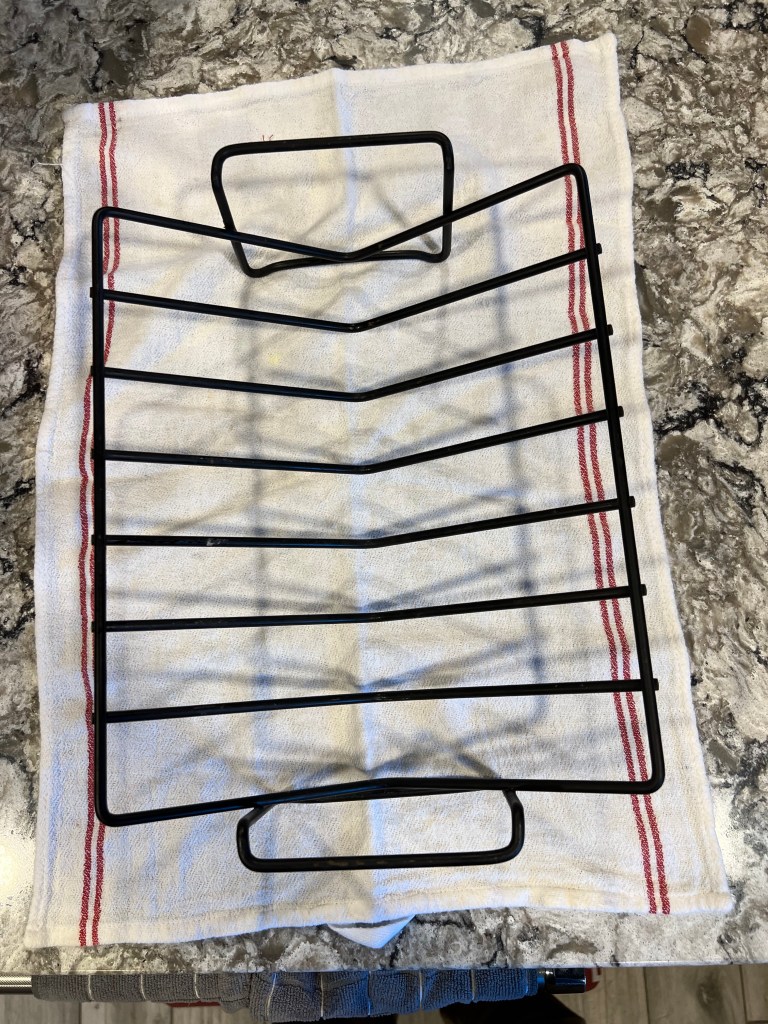
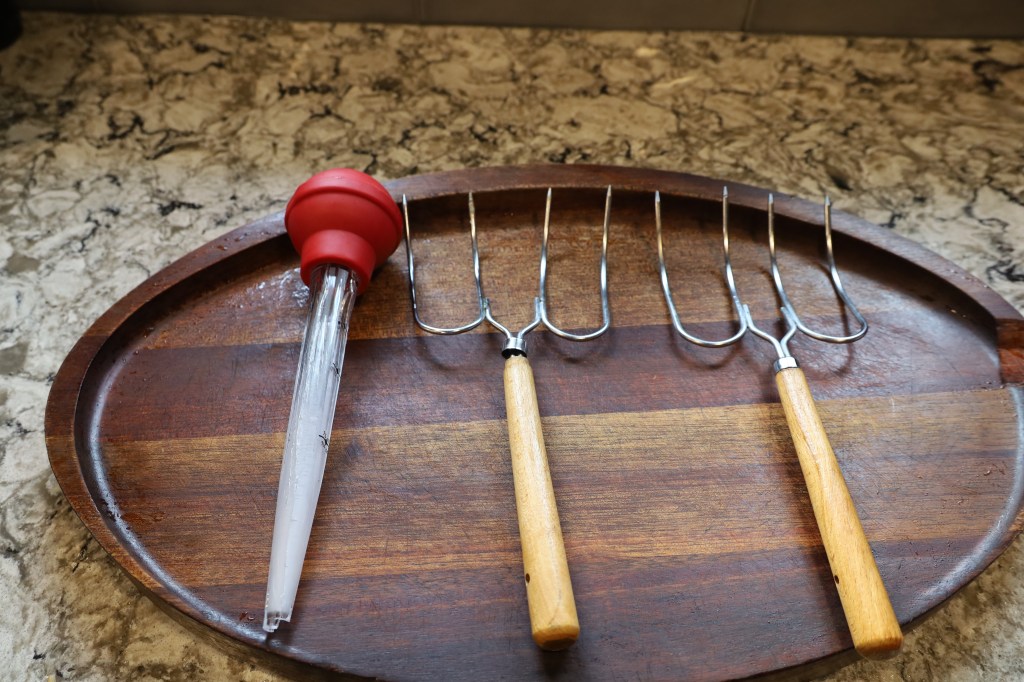
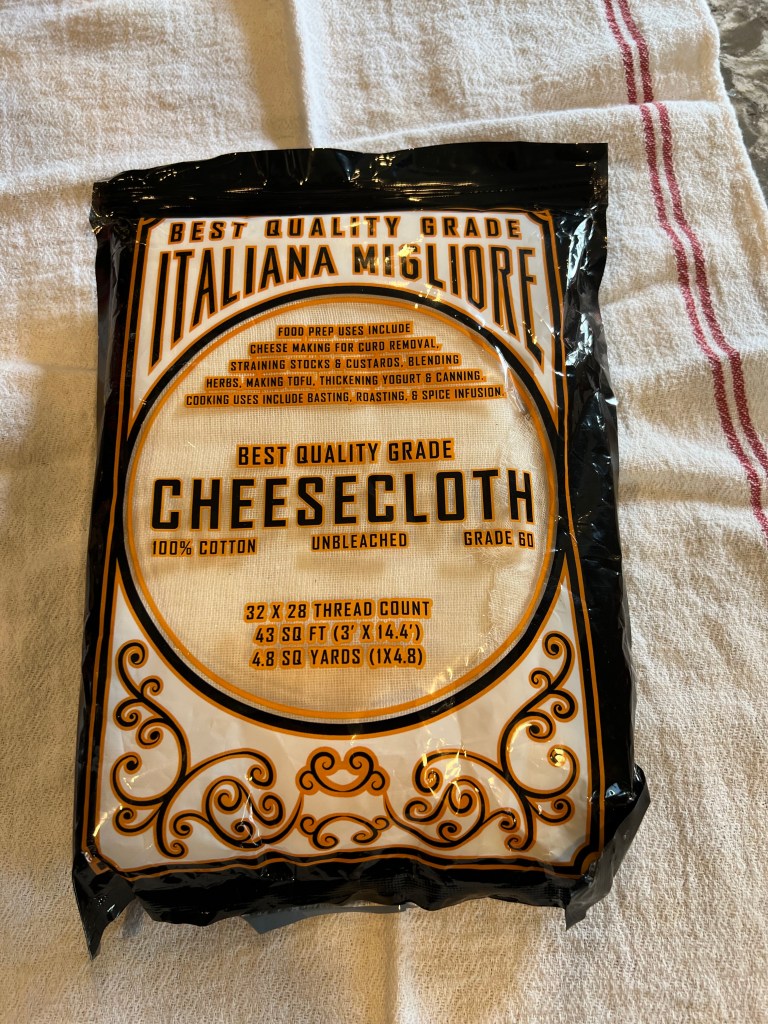
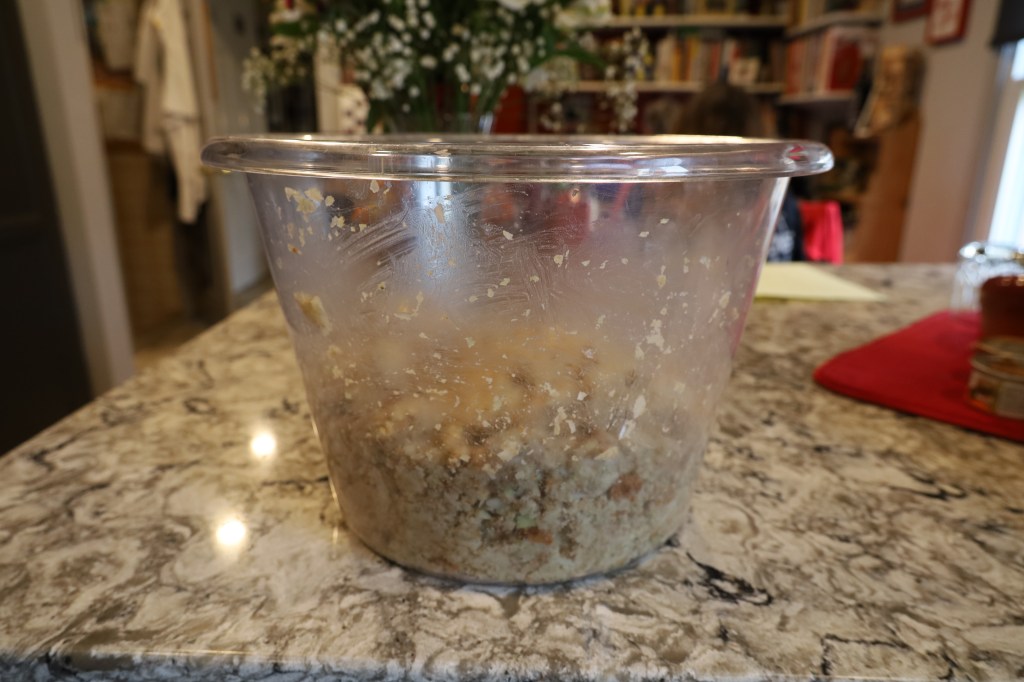

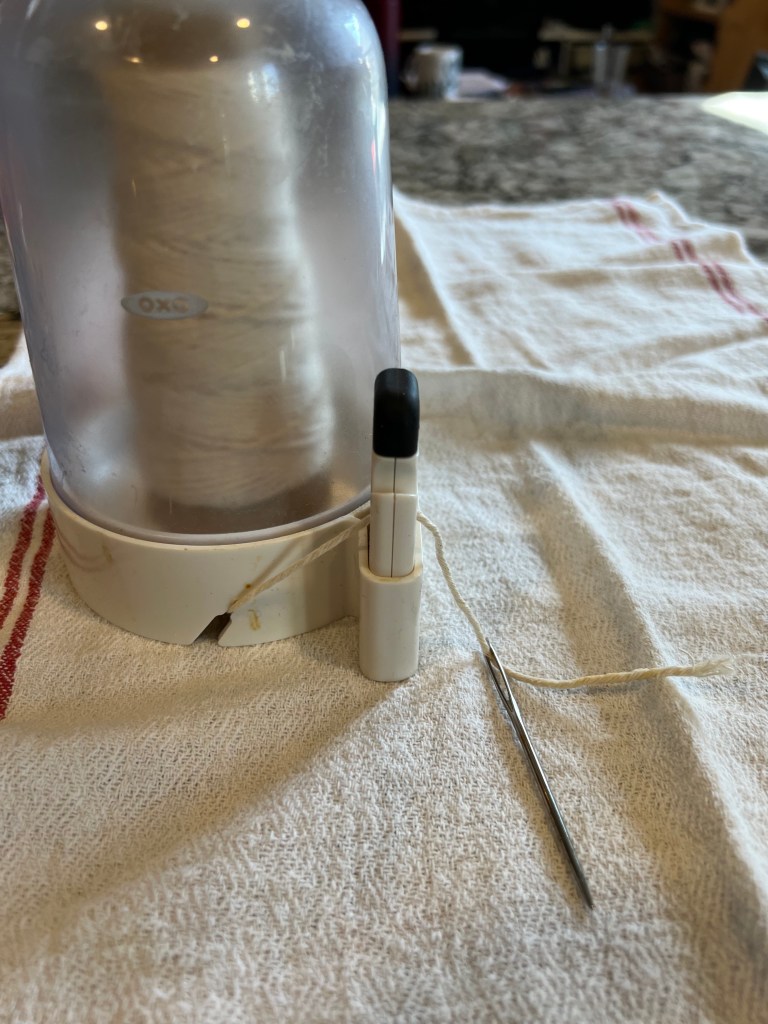
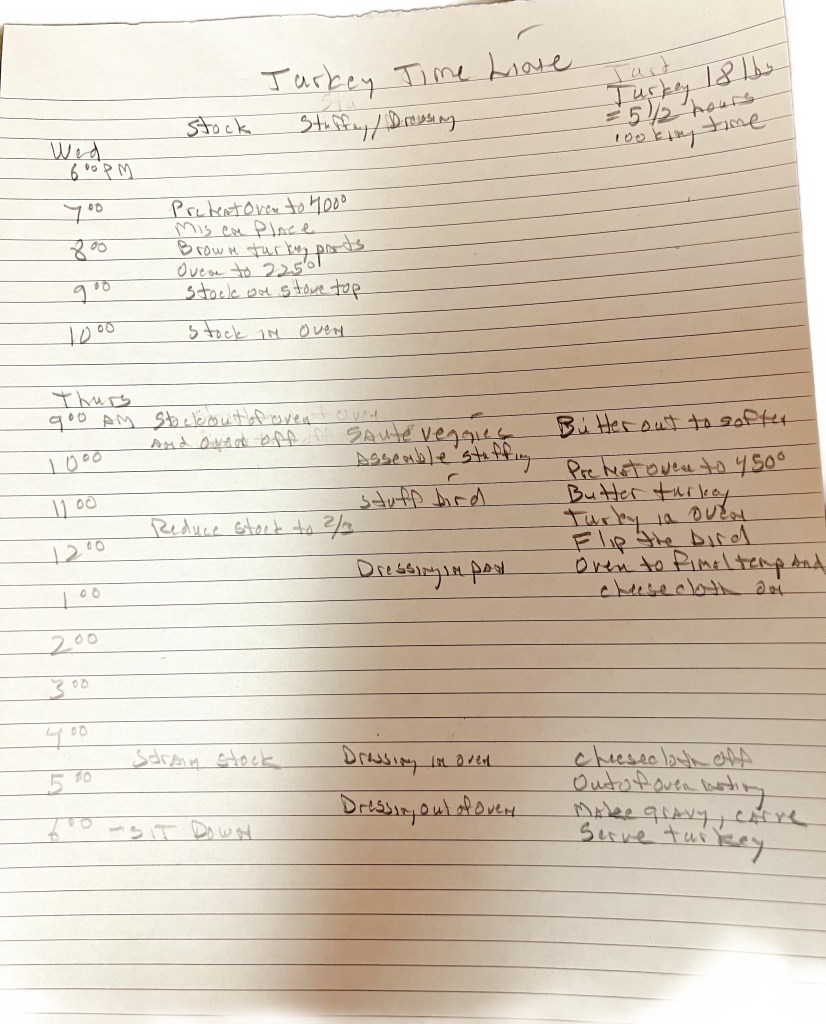
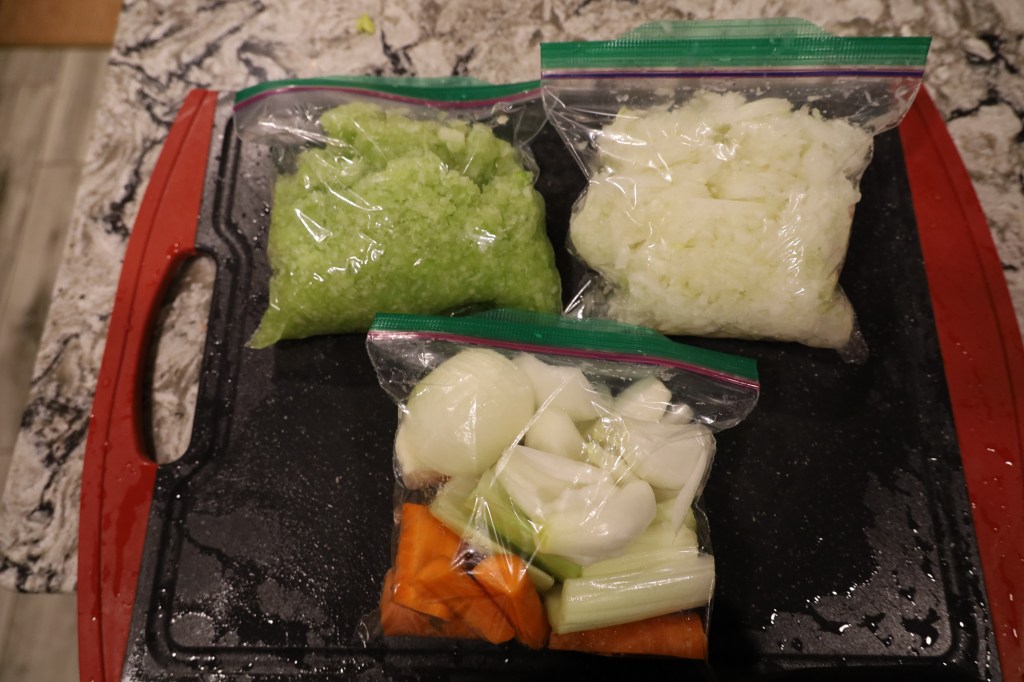
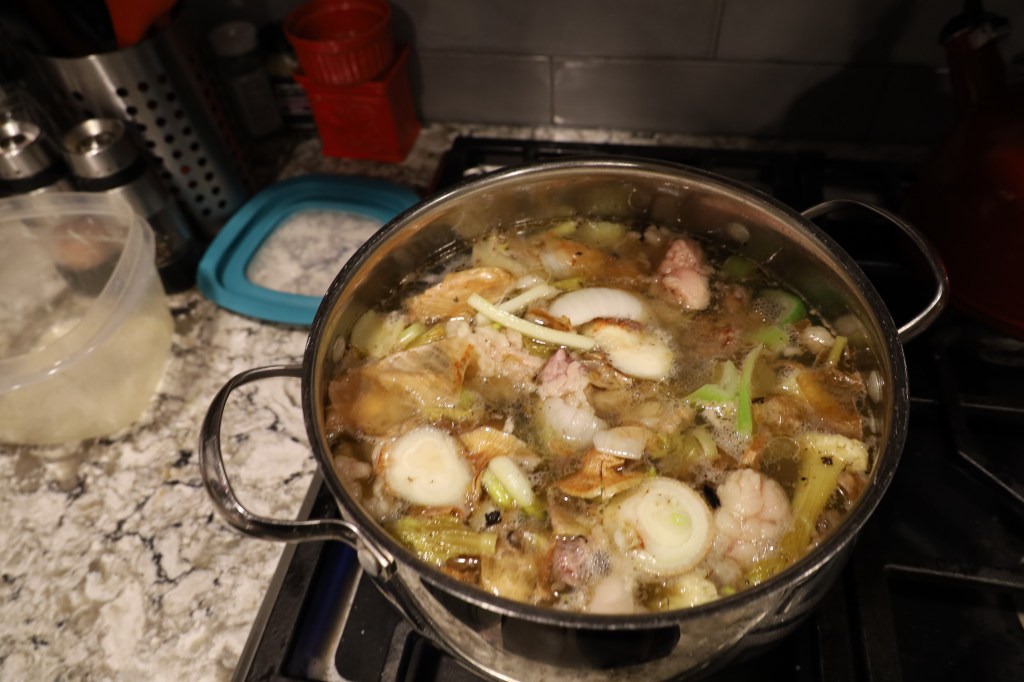
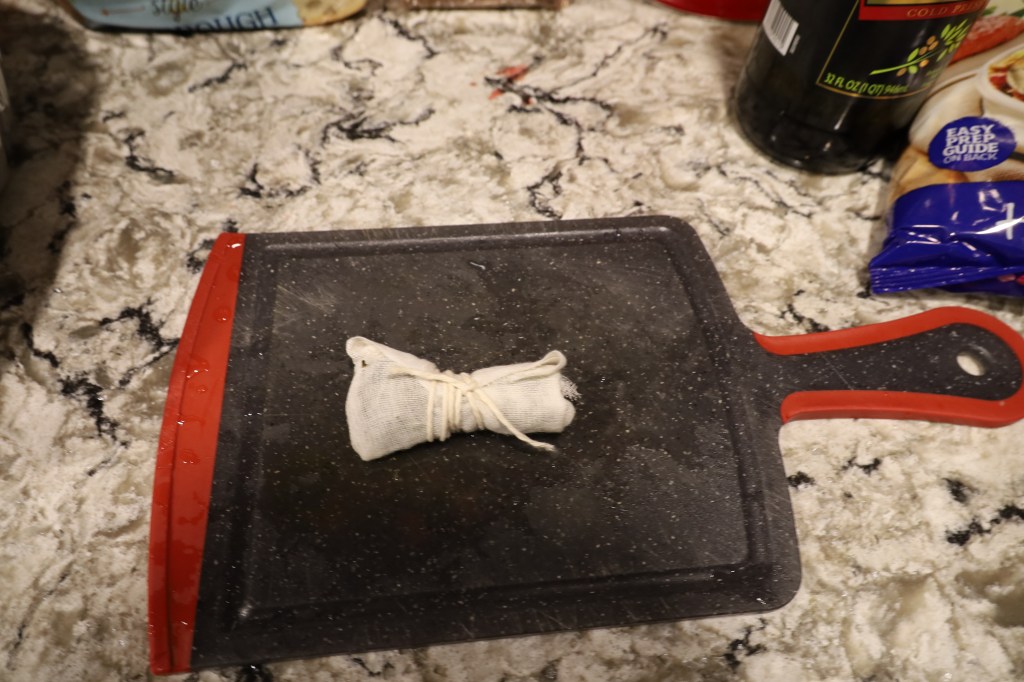
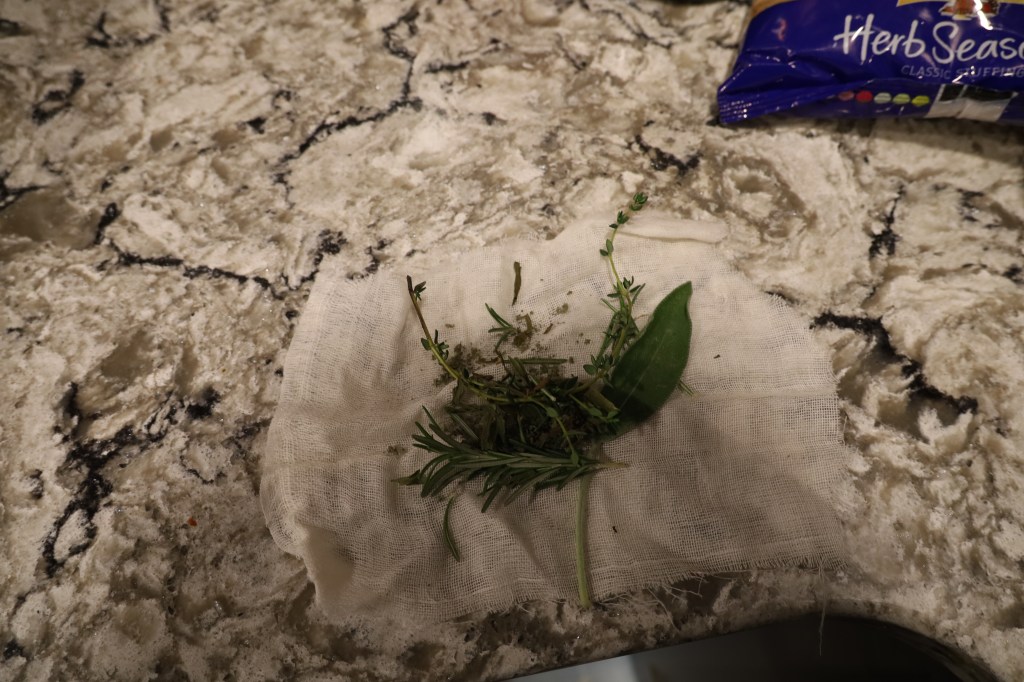

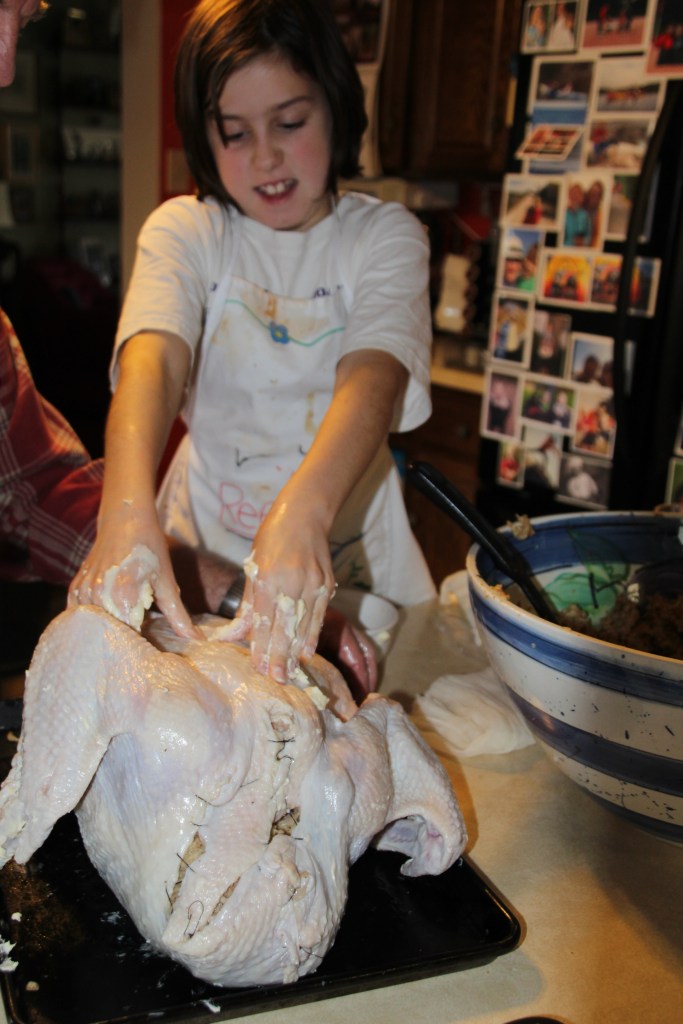

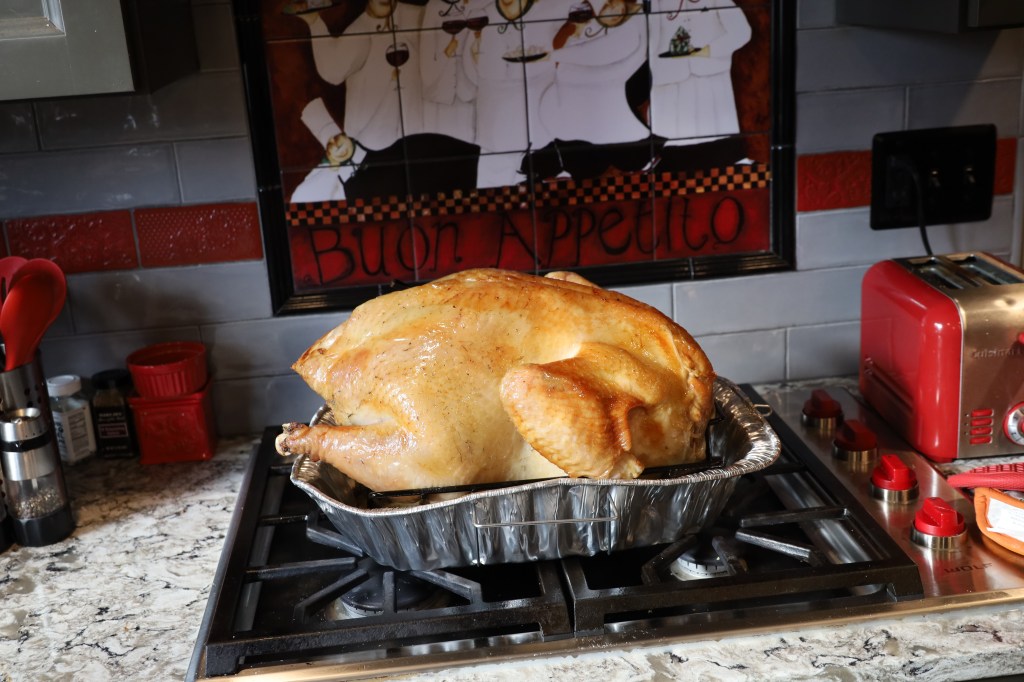

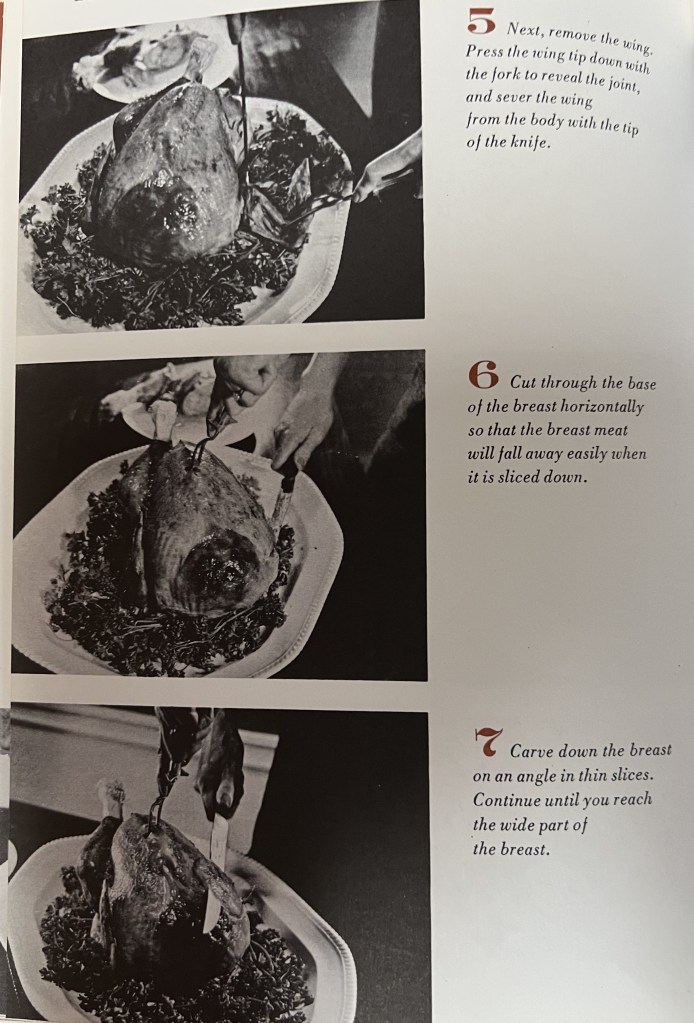
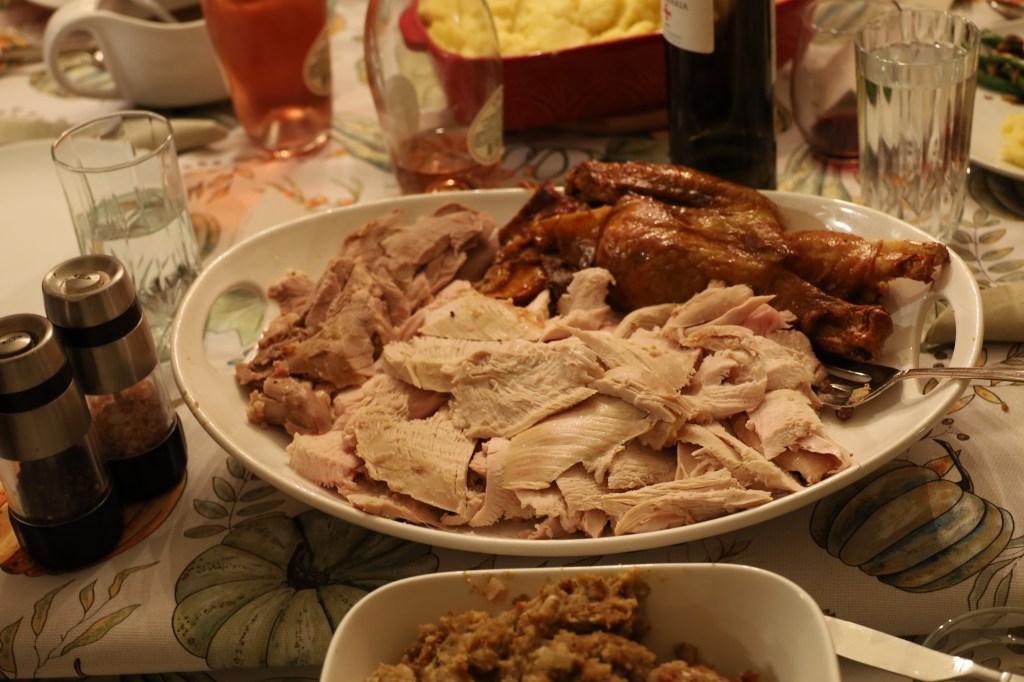
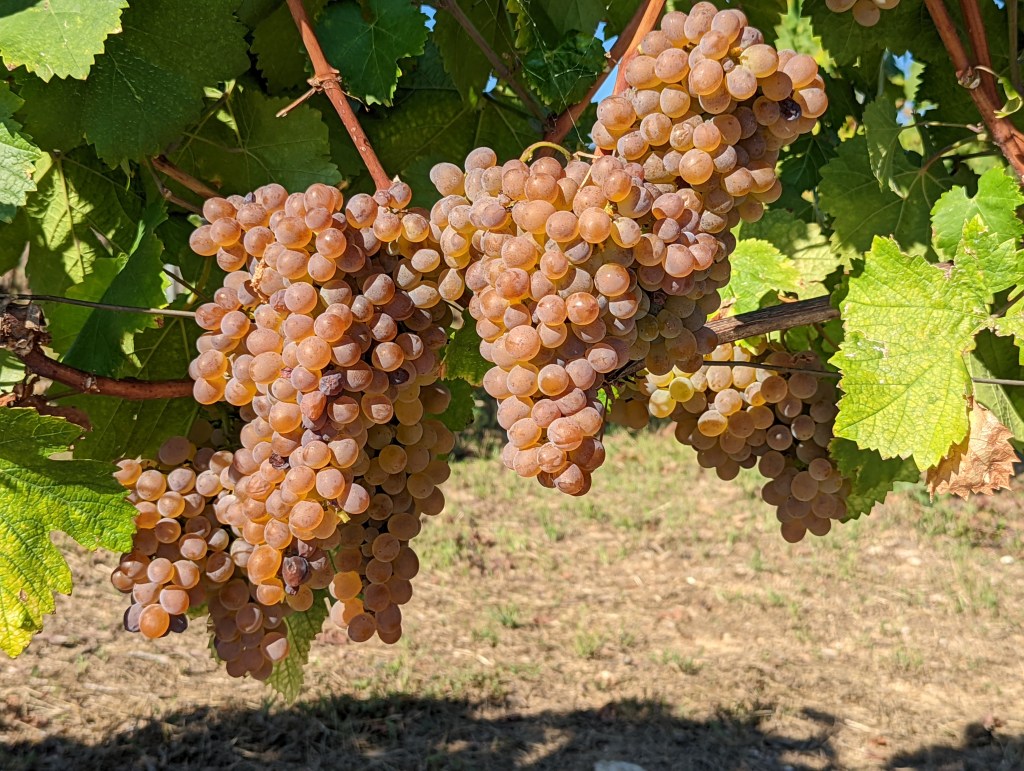


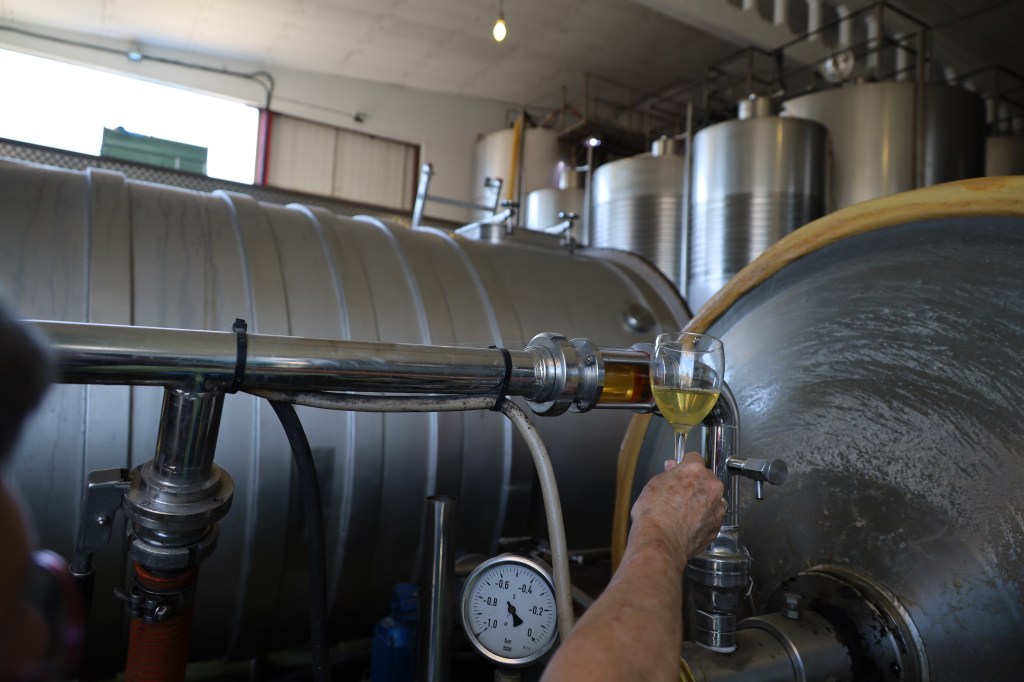
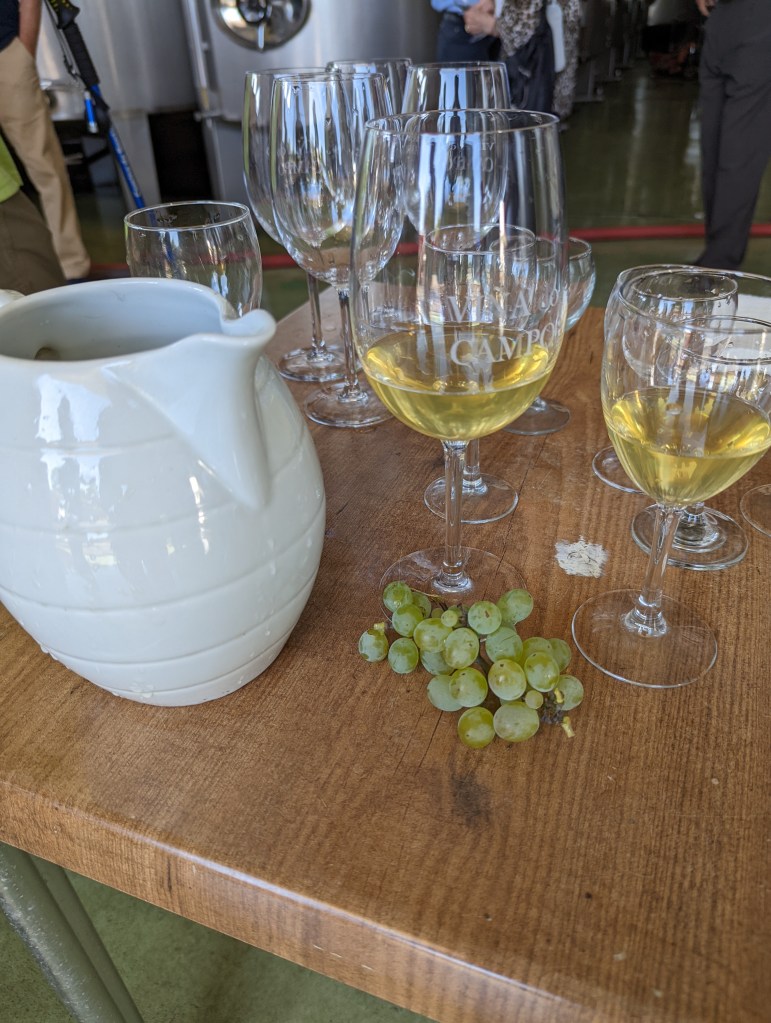
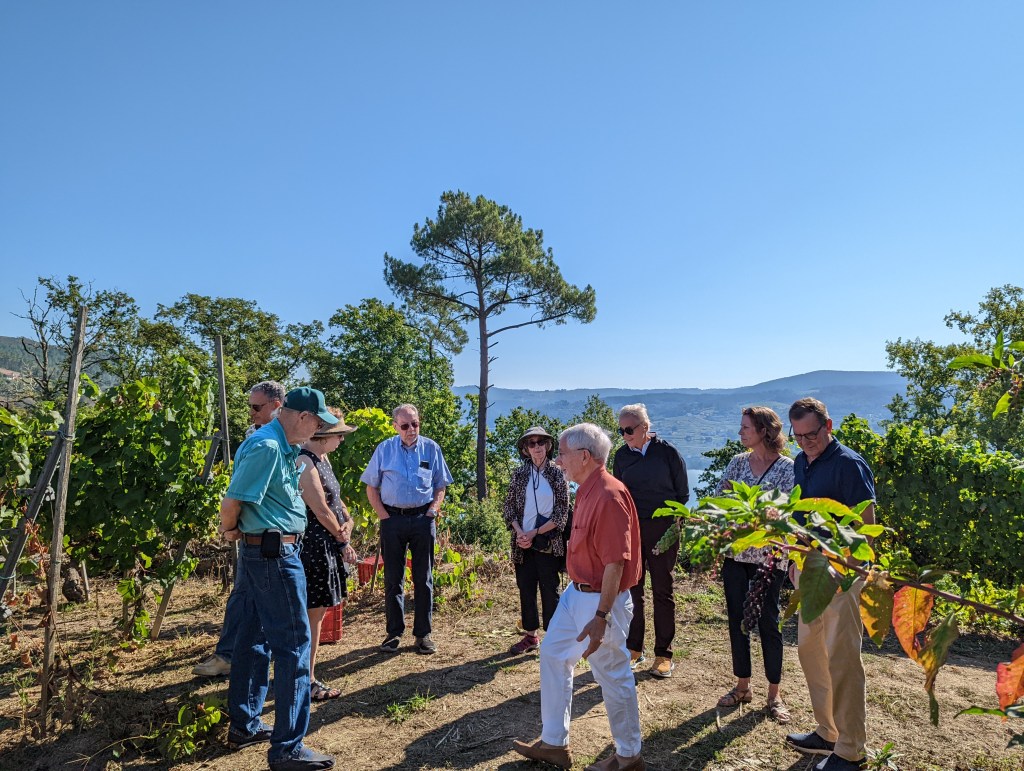
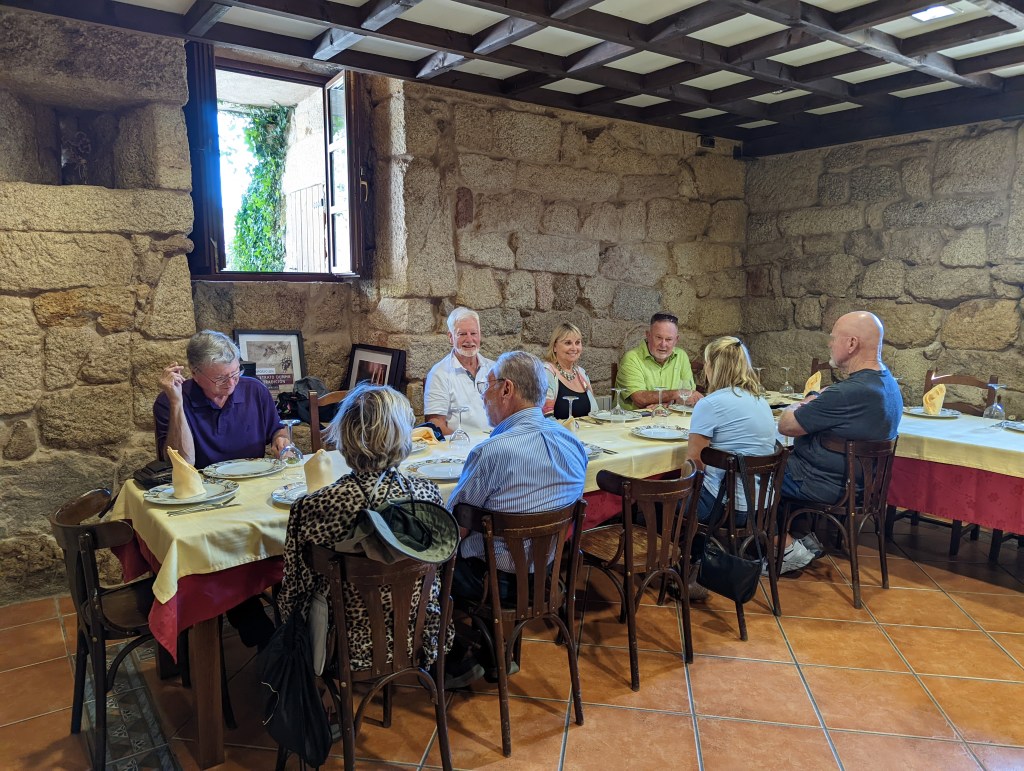


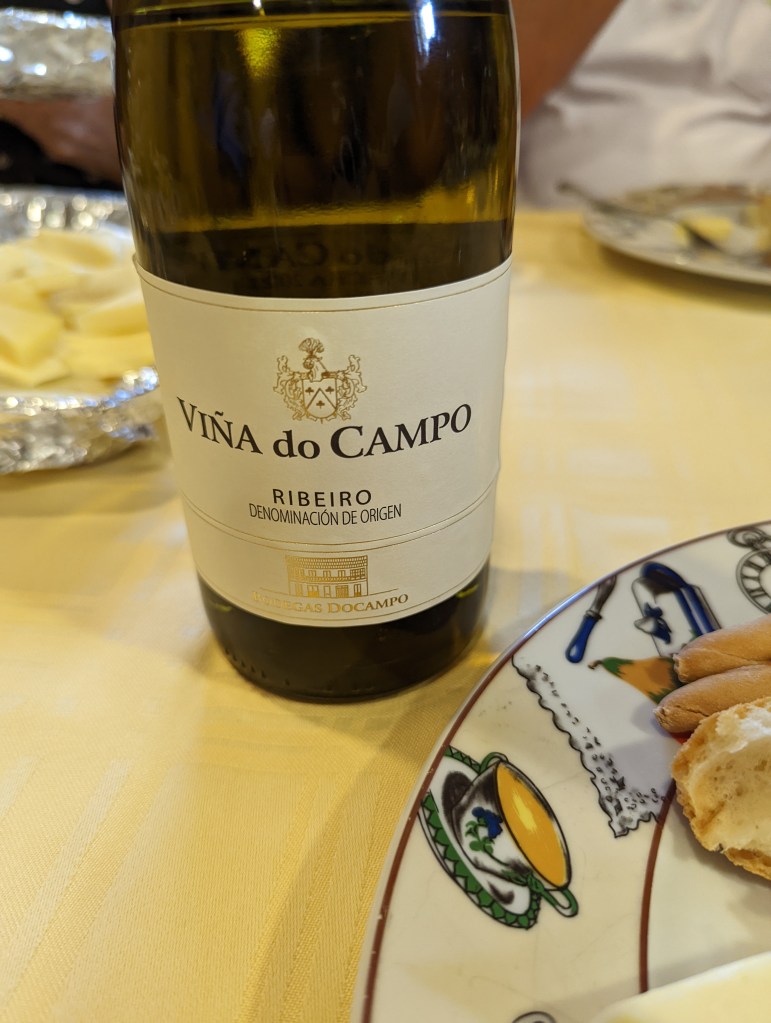
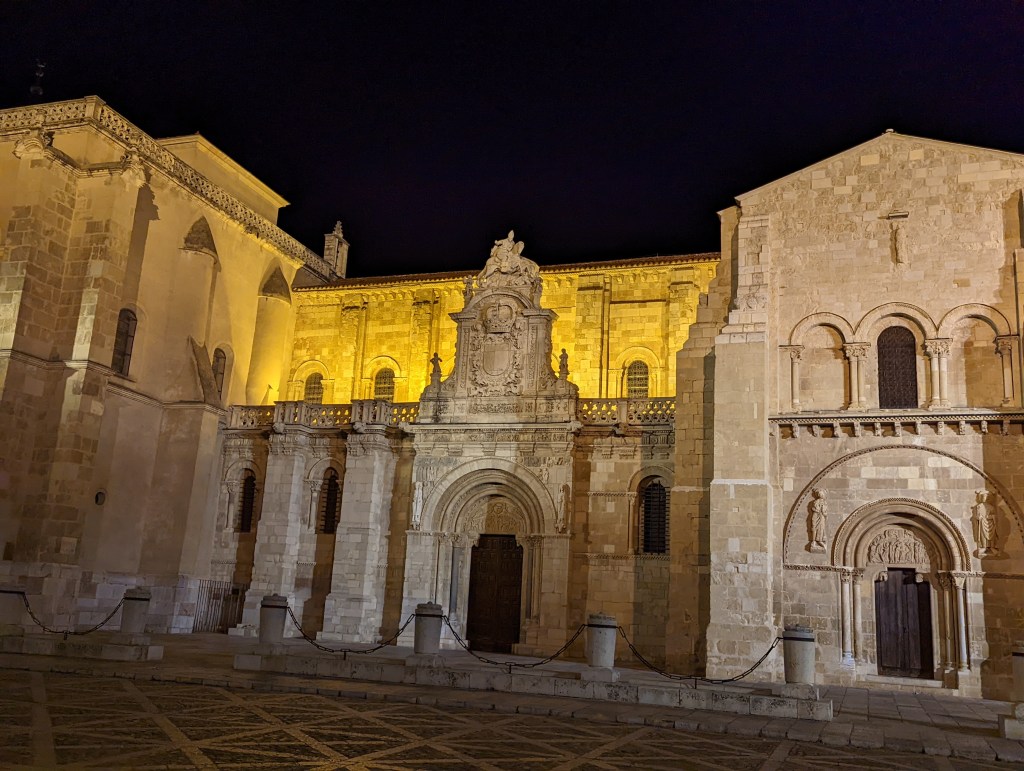
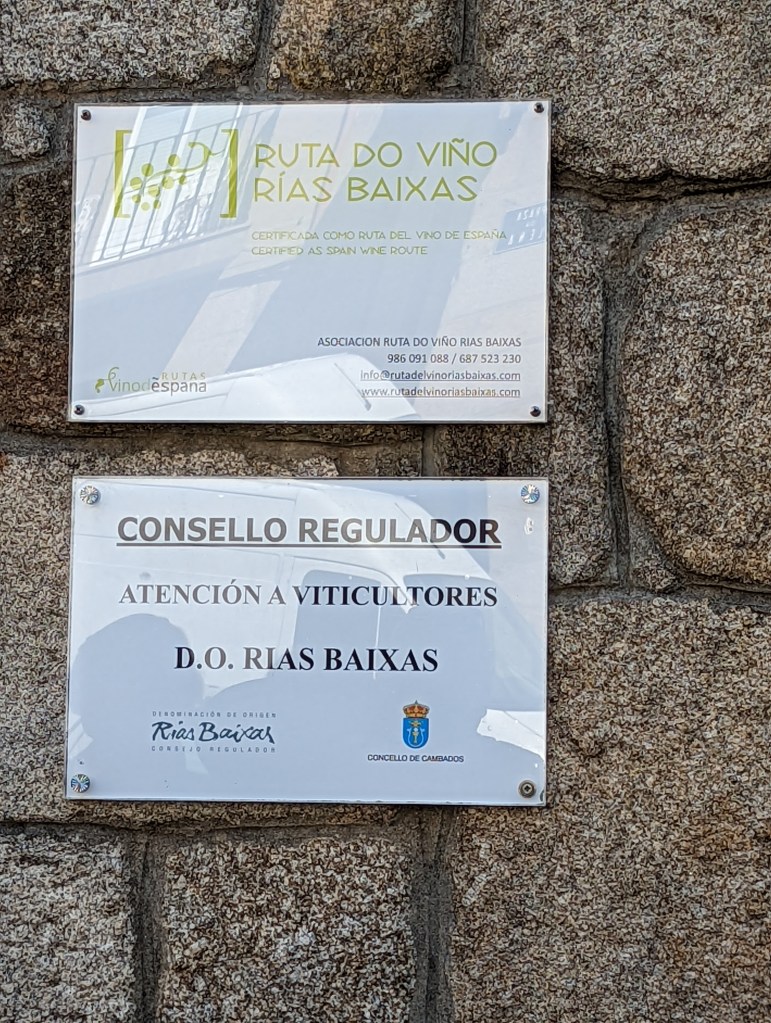
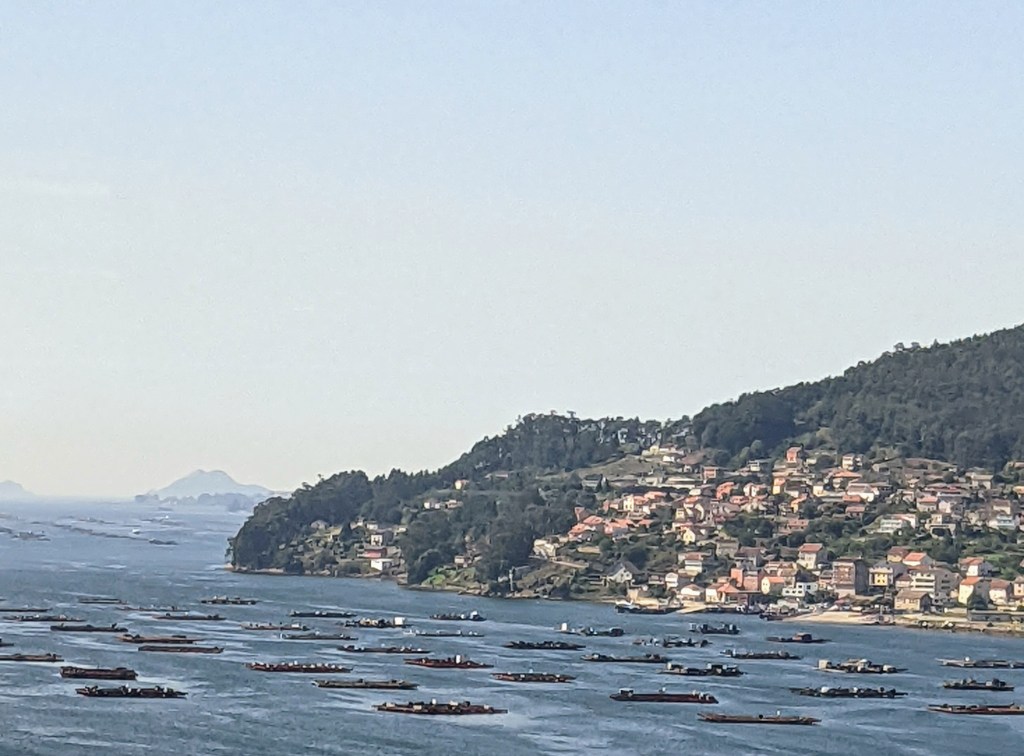
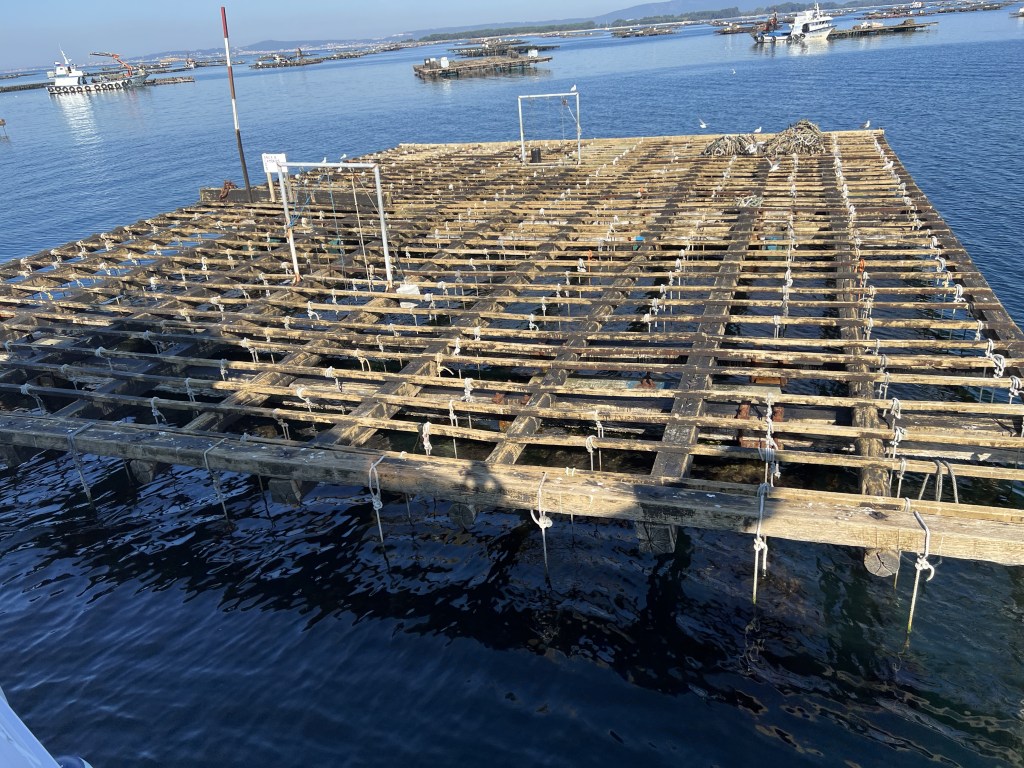
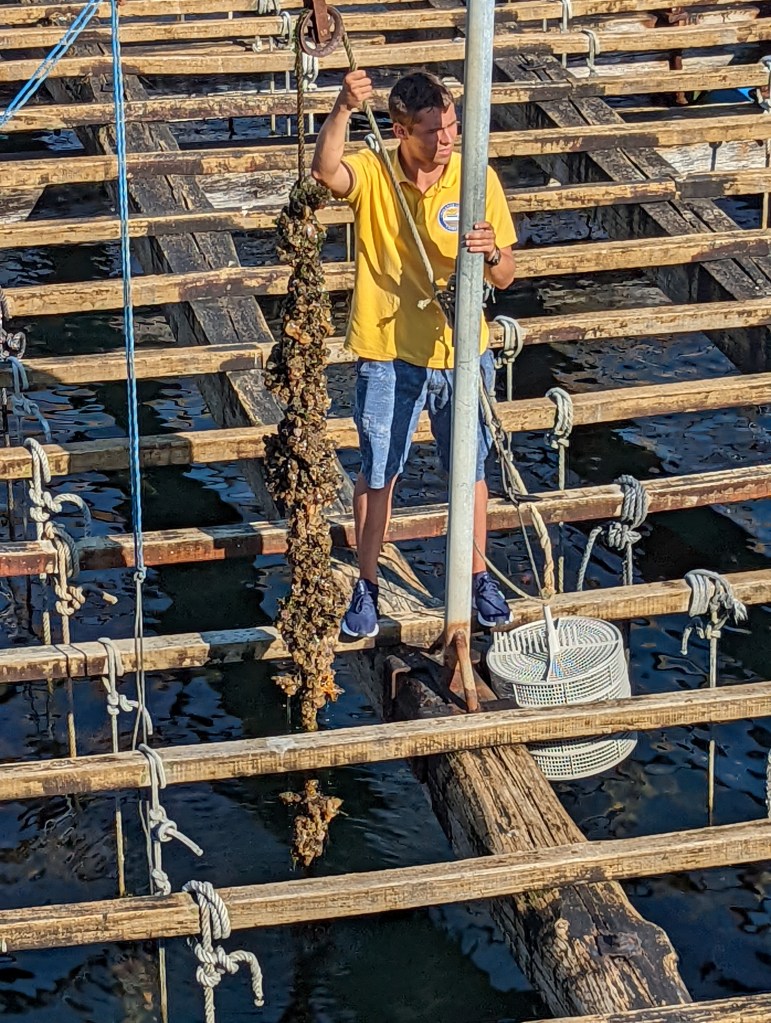

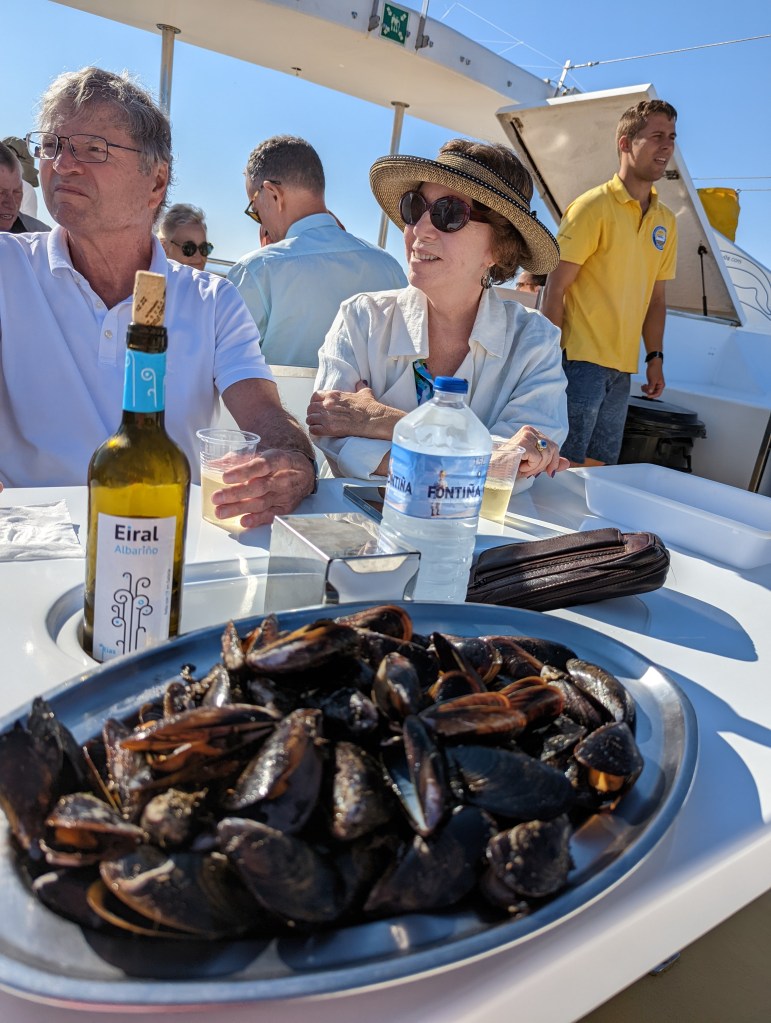
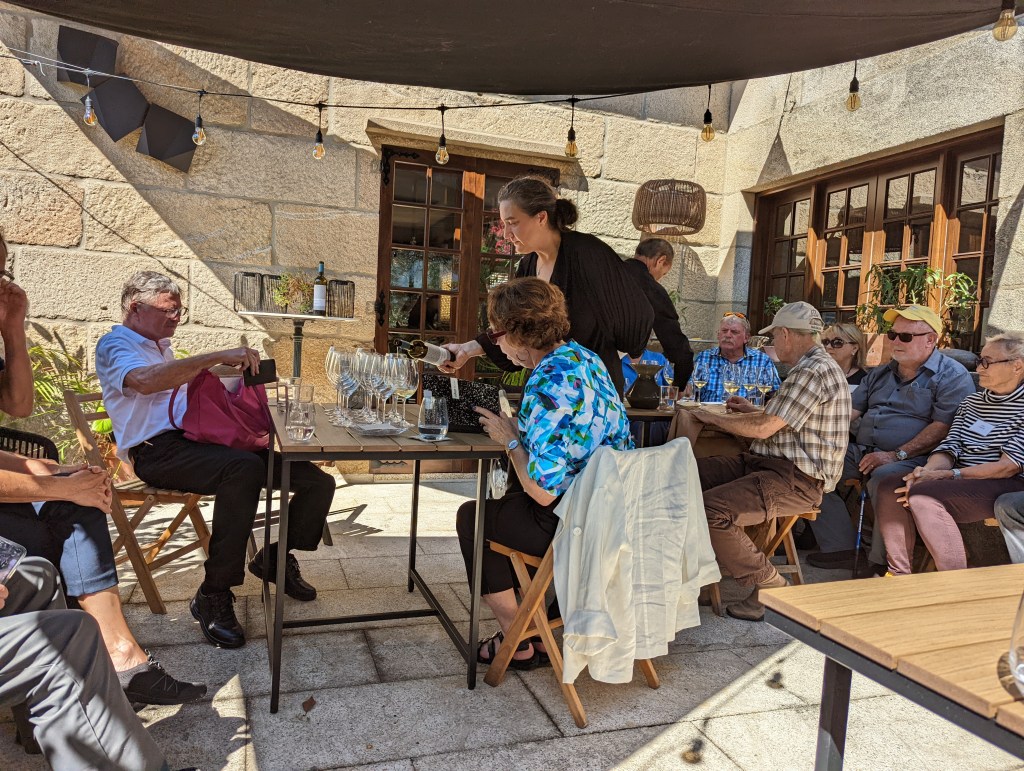
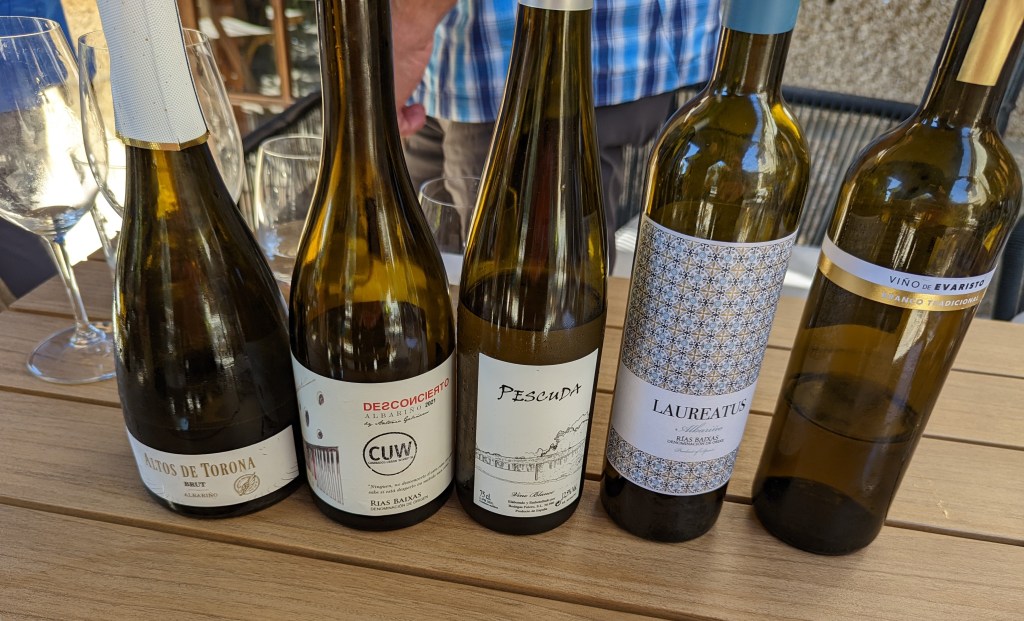
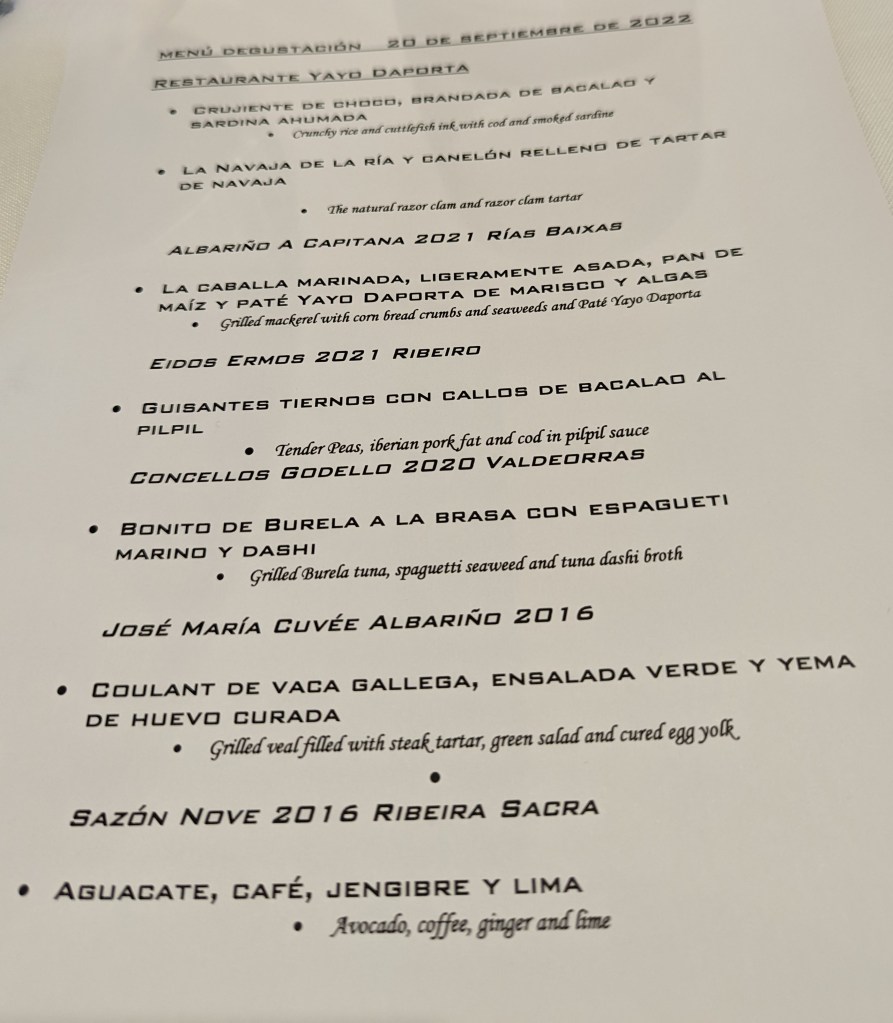
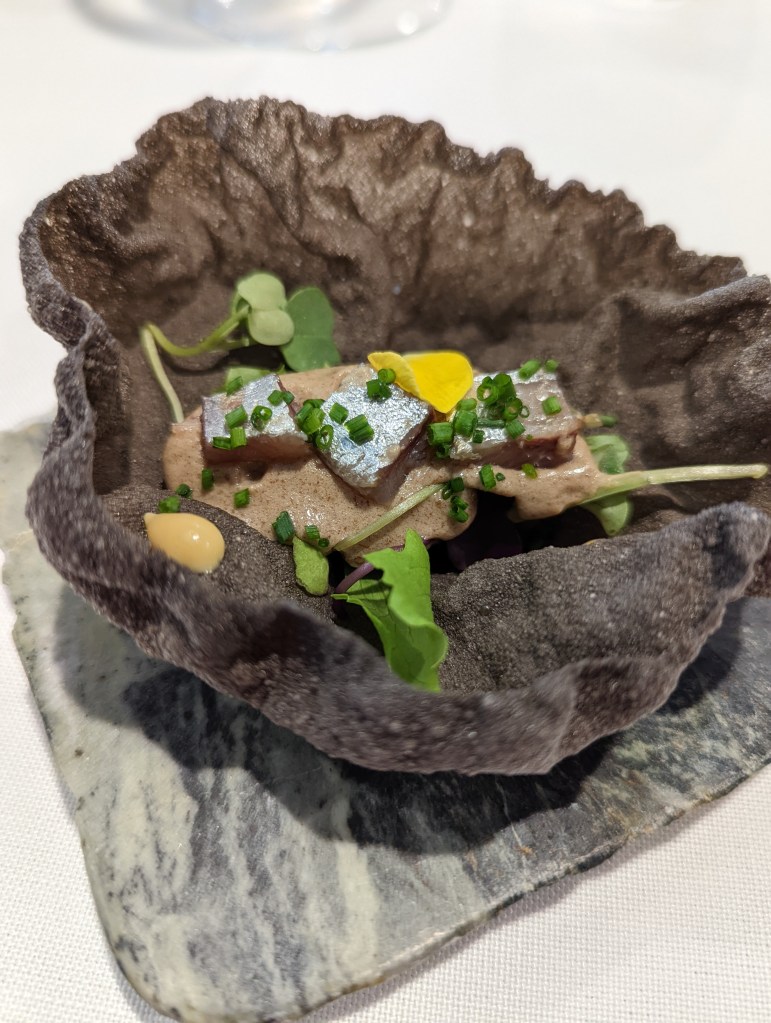
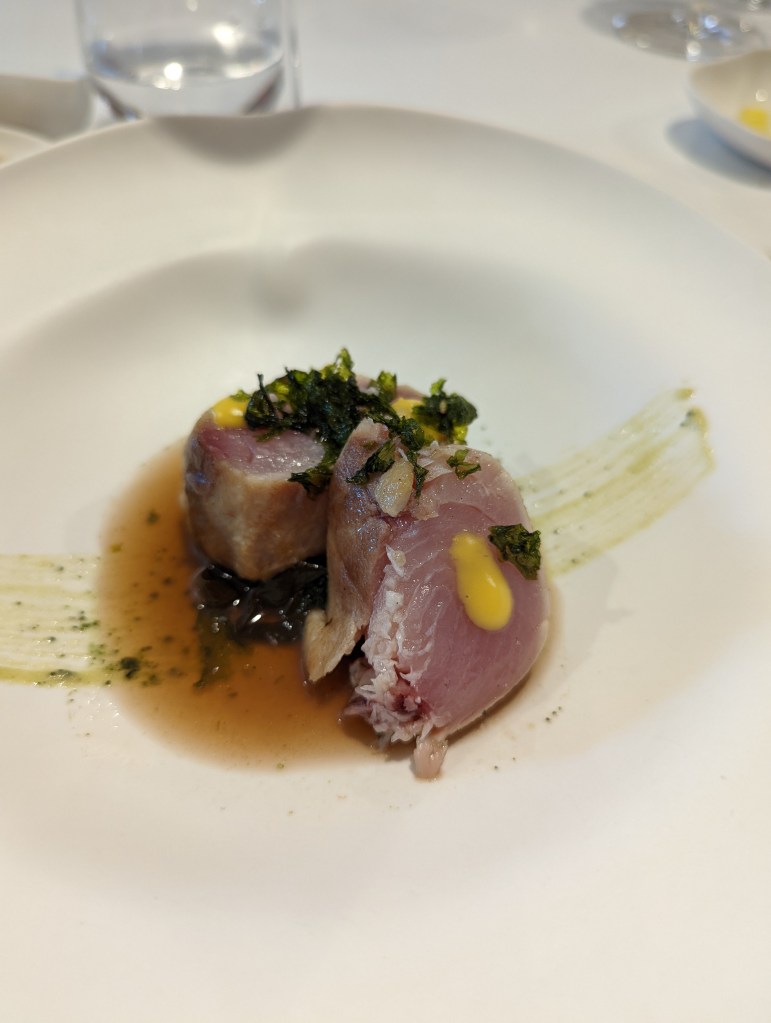
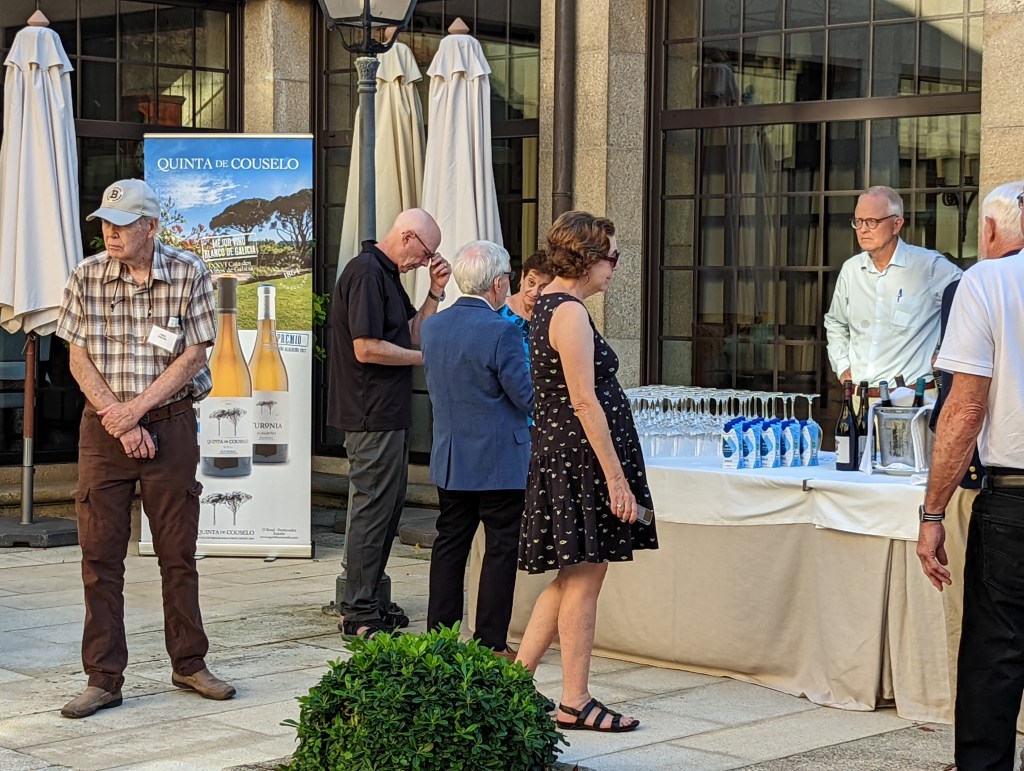

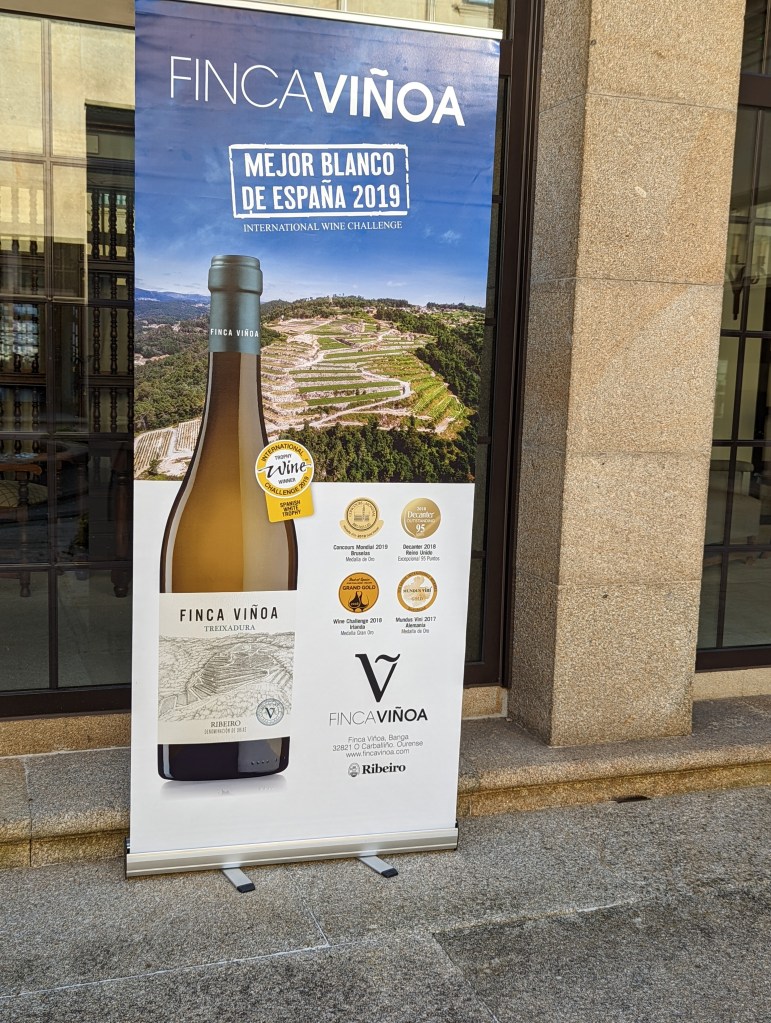
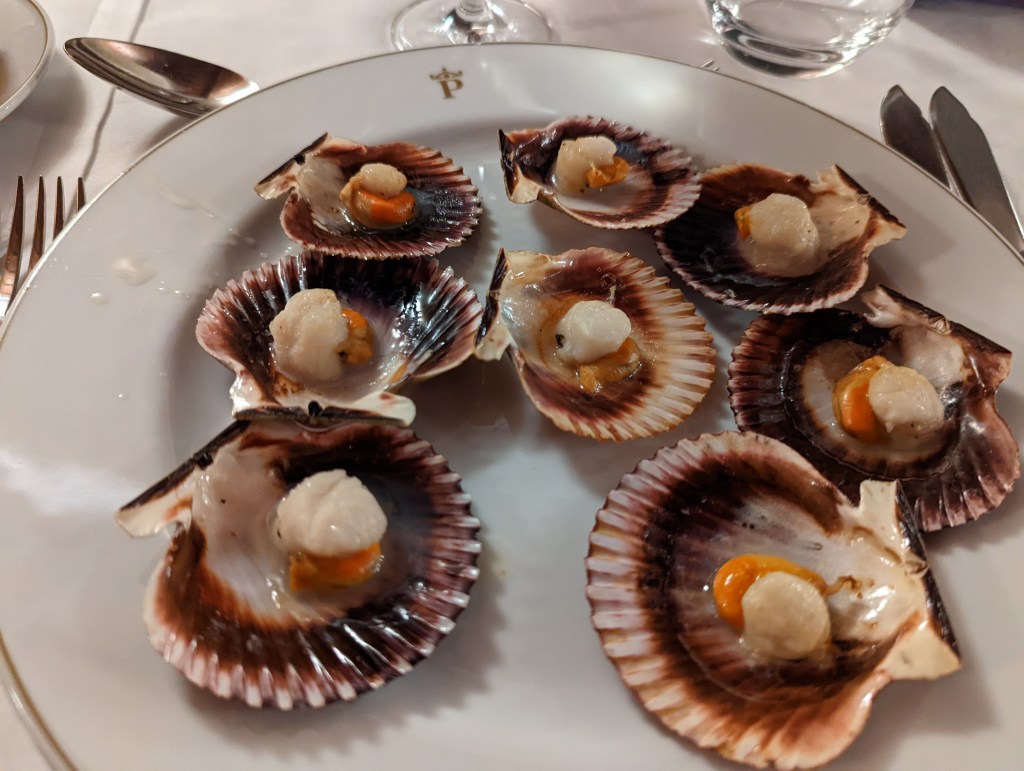
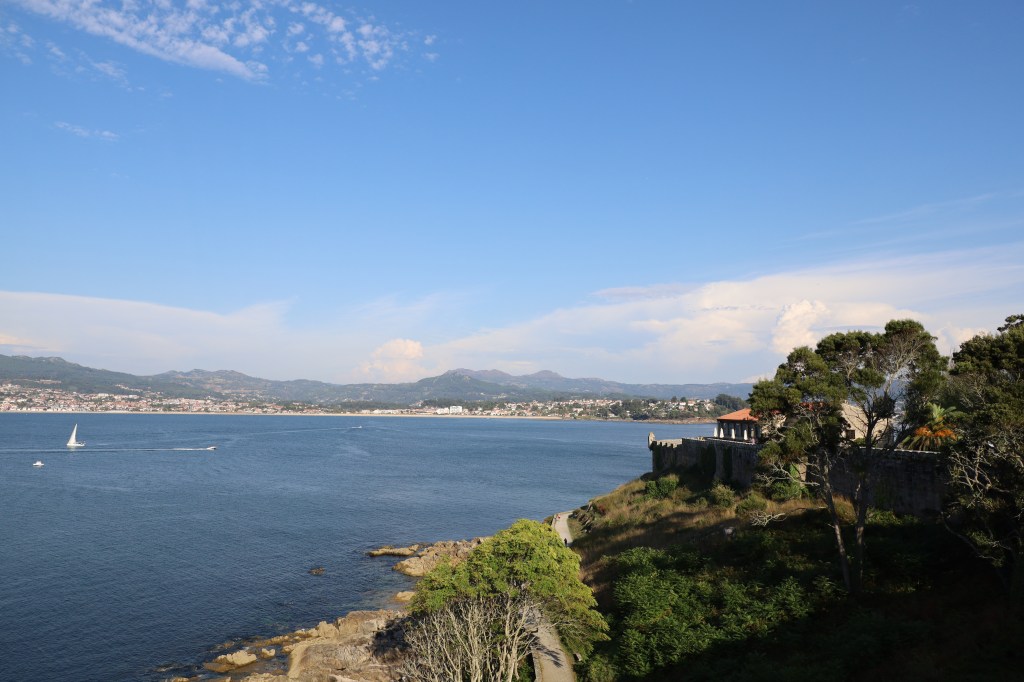
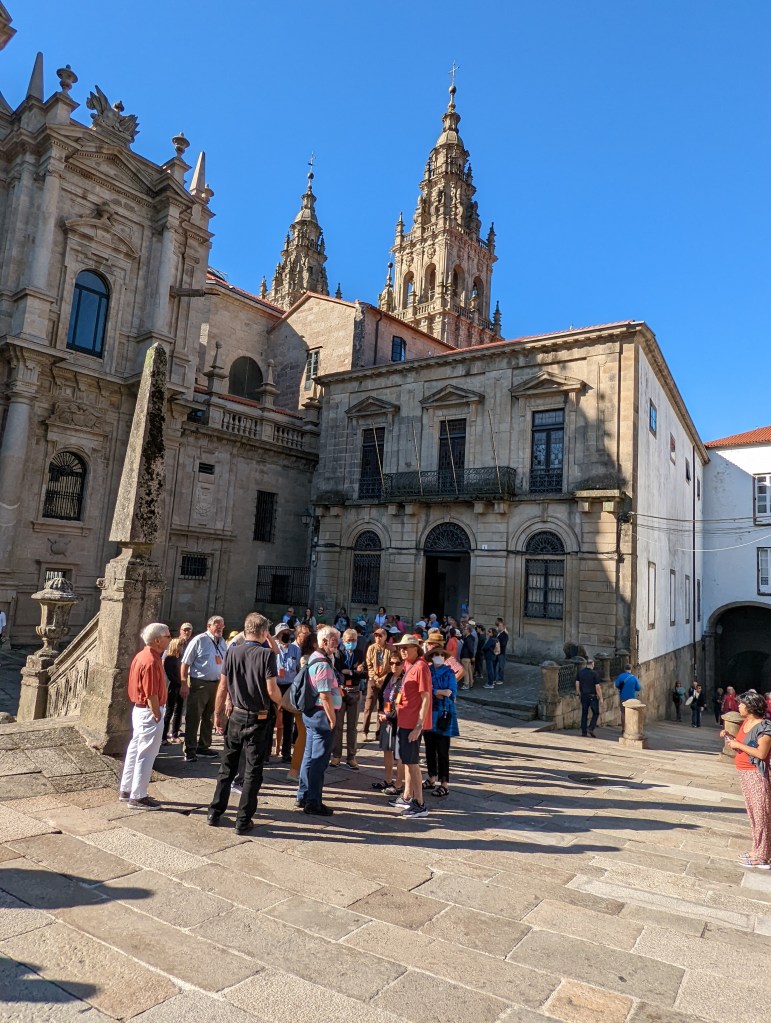
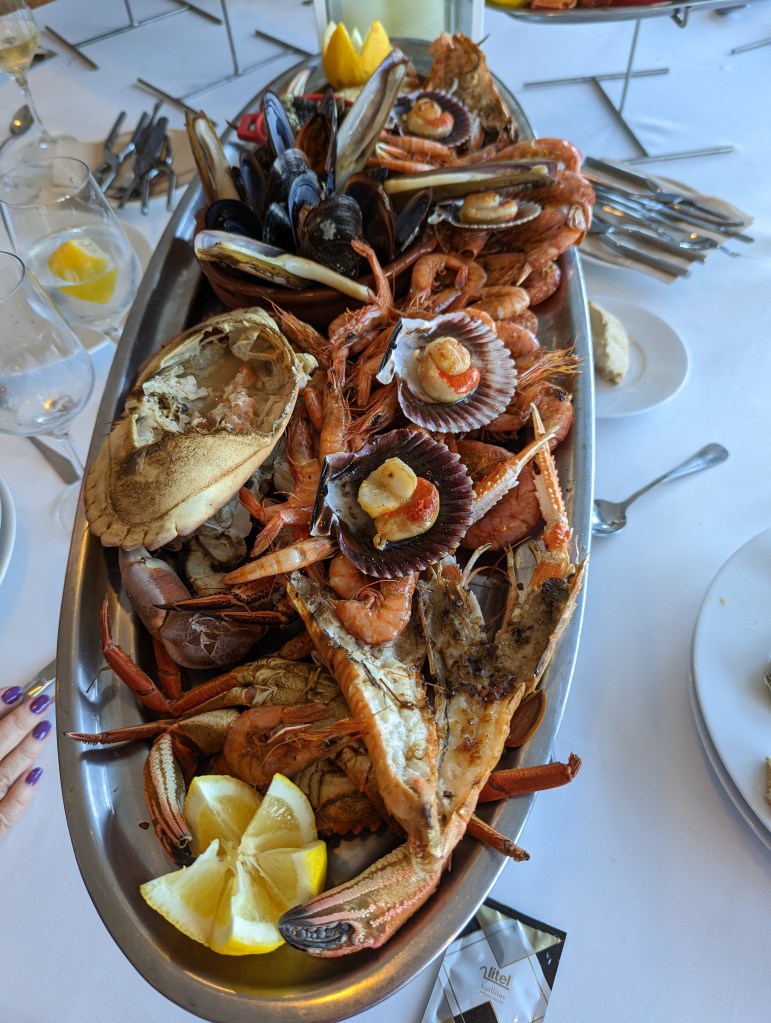
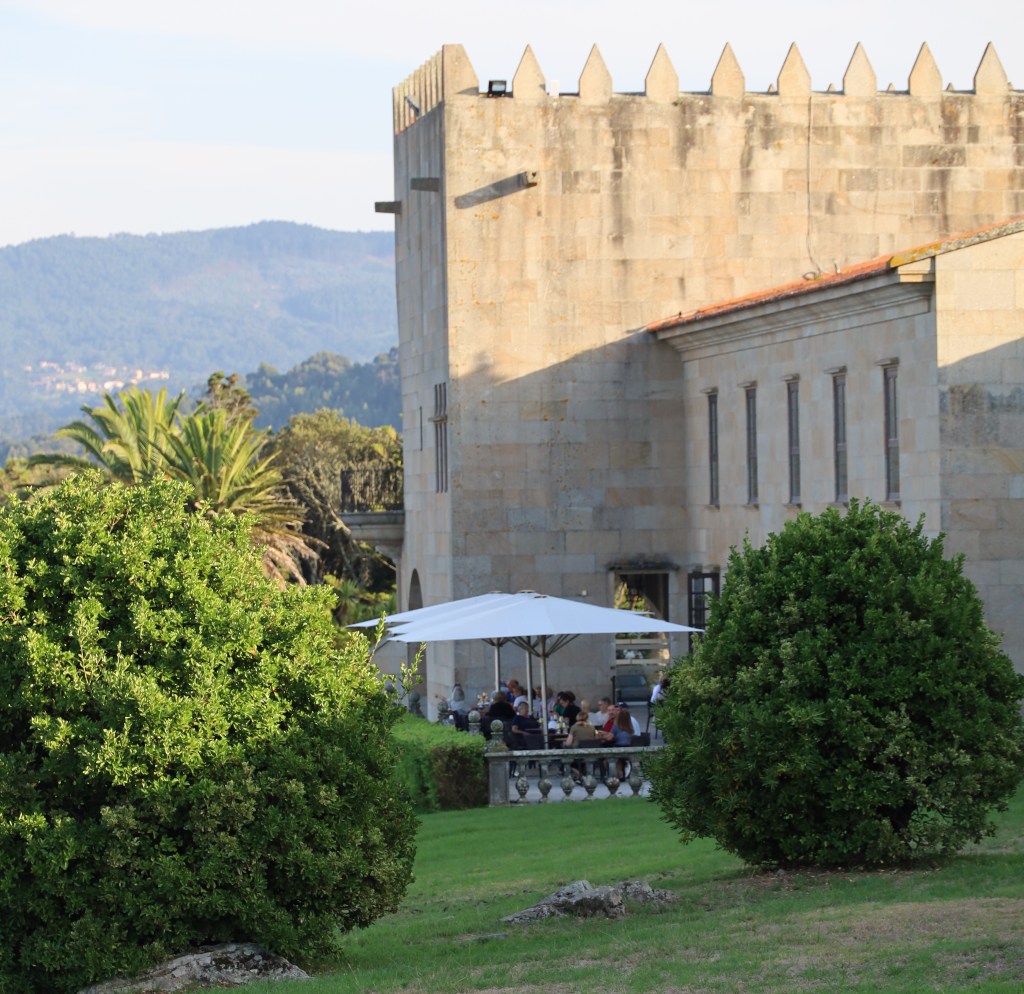

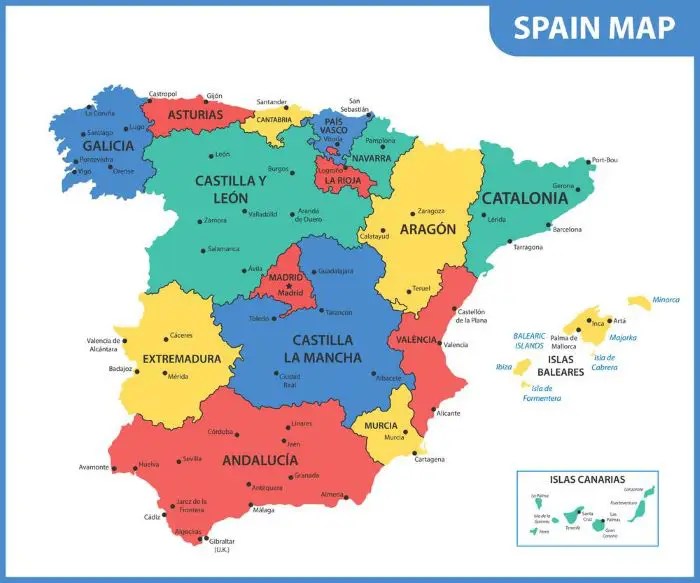
You must be logged in to post a comment.